A Developer's Guide to Allow In App Purchase
A practical guide to allow in app purchase functionality in your iOS app. Learn how to navigate App Store Connect, StoreKit, and testing for a smooth launch.
Before you can allow in app purchase functionality, you need to lay the groundwork in App Store Connect. This means setting up your product details, getting the legal and banking agreements sorted out, and deciding on your purchase model—whether it's consumables, non-consumables, or subscriptions. Critically, this all has to happen before you write a single line of code. Think of it as a non-negotiable first step to get your monetization off the ground.
Preparing Your App for In-App Purchases
Jumping into in-app purchases (IAPs) is a lot more involved than just flipping a switch in your app’s settings. It’s a core business decision that will define your monetization strategy and heavily influence the user experience. Before you even open Xcode or touch StoreKit, getting the foundation right is crucial to avoid the classic headaches that can stall your launch or annoy your users.
The first big step, and one many developers stumble on, is handling the legal and banking paperwork inside App Store Connect. Apple won't let you process a single transaction until you've signed their Paid Applications Agreement. This isn't optional. Your IAPs simply won't work, even in a test environment, without it. Trust me, getting this done early will save you a world of pain down the road.
Choosing Your Monetization Model
With the administrative stuff out of the way, it's time to figure out what you’re actually selling. Apple offers a few different IAP types, and each one is designed for a specific purpose. Getting a handle on these models is the key to matching your monetization plan with what your app actually does.
This infographic gives a great visual breakdown of the main IAP types.
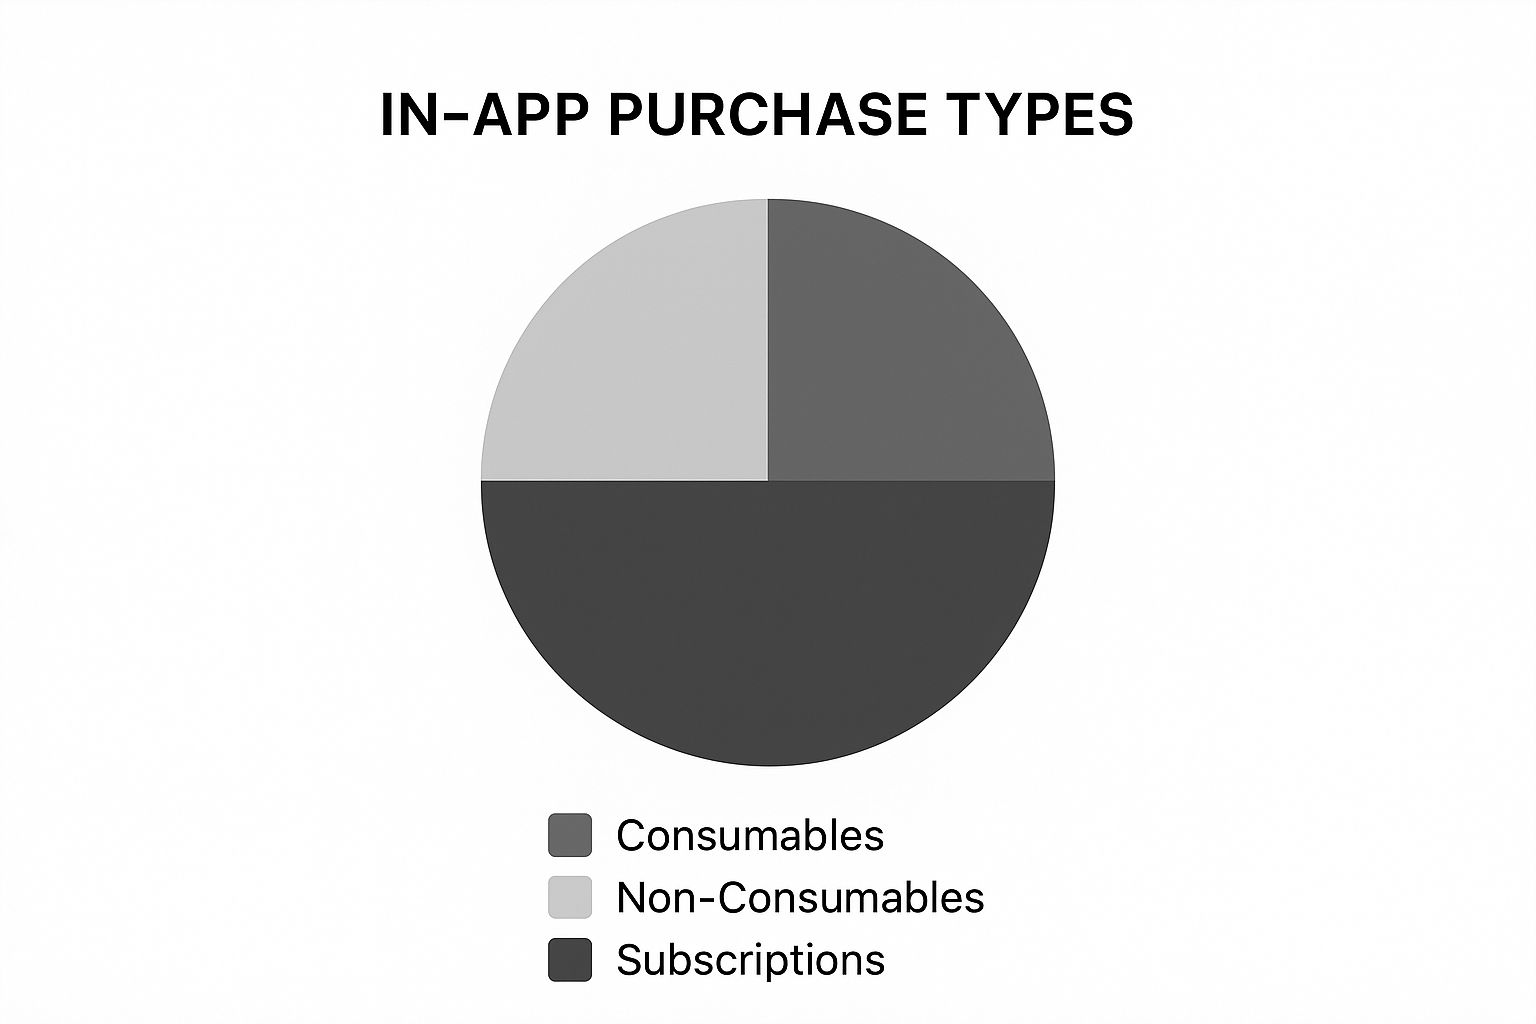
As you can see, subscriptions, consumables, and non-consumables all serve different needs, whether you're aiming for recurring revenue or selling one-off feature unlocks.
The decision you make here has a direct line to your app's revenue potential. The global IAP market, valued at around USD 188.96 billion in 2024 and projected to hit an incredible USD 922.89 billion by 2033, shows just how much is at stake. Nailing the right model from the get-go is more important than ever.
Key Takeaway: Choosing an IAP model is a fundamental business decision, not just a technical one. A game might make a killing selling consumable "gems," but a productivity app will almost certainly do better with a non-consumable "Pro" version or a monthly subscription.
To help you decide, here’s a quick comparison of the four main types of in-app purchases.
Choosing the Right In-App Purchase Type
| Purchase Type | Description | Common Use Cases | Key Consideration |
|---|---|---|---|
| Consumable | Items that are used once and can be purchased again. | In-game currency, extra lives, one-time hints or boosts. | Requires server-side logic to track and manage balances. |
| Non-Consumable | A permanent, one-time purchase that unlocks features. | Removing ads, unlocking a "Pro" version, extra photo filters. | Must be restorable for users across all their devices. |
| Auto-Renewing Subscription | Provides access to content or services on an ongoing basis. | Streaming services, news apps, premium features in a productivity tool. | Requires a clear value proposition to justify recurring payments. |
| Non-Renewing Subscription | Time-limited access to content that does not automatically renew. | Access to an archive for one season, a 30-day course pass. | Less common; user must manually re-purchase to extend access. |
Ultimately, the best choice depends entirely on the value your app provides and how your users engage with it.
For anyone just getting started, our Nuxie quickstart guide offers a more streamlined path to getting these models implemented. Making a smart choice here sets you up for a sustainable revenue stream and makes it crystal clear to your users what they're paying for.
Getting Set Up in App Store Connect
Alright, with the banking and legal paperwork out of the way, it's time to dive into the real hub for your app's monetization: App Store Connect. This is where you'll create and manage every single product you want to sell. Whether it's a simple one-time "Unlock Pro" feature or a complex recurring subscription, you have to meticulously define it here first.
Think of App Store Connect as your digital storefront's inventory management system. Each product entry is a record that your app will fetch from Apple's servers to display to your users. Getting this part right is absolutely critical. If there's any mismatch between your setup here and what your app's code is looking for, purchases will fail, and products simply won't appear.
This is the main dashboard you'll get familiar with—it's your command center for everything related to your app.
From here, you'll manage not just your in-app purchases but also app analytics, sales data, and much more.
Defining Your Products
For every in-app purchase (IAP) you plan to sell, you have to create a corresponding product entry in App Store Connect. This isn't just busywork; the details you enter here directly influence how users see your offerings and are a key part of Apple's approval process.
Here’s what you’ll need to define for each product:
- Reference Name: This is just for you. Think of it as an internal label, like
pro_unlock_tier_1, that helps you keep things straight. It's not visible to users. - Product ID: This is a huge one. It’s a unique string, like
com.yourapp.premiumaccess, that your app code will use to call this specific product. It has to be an exact match between your code and this entry. - Pricing Tier: You don't set a specific price in dollars or euros. Instead, you choose one of Apple’s price tiers. This is actually a lifesaver, as it automatically handles all the currency conversions and regional pricing adjustments for you.
- Display Name & Description: This is what your customers will see. It shows up on the App Store and in the purchase confirmation pop-up, so make it clear, compelling, and accurate.
A classic rookie mistake is using a lazy or generic Product ID. Trust me on this one: establish a clear naming convention from day one, like
com.yourcompany.yourapp.productname. It seems like a small detail now, but it will save you from major debugging headaches down the road, especially as you add more IAPs.
Prepping for App Review
Once your products are configured, you're almost there. The final piece is giving Apple's review team what they need to test and approve your IAPs. You have to prove that your purchase works as advertised.
You’ll need to provide clear review notes explaining what the IAP does and exactly how a reviewer can access and test it. More importantly, you must upload a screenshot showing your paywall or purchase screen within the app.
Don't rush this part. Vague descriptions or a missing screenshot are one of the fastest ways to get your app rejected. Spending an extra ten minutes writing clear, step-by-step instructions for the reviewer makes their job easier and can shave days off your approval time.
Getting StoreKit Hooked Up in Xcode
Alright, you've got your products all set up in App Store Connect. Now comes the fun part: actually connecting your app to Apple's payment system so it can start making money. This all happens inside Xcode, where we'll flip a few switches to bring your in-app purchases to life.
First things first, you have to explicitly tell your app project that it's going to use in-app purchases. It's a simple but absolutely critical step. Just head over to your project settings, click on your main target, and find the "Signing & Capabilities" tab. Click the little "+ Capability" button and search for "In-App Purchase."
If you skip this, your app will have no idea how to talk to the App Store for payments. It's a non-negotiable step.
Adding the StoreKit Framework
With the capability enabled, your next move is to bring in the StoreKit framework. Think of StoreKit as your IAP toolbox. It’s packed with all the APIs you need to handle the core parts of the user purchase flow:
- Grabbing the list of products you created in App Store Connect.
- Kicking off a purchase when a user decides to buy something.
- Getting updates on the transaction's status—whether it succeeded, failed, or is still pending.
- Letting users restore their previous non-consumable purchases.
To start using it, just add import StoreKit at the top of any Swift file where you'll be managing your IAP logic. That one line unlocks all the tools you need.
How to Organize Your IAP Code
When you're first starting, it’s really tempting to just drop your IAP code directly into your view controllers. Take it from me: that's a recipe for a maintenance headache down the road. A far better way to handle this is to centralize everything into a single, dedicated manager class.
I always create a singleton class I call something like
IAPManager. This class becomes the one and only place for handling product fetching, transactions, and checking if a user has an active subscription. It keeps the rest of my code clean and makes tracking down bugs infinitely easier.
Adopting this kind of pattern is just good iOS architecture. It separates your business logic from your UI, which helps keep your codebase organized and scalable as you add more monetization features. For a deeper dive into setting this up, check out our guide on how to integrate the iOS SDK properly. This separation is truly key to building a purchase experience that’s both robust and easy to maintain.
Testing Purchases in the Sandbox Environment
https://www.youtube.com/embed/G4T1l9N6Dx4
Alright, you've set up your products in App Store Connect and hooked everything up in your code. Now for the moment of truth: making sure it all actually works. This is where Apple's sandbox environment comes in, and it's your best friend for getting your in-app purchases right.
Think of the sandbox as a perfect replica of the live App Store, but with Monopoly money. It lets you go through the entire purchase flow—from fetching products to "buying" subscriptions—without a single real dollar changing hands. Seriously, don't rush this part. Skipping proper sandbox testing is a classic mistake that can lead to some painful 1-star reviews later on. This is your chance to find and squash bugs before your customers do.
Getting Your Sandbox Testers Ready
To start testing, you need a special key to get into this walled garden. Your personal Apple ID won't work. Instead, you'll need to create dedicated Sandbox Apple IDs.
Head over to the "Users and Access" section in App Store Connect to set these up. You're basically creating a handful of "dummy" accounts. The email addresses don't even have to be real, so feel free to make up a few. These accounts live only inside the sandbox and have no connection to the real App Store.
Once you have a sandbox account created, grab an actual iPhone or iPad (this is important!) and follow these steps:
- First things first, go to Settings > App Store on your device and sign out of your regular Apple ID. Don't skip this—it's a common source of headaches.
- Now, plug your device into your Mac and run your app directly from Xcode.
- Inside your app, tap the button to buy something.
- When the iOS sign-in prompt appears, use the email and password for one of your new sandbox tester accounts.
A word of caution: Never sign in to the main device Settings with your sandbox account. Only use it when the purchase pop-up appears inside your app.
Simulating What Happens in the Wild
Good testing is more than just a single successful purchase. You need to think like a user and try to break things. The goal is to mimic all the different situations people might find themselves in. This has become even more critical as in-app purchases have exploded in popularity, a trend accelerated by the pandemic as people flocked to mobile apps for everything from gaming to fitness. User expectations are higher than ever, and a buggy payment flow is a quick way to lose them. You can find more data on how digital wallets and smartphone use drove market growth on imarcgroup.com.
Here’s a checklist of scenarios you absolutely must test:
- The Happy Path: A user successfully buys an item. The transaction goes through, and your app correctly unlocks the paid content.
- The Failed Transaction: A payment is declined. Does your app handle it gracefully with a clear message, or does it crash?
- The Interrupted Purchase: The user gets a call or force-quits the app right in the middle of a transaction. When they relaunch the app, does it properly handle the pending purchase?
- Restoring Purchases: This is a big one for subscriptions and non-consumable items. Test your "Restore Purchases" button to make sure it reliably unlocks content for a user who, for example, just got a new phone.
Pro Tip: I can't stress this enough: in-app purchases do not work on the iOS simulator. You must use a physical device. Trying to test on the simulator is a dead end—it won't fetch products, and you'll waste hours debugging something that was never going to work. Always, always use a real iPhone or iPad.
Crafting a Seamless Purchase Experience
Getting your in-app purchase flow to work is just the first hurdle. The real challenge? Creating an experience that feels so seamless and trustworthy that users actually want to complete their purchase. Once you allow in app purchase functionality, your entire focus needs to pivot to the user's journey.
Little details here aren't just about polish; they build the foundation of trust and can make or break your revenue goals. A clunky, confusing, or slow paywall will send potential customers running for the exit faster than anything else.
One of the first things you need to get right is your product information. Never, ever hard-code prices or product titles directly into your app. Instead, you should always fetch these details straight from Apple's servers each time the paywall is displayed. This ensures your users always see the correct, localized pricing and the most current descriptions you've set up in App Store Connect.
Guiding the User with Clear Feedback
When money is on the line, a silent app is a suspicious app. Users need constant, clear feedback about what's happening at every single step. Leaving them hanging with a spinning wheel and zero context is a surefire way to cause frustration and abandoned carts. A professional-feeling app communicates constantly.
Think about designing clear UI for these essential moments:
- Loading State: Don't just show a blank screen while your app is fetching products from StoreKit. A subtle loading indicator or a skeleton screen is all it takes. It’s a small signal that tells the user, "Hang on, I'm working on it," and it does wonders for managing expectations.
- Success State: A successful purchase deserves more than a generic "Thanks!" message. Give them a clear confirmation that reinforces their decision: "Success! You've unlocked Pro features." Then, immediately grant them access to what they paid for.
- Error State: Payments fail. It happens. A card gets declined, the network drops, or parental controls kick in. Your app has to handle this gracefully. Instead of a vague "Error," give them helpful, actionable advice like, "Your payment couldn't be processed. Please check your payment information in your device settings."
Pro Tip: Your purchase flow is a conversation with your user. Think about that little dopamine hit people get from a successful purchase. A well-designed success screen can amplify that positive feeling, turning a simple transaction into a truly rewarding moment.
Don't Forget the "Restore Purchases" Button
For any app that sells subscriptions or non-consumable items, the "Restore Purchases" button isn't just a nice-to-have—it's an Apple requirement. Forgetting it is one of the most common reasons apps get rejected during review.
This button is a critical safety net for your users. It lets them regain access to everything they've paid for if they switch to a new iPhone or reinstall your app, all without the frustration of having to buy it again.
Implementing it is a matter of calling the restoreCompletedTransactions() method from StoreKit. Your app will then get a callback for each previously purchased item, allowing you to re-unlock the features they own. It's a fundamental part of a good user experience that shows you respect their purchase history.
These are the kinds of thoughtful details that build a purchase experience that feels secure, professional, and worthy of your users' investment. For more ideas on structuring your offers, check out these different mobile app monetization strategies to see what might fit your app best.
Got Questions About iOS In-App Purchases? We've Got Answers.
If you’re working with in-app purchases, you’re bound to hit a few snags. It happens to everyone, from first-timers to seasoned pros. Getting stuck on the same few tricky issues is practically a rite of passage. Let's walk through some of the most common questions and get you back on track.
"Why Aren't My Products Showing Up in Sandbox?"
This is, without a doubt, the number one panic-inducing problem developers face. You've set everything up, you hit "run," and... nothing. Your products are nowhere to be found. Before you start questioning your code (or your career choices), run through this quick checklist. The culprit is almost always one of these four things.
- Paid Applications Agreement: First things first, have you signed the "Paid Applications Agreement" in App Store Connect? Until that's sorted, Apple won't serve your IAPs, even in a test environment.
- Product ID Mismatch: This one gets people all the time. Your Product IDs in Xcode must be an exact, case-sensitive match to what you entered in App Store Connect. A tiny typo is all it takes to break everything. Double-check it. Now, triple-check it.
- Testing on a Real Device: You absolutely have to test on a physical iPhone or iPad. The iOS simulator just can't handle fetching products or processing purchases. Don't waste your time trying.
- Using a Sandbox Account: Make sure you're logged into your Sandbox Apple ID on your test device. Critically, you should sign in during the purchase flow when the prompt appears, not from the main Settings app beforehand.
Working through these points will solve the issue more than 90% of the time. A little patience helps, too—it can sometimes take a few hours for a new IAP to propagate through Apple's system and appear in the sandbox.
"Can I Change the Price of an In-App Purchase Later?"
Yes, you can. You have full control over your pricing tiers in App Store Connect.
For simple, one-time purchases (like a "Pro Unlock" or "Remove Ads" feature), it's straightforward. You just change the price, and all future buyers will see the new price.
Subscriptions are a bit more nuanced. When you change a subscription price, Apple gives you a choice: you can either let your existing subscribers keep their original price grandfathered in, or you can migrate them to the new, higher price. Just be careful—Apple has very specific rules about this and requires you to notify users properly before any price increase takes effect.
"What Are the Top Reasons Apple Rejects In-App Purchases?"
Getting your app update rejected because of an IAP issue is frustrating. The good news is that rejections usually come down to a handful of common, avoidable mistakes.
The fastest way to get rejected is with a vague product description. Apple's reviewers need to know exactly what the user is paying for. Another big one is forgetting to add a "Restore Purchases" button. If you're selling non-consumable items or subscriptions, this isn't optional; it's mandatory.
Finally, make sure you're only selling what Apple allows. Trying to use IAPs to sell physical goods, services outside the app, or to collect charitable donations is a guaranteed rejection. Stick to digital goods and services within your app.
The market for these digital goods is huge, by the way. In 2023, North America alone generated over USD 65.2 billion in IAP revenue, which is more than 38% of the entire global market. This growth is driven by high smartphone use and the popularity of freemium apps. You can discover more insights on the in-app purchase market on scoop.market.us.
Ready to build beautiful, high-converting paywalls without the hassle? Nuxie lets you design, test, and launch optimized paywalls in minutes using AI. Get started with Nuxie today!