Your First iOS Tutorial Swift App
Dive into our hands-on iOS tutorial Swift guide. Learn to build your first app, navigate Xcode, and master core concepts with real-world examples.
This practical guide is all about getting you from a blank screen to a real, working iOS application. We're going to learn by doing, focusing on the essential steps to get your environment set up and start writing your first lines of Swift code.
Starting Your iOS Development Journey

Diving into iOS development can feel like a massive undertaking, but it really just boils down to a few manageable parts. I’ve designed this guide for anyone who wants to skip the dense theory and get their hands dirty building something tangible. We'll demystify the core tools and concepts by focusing on practical, actionable steps.
Our language of choice is Swift, Apple’s modern and powerful programming language. Its clean syntax and built-in safety features make it a fantastic starting point for beginners, but it's also what the pros use every day. On top of that, Swift's performance is impressive—it often runs significantly faster than other languages like Python for mobile-specific tasks.
What You Will Accomplish
When you finish this tutorial, you'll have hands-on experience and a solid foundation to build upon. We'll be building a simple but complete "Quote of the Day" app. I chose this project specifically because it’s straightforward, allowing you to master the fundamentals without feeling overwhelmed.
You’ll walk away with real skills and a working app to show for it.
The best way to learn is by building. This tutorial emphasizes a project-based approach, ensuring every concept is tied to a real-world application you create from scratch.
Key Skills You Will Learn
This guide is structured to arm you with the most critical skills for any iOS developer. You'll learn more than just how to code; you'll understand the entire workflow, from creating a project to building a functional user interface.
Here are the core competencies we’ll cover:
- Environment Setup: Get comfortable navigating and using Xcode, the integrated development environment (IDE) for all Apple platforms.
- UI Creation: Visually design your app's interface using SwiftUI, Apple's modern framework for building user interfaces across all its devices.
- Swift Fundamentals: Write basic Swift code, including functions and managing variables, to make your app interactive.
- Project Structure: Understand how an iOS project is organized and where to find key files and resources.
If you're eager to get a head start, you can check out this resource: https://nuxie.io/docs/guides/quickstart. It can give you some valuable context before we dive deeper into the code. This journey is all about building momentum, one step at a time.
Getting Comfortable In Your Xcode Environment
Your iOS journey really kicks off the moment you open Xcode. Think of it as your creative workshop—every line of Swift, every storyboard tweak, and every app launch happens here. Before diving into code, it’s worth spending some quality time exploring the layout and features that will shape your day-to-day workflow.
You’ll find Xcode in the Mac App Store. Fair warning: it’s a hefty download—usually over 10 GB—so grab a coffee and let it trickle in. Once the install finishes, launch Xcode and you’ll see the welcome screen ready for a new project.
Creating Your First Project
With the welcome screen open, you’re just a few clicks away from your first app scaffold. On my initial attempts, I liked experimenting with sample app names—sometimes cheesy, sometimes practical. Here’s how I usually set things up:
- Select Create a new Xcode project
- Make sure iOS is highlighted at the top
- Pick the App template and hit Next
- Fill in the details:
- Product Name: “MyFirstApp” (or something you’ll actually remember)
- Interface: SwiftUI
- Language: Swift
Choose where to save the folder and Xcode will generate everything you need. It might look overwhelming—so many files and folders—but don’t stress. At this stage, you only need to focus on a handful of essentials.
“Don’t feel pressured to master every file right away. I ignore most of them until I actually need a feature.”
Navigating The Main Workspace
Breaking down Xcode’s interface makes it feel a lot less intimidating. Here’s the map I use:
- Project Navigator (left): Your file tree. This is where you’ll jump between views, models, assets, and more.
- Editor Area (center): Time to write Swift code or design screens in SwiftUI. Whatever you select in the navigator shows up here.
- Inspector Pane (right): Context-sensitive settings live here. Select a button in SwiftUI and you’ll see styling options; choose a file and you’ll see file-specific settings.
- Debug Area (bottom): Hit Run and this region comes alive with console logs, variable inspectors, and crash reports. It’s my first stop whenever something misbehaves.
Personal Tip: if builds start to drag or Xcode feels sluggish, go to Product → Clean Build Folder. A quick clean can save you from hours of head-scratching.
With those areas under your belt, you’re all set to poke around your newly generated project and see how SwiftUI files, asset catalogs, and supporting files fit together. Next up, we’ll dive into your first view and build a simple interface from scratch.
Building Your First App: A Practical Walkthrough
Alright, enough with the theory. Let's get our hands dirty and actually build something. We’re going to take that empty Xcode project and transform it into a simple but functional "Quote of the Day" generator.
This project is a perfect entry point because it covers the essentials—designing a UI and handling user interaction—without burying you in complexity. First, we'll lay out the screen visually using SwiftUI, adding text and a button. Then, we'll hook up some Swift code to make it all work.
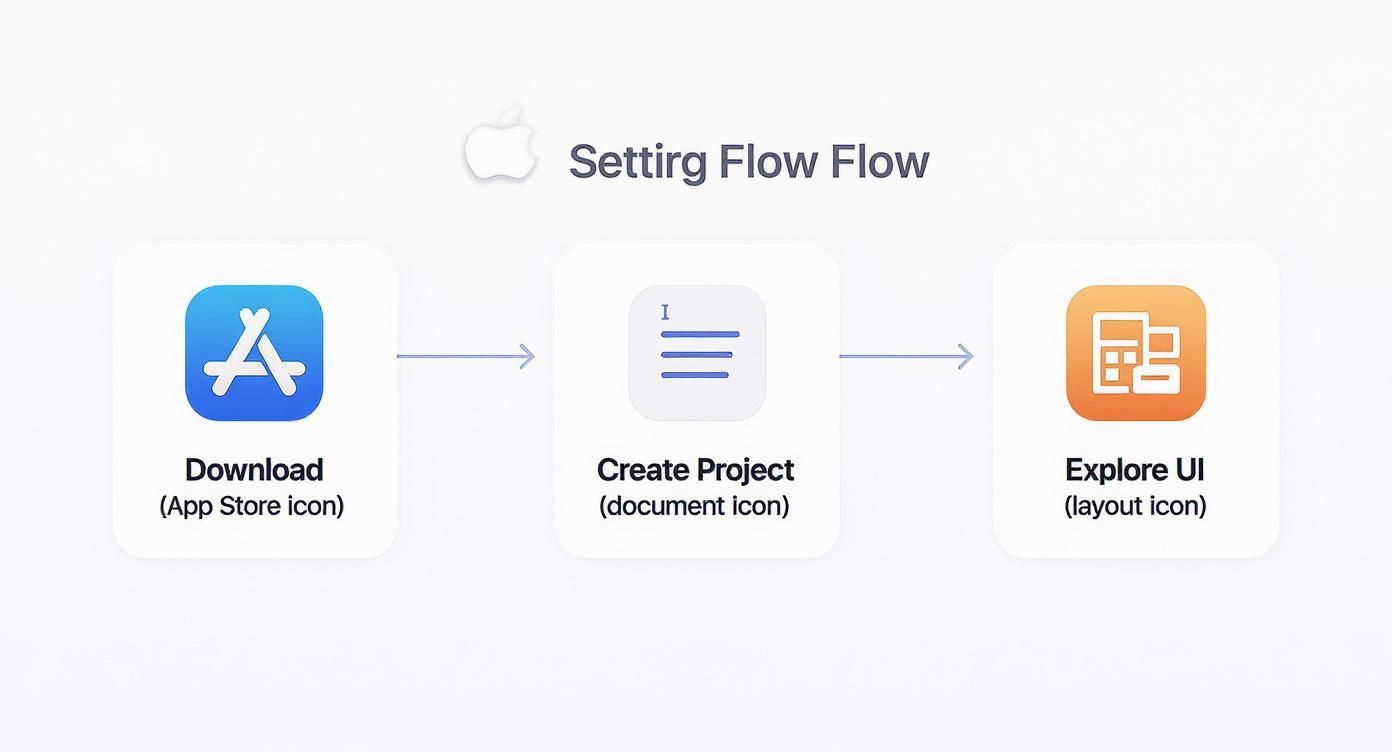
The initial Xcode setup we just finished was all about getting us to this point. Think of it as laying the foundation before we start putting up the walls.

As you can see, getting the project ready is a straightforward process designed to get you coding as fast as possible. Now, for the fun part.
Crafting the User Interface with SwiftUI
Go ahead and open the ContentView.swift file from the Project Navigator on the left. This file represents the main screen of our app. Right now, it just contains some default placeholder code, which we’re about to replace.
Our goal is simple: create a screen with a text area for the quote and a button to get a new one. In SwiftUI, this is incredibly direct. We'll use a VStack to arrange our elements vertically, one on top of the other.
import SwiftUI
struct ContentView: View {
// We'll add our state variables here in a moment
var body: some View {
    VStack(spacing: 20) {
        Text("Your inspirational quote will appear here.")
            .font(.title)
            .multilineTextAlignment(.center)
            .padding()

        Button("Show New Quote") {
            // The button's action will go right here
        }
        .padding()
        .background(Color.blue)
        .foregroundColor(.white)
        .cornerRadius(10)
    }
    .padding()
}
}
This code gives us a clean, centered layout. The Text view is just a placeholder for now, and the Button is styled to look like a proper button. If you have the preview canvas open in Xcode, you should see your design update in real-time as you type.
To help you get comfortable with the building blocks of SwiftUI, here are the core components we're using in this app.
Core SwiftUI Components for Beginners
| Component | Purpose | Example Usage |
|---|---|---|
VStack |
A container that arranges its children in a vertical line. | VStack { Text("Top"); Text("Bottom") } |
Text |
A view used to display one or more lines of static text. | Text("Hello, World!") |
Button |
A control that triggers an action when the user taps it. | Button("Tap Me") { print("Tapped!") } |
@State |
A property wrapper that lets a view manage and react to data changes. | @State private var tapCount = 0 |
These components are the bread and butter of most SwiftUI apps. Mastering them is the first big step in your iOS development journey.
Making the App Interactive with Swift
A static screen isn't much of an app. To bring it to life, we need to manage its state—specifically, our list of quotes and the one currently being displayed. For this, we'll turn to a core feature of SwiftUI: the state variable.
Marked with the @State attribute, a state variable is a special property that tells SwiftUI to automatically redraw the UI whenever its value changes. This is the secret sauce that makes SwiftUI so powerful and declarative. You don't have to manually update the screen; you just change the data, and the UI takes care of itself.
Implementing the Core Logic
The first thing we need is some data. Let's create an array of quotes and a state variable to hold the one that’s currently on screen. We’ll also write a quick function to pick a random quote and update that state.
Add Your State and Data: Pop these two lines in at the top of your
ContentViewstruct.
@State private var currentQuote = "Tap the button to start!"
private let quotes = [
"The only way to do great work is to love what you do.",
"Success is not final, failure is not fatal: it is the courage to continue that counts.",
"Your time is limited, don't waste it living someone else's life."
]Create the Update Function: Next, add this function inside the
ContentViewstruct but just outside thebodyproperty.
func updateQuote() {
currentQuote = quotes.randomElement() ?? "No quotes found."
}Connect Everything: Finally, we just need to hook this logic up to our UI. Find the placeholder
TextandButtonin yourbodyand wire them up to our new variable and function.
// Inside the body property:
Text(currentQuote) // This now displays our state variable
Button("Show New Quote") {
updateQuote() // This calls our function when tapped
}
That’s it! Now, run the app in the simulator (press Cmd + R). Tap the button, and you'll see the text magically update with a new quote.
Congratulations, you've just built your first interactive iOS app! As you grow, you'll often want to integrate external tools. When you're ready for that, check out our guide on how to integrate the iOS SDK for more advanced features.
Getting to Grips with Key Swift Programming Concepts

Alright, you've just built a working app. That's a huge step! Now, let's peel back the layers and really understand the Swift concepts you just put into action. It's one thing to follow a tutorial, but it’s another thing entirely to see the why behind the code. This is where it all starts to click.
We'll use our simple quote generator to explore the foundational pillars of the Swift language.
Since Apple introduced it back in 2014, Swift's growth has been nothing short of meteoric. By 2025, it had climbed the ranks to become the 9th most popular programming language, with 4.91% of developers using it. It's clean, safe, and fast—up to 2.6 times faster than Objective-C—which is why it's the go-to for modern iOS development. If you're curious about the data, Netguru has a great write-up on its rise.
Variables and Constants: The Core of Your Data
Think about our app. We needed a place to store our list of quotes and another to hold the single quote currently on screen. To do that, we used two of the most fundamental building blocks in Swift: variables and constants. You will use these in every single app you ever build, period.
Constants (
let): You useletwhen a value is set once and never changes. Our array of quotes is a perfect example. Once the app launches, that list is fixed. We defined it withlet quotes = [...]. This isn't just for organization; it's a safety net. The compiler will physically stop you if you accidentally try to modify it later on.Variables (
var): When you know a value will need to change, you reach forvar. ThecurrentQuotehad to be updated every time the user tapped the "New Quote" button, so it absolutely had to be a variable:var currentQuote = "...".
Here’s a piece of advice I give every new developer: Always start with
let. Don't even think about it, just make everything a constant by default. When you actually need it to change, the compiler will complain. That's your cue to switch it tovar. This simple habit makes your code incredibly predictable and nips a whole class of bugs in the bud.
Demystifying Data Types and Collections
Swift is what we call a type-safe language. This just means that every piece of data has a specific "type," like String for text or Int for a whole number. This might feel a bit strict at first, but it’s a lifesaver because it helps you catch mistakes before you even run your app.
In our quote app, we worked with two main data types:
String: This is simply a piece of text. ThecurrentQuotevariable was aString, and so was every individual quote inside ourquoteslist.Array<String>: This is a collection, or more simply, a list. In our case, it was a list that specifically holdsStringvalues. Ourquotesconstant was anArray<String>.
Getting comfortable with these basic types is non-negotiable for any ios tutorial swift project. They are the bedrock upon which you'll build much more complex data structures down the road.
Handling "Nothing" with Optionals
So, what happens when something might not have a value? In our updateQuote function, we called quotes.randomElement(). This is a clever little method because it anticipates a potential problem: what if the quotes array was empty? It can't pick a random element if there aren't any.
Instead of crashing, it returns nil, which is Swift's way of saying "nothing" or "no value here."
This is where optionals enter the picture. An optional is like a container that might have a value inside, or it might be empty (nil). To prevent the crashes that plague other languages, Swift forces you to safely "unwrap" this container before using its contents.
We used a particularly elegant tool for this, the nil-coalescing operator (??):
currentQuote = quotes.randomElement() ?? "No quotes found."
This single line is both incredibly safe and easy to read. It says: "Try to get a random element from the quotes array. If you get a real String back, assign it to currentQuote. But if you get nil instead, just use the fallback text 'No quotes found.'." It’s a clean and professional way to handle potential failures without your app hitting a wall.
What to Do Next: Building Essential Developer Habits
Getting your first app up and running is a massive achievement, but what you do now is what truly matters. The real work begins as you turn that initial success into a durable skill, and that comes down to building the habits that professional developers live by. Let's look at where you should focus your energy next.
The absolute first habit you need to lock down is using version control. I'm talking about Git. It lets you take snapshots of your project, so you can experiment freely without worrying about breaking everything. It’s your safety net. Platforms like GitHub and GitLab are where you'll store and showcase this work, making it a non-negotiable step for building a real portfolio.
Broaden Your Learning Path
Now that you have the basics down, it’s time to start adding some more advanced and genuinely useful features to your apps.
Here are a few key areas I’d recommend tackling next:
- Networking: This is all about learning to fetch data from live APIs. It’s how apps pull in everything from weather forecasts and stock prices to user profiles from a server.
- Navigation: Start building apps with more than one screen. You'll need to learn how users can move between them, like tapping a button on the main page to open a separate settings screen.
- Data Persistence: Figure out how to save user data right on the device. This ensures that information isn't lost every time the user closes the app.
While you're deep in Swift, it's also smart to understand where it fits in the broader programming landscape. For instance, a language like Python, which commanded 28.59% of global search interest in early 2025, is a giant in AI and data science. But when it comes to raw performance and seamless integration on Apple devices, Swift is the undisputed champion. You can get more details by comparing Swift vs. Python on goldenowl.asia.
Your goal isn't just to write code that works, but code that is clean, readable, and maintainable. Start adopting good practices now, even on your smallest personal projects. It pays off big time later.
Get Plugged into the Community
Remember, you aren't learning this stuff in a bubble. The iOS developer community is huge and incredibly helpful. Make a habit of visiting platforms like Stack Overflow whenever you get stuck on a specific problem—chances are, someone has already solved it. Follow well-known developers and blogs to keep a pulse on what’s new and important.
As your apps get more complex, you'll also need to make sure everything works as expected. That’s where testing comes in. To get started on the right foot, take a look at our guide to effective strategies for app testing on iOS.
Making these practices a regular part of your routine is what will truly accelerate your journey from a beginner to a confident, capable developer.
Answering Your Burning Questions
Diving into iOS development always brings up a few common questions. It’s totally normal to have them—everyone does at the start. Let's get these cleared up right away so you can focus on the fun part: actually building your app.
SwiftUI or UIKit: Where Do I Start?
For anyone just getting into iOS development in 2025, my advice is simple: start with SwiftUI. Apple has made it very clear that SwiftUI is the way forward for building apps on all their devices. Its modern, declarative approach is just so much more intuitive for beginners than UIKit's older, more verbose style. You'll find you can build beautiful interfaces with way less code and a lot less headache.
Now, that's not to say UIKit is dead. Far from it. It powers millions of apps and offers a level of granular control that SwiftUI is still catching up to in some niche areas. But for building new projects and getting up to speed with modern best practices, SwiftUI is the winner. You can always circle back to learn UIKit if you land a job maintaining an older, established codebase.
Honestly, if I were starting today, I'd dedicate my first three to six months exclusively to SwiftUI. Really nail down the fundamentals—state management, views, and modifiers—before even looking at UIKit. That solid foundation will pay dividends for years to come.
Do I Really Need a Mac?
I get this one a lot. The straightforward answer is yes, you absolutely need a Mac. The entire world of native iOS development revolves around Xcode, which is Apple's own development environment. It’s the only officially supported tool for building, testing, and ultimately shipping your app to the App Store, and it only runs on macOS.
You might see some online services or virtual machine setups that claim to let you code for iOS on a Windows PC. Take it from me: they’re almost always more trouble than they're worth. They can be clunky, slow, and a nightmare for serious development. A real Mac—even an entry-level MacBook Air or Mac Mini—is a non-negotiable investment if you're serious about this career.
How Long Until I'm Actually Good at This?
Ah, the classic "how long will it take?" question. The honest answer is that it really depends on your background and how much time you put in.
- Got some coding experience already? You'll likely pick up the Swift language syntax in a few weeks.
- Starting from scratch? Plan on a solid three to six months of dedicated learning before you're comfortably building simple, functional apps on your own.
Getting to a point where you're job-ready and can tackle complex, production-level apps is a longer game. That's more like a year or more of consistent practice, building projects for a portfolio, and really digging into the deeper parts of Apple's frameworks. The key is consistency over intensity. Coding for an hour every day is far more effective than a frantic eight-hour session once a week.
Ready to build, target, and ship high-converting paywalls in minutes? With Nuxie, you can design and deploy paywalls without app updates, using an AI-powered studio and visual campaign builder. Get started for free with Nuxie.