Mastering App Testing iOS for Flawless Releases
Discover how to master app testing iOS with our guide. Learn proven strategies for manual, automated, and performance testing to launch a perfect app.
Launching an app on Apple's competitive App Store isn't for the faint of heart. User expectations are sky-high, and one critical bug can tank your ratings overnight. That's where a solid app testing for iOS strategy becomes your most valuable asset. It's not just about squashing bugs; it’s a systematic process to make sure your app is functional, intuitive, performant, and compatible across the whole spectrum of Apple devices and iOS versions.
Why Your iOS App Testing Can't Be an Afterthought
In the iOS world, testing isn't just a box to check—it's a core part of your business strategy. Think about it: users expect a polished, seamless experience from the moment they tap your icon. If you don't deliver, they won't hesitate to find a competitor who does.
Apple sets this high bar themselves. Their rigorous App Store review process is designed to filter out apps that are unstable, insecure, or just plain clunky. A robust testing plan is your best defense against a rejection that could cost you weeks of delays and frustrating rework.
The Business Case for Rigorous Testing
Putting real effort into your app testing iOS workflow is one of the smartest business decisions you can make. The iOS platform is projected to have the fastest compound annual growth rate of any mobile platform between 2025 and 2032. This growth is fueled by Apple’s commitment to quality, which means developers who prioritize thorough testing will be the ones who succeed. If you want to dive deeper, exploring current mobile application testing trends can give you a real sense of where the market is headed.
A well-tested app has a direct, positive impact on your bottom line.
- Higher User Retention: When an app just works, people stick around. Simple as that.
- Positive App Store Ratings: Fewer bugs mean better reviews, which directly influences your app’s visibility and a user’s decision to download.
- Increased Revenue: A reliable app builds trust. That trust makes users far more comfortable hitting "buy" on in-app purchases or subscriptions.
Simply put, treating testing as an afterthought is a recipe for failure on the App Store. A proactive, structured approach ensures your application not only functions correctly but also delights users, protecting your brand and maximizing your return on investment.
Core Stages of an iOS Testing Workflow
So, how do you build a process that catches issues early and often? It helps to break it down into distinct phases. Each stage builds on the one before it, creating a comprehensive quality net that ensures your app is truly ready for primetime.
Let's walk through what a modern, effective workflow actually looks like.
Key Stages of a Modern iOS Testing Workflow
This table gives a high-level overview of the essential phases required to ensure your iOS app is ready for launch, from initial planning to final submission checks.
| Testing Phase | Primary Goal | Key Activities |
|---|---|---|
| Unit & Integration Testing | Verify individual code components and their interactions. | Writing code-level tests with XCTest, mocking dependencies. |
| UI & Functional Testing | Ensure the app works as designed from a user's perspective. | Manual exploratory testing, automated UI scripts with XCUITest. |
| Performance & Security Testing | Validate app responsiveness, stability, and data protection. | Load testing, battery usage analysis, vulnerability scans. |
| Compatibility Testing | Confirm the app works across different devices and OS versions. | Testing on a device matrix of various iPhones and iPads. |
| Beta & Release Testing | Gather real-world user feedback and perform final checks. | Using TestFlight for beta distribution, final regression testing. |
By methodically moving through each of these stages, you ensure that you're not just fixing bugs, but building a high-quality product that can thrive in the demanding iOS ecosystem.
Building Your Strategic iOS Test Plan
Let's be honest, diving into testing without a plan is a recipe for disaster. Effective testing doesn't start with code; it starts with a strategy. A solid test plan is what separates a smooth, successful app launch from a frantic, bug-filled nightmare. It's the moment you shift from a vague idea of "testing the app" to a precise, actionable roadmap that saves you time, money, and headaches.
Without this blueprint, teams often get lost. They might spend days testing features nobody uses or, even worse, completely overlook critical user journeys. Your plan aligns your entire QA effort with what the business needs and what users actually expect, ensuring every bit of app testing iOS work pushes the app closer to perfection.
First, Define Clear Testing Objectives
Before you even think about what you're going to test, you need to lock down why. What’s the end goal here? Are you trying to validate that a brand-new in-app purchase flow is seamless and secure? Or is the top priority ensuring the app is absolutely stable on the latest iOS release? Nailing down these objectives gives your entire process a clear purpose.
Vague goals won't cut it. Instead of saying "test performance," get specific. Try something like, "The main feed must load in under two seconds on a standard 4G connection." This kind of clarity makes it so much easier to prioritize what to test and to know for certain when you’ve succeeded.
Next, Construct Your iOS Device Matrix
You can't test on every iPhone and iPad ever released—it’s just not practical. This is where a device matrix becomes your best friend. It’s a strategic tool for deciding which devices and OS versions get your attention. It's not just about chasing the newest, shiniest models; it’s about making smart, data-driven decisions based on your real-world users.
For example, the adoption rate for iOS 18 is staggering, with nearly 89% of active Apple devices running it. That number alone tells you that prioritizing testing on iOS 18 is non-negotiable. Looking ahead to 2025, the key devices to focus on include the iPhone 15 series, the iPhone 14, and the ever-popular iPhone 11. This mix covers both early adopters and the mainstream majority. Digging into the latest iOS app development statistics is a great way to inform this strategy.
Think of your matrix as a living document, not a one-and-done checklist. Here’s a simple way I like to break it down:
- High Priority: The latest iPhone models (like the iPhone 15 Pro) and the most common older model your analytics show (often something like the iPhone 11).
- Medium Priority: Last year's flagships (e.g., iPhone 14) and the most popular iPad your users have.
- Low Priority: Older devices that only account for a tiny percentage of your user base.
A smart device matrix isn't about achieving 100% coverage. It's about focusing your precious time and resources on the devices and OS versions that will deliver the biggest impact for the people who actually use your app.
Finally, Select the Right Mix of Testing Types
A truly comprehensive test plan layers different types of testing to catch different kinds of problems. If you only focus on one area, you're leaving blind spots. A robust app testing iOS strategy weaves together several methods to create a tight quality net.
Here are the essentials you'll want to include:
- Functional Testing: The basics. Does the app actually do what it's supposed to? This is where you verify that login flows, forms, and navigation all work exactly as designed.
- UI/UX Testing: How does the app feel to use? This is about more than just finding bugs. You're assessing visual polish, layout consistency across screen sizes, and overall intuitiveness to make sure it lives up to Apple's high design bar.
- Performance Testing: Is the app snappy and efficient? Here, you'll measure things like load times, battery drain, and memory usage. Nobody likes a slow, clunky app that kills their battery.
- Security Testing: Is your users' data locked down? This involves probing for vulnerabilities, checking for insecure data storage, and ensuring you're compliant with regulations like GDPR.
By strategically combining these approaches in your plan, you can be confident you’ve examined your app from every important angle. This upfront work is what makes the entire testing cycle run smoothly and efficiently.
Uncovering Bugs with Manual and Exploratory Testing
Automation is fantastic for catching predictable bugs and regressions. It’s your workhorse. But let’s be honest—it has a massive blind spot. An automated script can't feel the frustration of a confusing workflow or notice that a button is just a few pixels off-center.
This is where your human testers come in. They aren't just valuable; they're absolutely essential for creating an iOS app that feels polished and high-quality. While a script can confirm a button works, it takes a person to decide if that button is intuitive. This human element is your secret weapon for finding the nuanced flaws that automation will always miss. It's about thinking like a real user—curious, impatient, and completely unpredictable.
Adopting a User-Centric Mindset
The single most important part of manual testing is empathy. You have to take off your developer or QA hat and put yourself in the shoes of a first-time user. Forget everything you know about the app's architecture and just… explore.
What happens if you mash a button three times in a row? What if you get a phone call right as you’re trying to complete an in-app purchase? These are the real-world scenarios, the "edge cases," where apps tend to fall apart. Speaking of which, a broken payment flow is a surefire way to lose users. If you want to make sure yours is solid, check out our guide on how to configure and test in-app purchases.
This isn't about rigidly following a test case. It’s about being creative and actively trying to break the app in ways a real person might, even if by accident.
Key Areas for Manual Investigation
Even though exploratory testing is about freedom, it’s smart to have a few areas to focus your energy on. These are the places where automation usually stumbles and a human touch makes all the difference.
- Complex Gestures and Interactions: Get hands-on with multi-touch gestures. Try pinching, zooming, long-pressing, and swiping. Does a drag-and-drop feel smooth and responsive, or does it lag?
- Interrupt Handling: Life gets in the way. Simulate those interruptions. Lock the screen, switch to another app and come back, or toggle airplane mode right in the middle of a process. A great app should handle these interruptions gracefully without crashing or losing the user's data.
- UI and Visual Polish: This is purely human territory. Hunt for misaligned text, blurry images, or inconsistent fonts. Check how the UI adapts to different screen sizes—does it look as good on an iPhone 15 Pro Max as it does on an iPhone SE?
Your manual testing is the final line of defense for your app's reputation. It’s how you catch the subtle, experience-breaking bugs that lead to one-star reviews. You’re not just making sure the app works; you’re making sure it feels great to use.
Mastering Apple's Human Interface Guidelines
Apple holds its developers to an incredibly high standard for design, all laid out in their Human Interface Guidelines (HIG). This isn't just a suggestion box; following these guidelines is a huge factor in passing the App Store review and, more importantly, in meeting your users' expectations.
As you test manually, keep the HIG in mind and actively check for compliance:
- Navigation: Is it easy to get around? Does the back button always go where you expect it to?
- Feedback and States: Does the app give clear feedback? Are loading spinners, disabled buttons, and success messages obvious?
- Platform Consistency: Does the app feel like an iOS app? Using standard iOS patterns and components makes your app feel familiar and trustworthy. An app that ignores these conventions can feel cheap or out of place.
Documenting Findings for Swift Resolution
Finding a bug is only half the job. If you can't communicate it clearly to the development team, it’s as if you never found it. A well-written bug report is the bridge between QA and engineering, paving the way for a quick fix.
Keep your bug reports concise but packed with information. Always include:
- A Clear, Descriptive Title: Think "App crashes when tapping 'Save' on profile screen."
- Precise Steps to Reproduce: A numbered list of exact steps that anyone on the team can follow. No ambiguity.
- Visual Evidence: A screenshot is good, but a screen recording is gold. It shows the problem in action and leaves no room for interpretation.
- Device and OS Details: Be specific. Note the exact model (e.g., iPhone 14) and iOS version (e.g., iOS 17.5.1).
- Relevant Logs: If you can, attach crash logs or console output. This is often the first place a developer will look.
When you combine this kind of structured documentation with the creative, user-focused mindset of exploratory testing, your QA team provides the kind of critical feedback that automation can only dream of.
Scaling Your Efforts with Smart iOS Test Automation
Manual testing is your quality compass. It’s perfect for finding those tricky UI bugs and frustrating user experience issues that only a human can spot. But when it comes to the sheer volume of regression checks and repetitive tasks, you need an engine. That’s where smart iOS test automation comes in—it’s how you scale your QA without burning out your team.
Automation takes over the predictable, monotonous work, running through tests with speed and precision. This frees up your human testers to do what they do best: exploratory testing, creative problem-solving, and really thinking like a user. It’s not about replacing people; it’s about empowering them. By automating core flows like logins, sign-ups, and checkouts, you build a safety net that catches critical bugs before they ever get to your users.
This division of labor is key to any modern app testing iOS strategy. Think of it as a simple decision point.
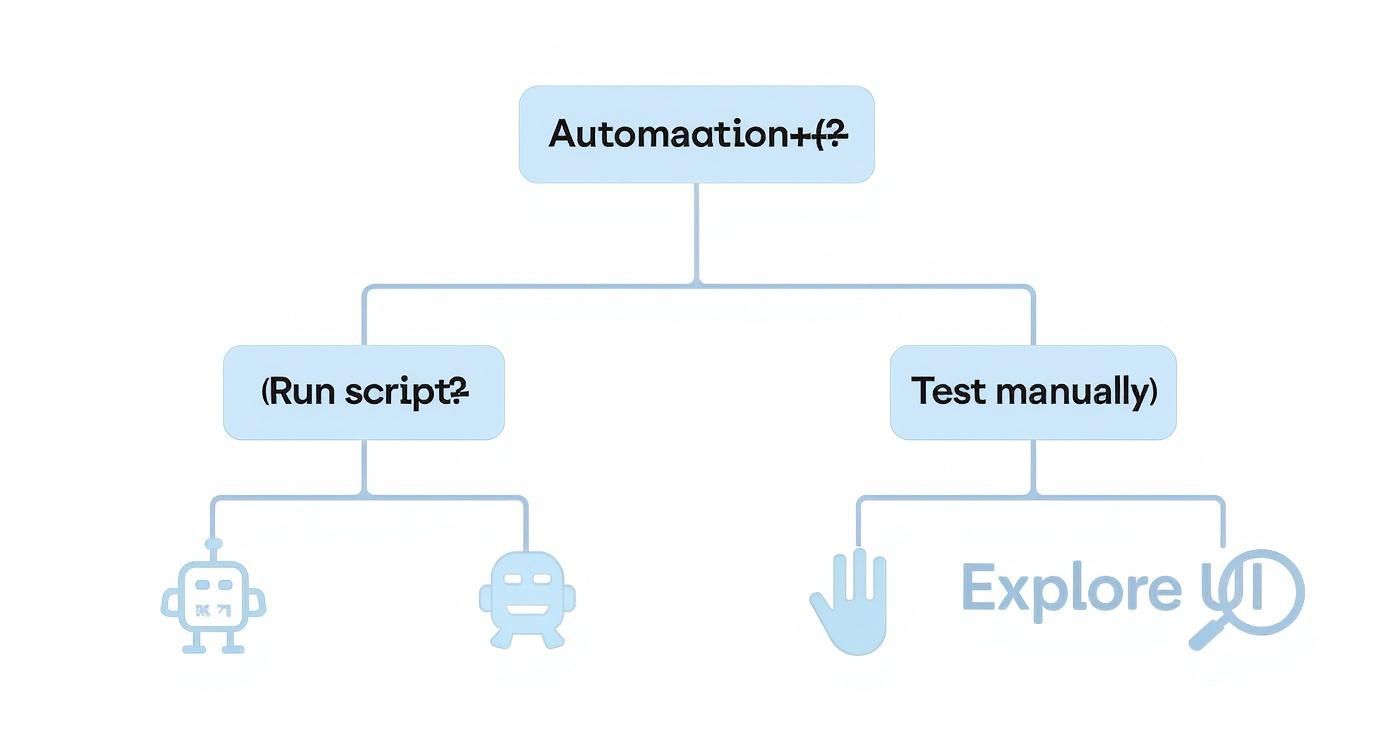
The real takeaway here is that you need both. Automation gives you speed and broad coverage, while manual testing provides depth and genuine user empathy.
Choosing Your First Automation Framework
Diving into iOS automation can feel a bit overwhelming. There are a dozen tools out there, and they all claim to be the best. For most teams just starting out, the simplest and safest bet is Apple's own native framework, XCUITest.
Because it's baked right into Xcode, XCUITest gives you tight integration, great performance, and day-one support for new iOS features. You won't be stuck waiting for a third-party tool to catch up when a new OS version drops. It uses Swift or Objective-C, so your developers are already on familiar ground.
XCUITest is the path of least resistance for iOS-native teams. Its reliability and deep integration with the Apple ecosystem make it the default choice for building a maintainable and long-lasting test automation suite.
Of course, XCUITest isn't the only game in town. Other frameworks are better suited for different situations, especially if you’re working on cross-platform apps.
When it comes to picking the right tool for the job, you have a few solid options. Each has its own strengths depending on your team's skillset and the technology your app is built on.
Choosing Your iOS Automation Framework
| Framework | Primary Language | Best For | Key Advantage |
|---|---|---|---|
| XCUITest | Swift, Objective-C | iOS-native apps built in Xcode. | Native performance and seamless integration with the Apple ecosystem. |
| Appium | Java, Python, JS, etc. | Teams managing both iOS and Android apps with a single codebase. | Write tests once and run them on multiple platforms. |
| Detox | JavaScript | React Native applications. | Eliminates test flakiness by automatically synchronizing with the app. |
While tools like Appium and Detox have their place, starting with XCUITest provides a stable foundation that lives right alongside your app’s source code. It’s the most direct route to reliable UI testing for a pure iOS project.
Scripting Your First Essential Test Case
Theory is one thing, but let's get practical. A great first test case to automate is the user login flow. It’s a perfect candidate because it’s a high-traffic journey where things absolutely cannot break.
Here’s what your first script would actually do:
- Launch the app.
- Find the username field and type in a valid test username.
- Find the password field and enter the correct password.
- Tap the "Log In" button.
- Check that the app navigates to the main dashboard screen.
This simple script delivers huge value. Run it with every new build, and you’ll instantly know if your core authentication is working. From here, you can incrementally add more tests for password resets, failed logins, and social sign-on. This step-by-step approach is how you build a solid automation practice without getting overwhelmed. If you're instrumenting your app for these kinds of flows, our guide on how to integrate the iOS SDK has some useful context.
Leveraging Cloud Device Farms for Broader Coverage
Once you have a few automated scripts running smoothly on a local simulator, it's time to think bigger. How does your app perform on an older iPhone running a previous version of iOS? What about on the latest iPad Pro? Buying and maintaining a lab of physical devices is a massive headache and a huge expense.
This is where cloud device farms are a game-changer. Services like BrowserStack, Sauce Labs, or AWS Device Farm give you on-demand access to hundreds of real iOS devices. You just upload your app and your test scripts, and you can run them in parallel across dozens of different device configurations.
This approach gives you some serious advantages:
- Massive Cost Savings: You skip the huge upfront cost of buying and maintaining all that hardware.
- Increased Test Coverage: Easily test on device and OS combinations you'd never be able to own in-house.
- Parallel Execution: Run hundreds of tests at once, which can shrink your test cycles from hours down to minutes.
By starting with a solid framework like XCUITest, automating your most critical test cases first, and then scaling your app testing iOS execution with a cloud device farm, you're building a smart automation strategy that will pay dividends.
Navigating the App Store Submission Gauntlet
https://www.youtube.com/embed/9vkkJ4tC4SQ
You’ve poured everything into planning, designing, building, and testing your app. Now you’ve reached the final boss: the App Store review. Don’t mistake this for a simple formality. It's a tough quality gate where Apple scrutinizes every corner of your app against their notoriously high standards. A rejection at this stage can set you back weeks, killing your launch momentum right when you need it most.
Think of the submission process as your final exam. To pass, you need to prepare meticulously and know exactly what the reviewers are looking for. It's not just about shipping a bug-free build; it’s about presenting a complete, polished, and trustworthy experience from the second a reviewer opens it.
The Pre-Submission Checklist You Cannot Skip
Before you even dream of hitting that "Submit for Review" button, you need to run through one last, comprehensive checklist. This is absolutely not the time to cut corners. I've seen countless teams get rejected for simple metadata mistakes that could have been caught in five minutes.
Your final sweep has to cover these critical areas:
- Accurate Metadata: Is your app description clear, honest, and free of typos? Do your keywords actually reflect what your app does?
- Polished Screenshots and Previews: Your store listing's visuals are your first impression. They must be up-to-date and represent the current version of the app you're submitting. Mismatches are an easy and common reason for rejection.
- Functional Demo Account: If your app requires a login, providing a fully functional demo account with clear instructions is non-negotiable. A reviewer has to be able to access everything.
- Privacy Policy and Data Handling: Make sure you have a clear, accessible privacy policy linked both in the app and in App Store Connect. You have to be transparent about what data you collect and why.
A rejection is more than just a delay; it's a signal that your quality process has a blind spot. A thorough pre-submission review is your best insurance against the costly back-and-forth with Apple's review team.
Decoding Common App Store Rejections
Apple’s App Store is a massive marketplace, on track to pull in $138 billion in global revenue in 2025. They protect that quality fiercely, and that means being strict. In fact, a staggering 38% of iOS developers reported getting at least one app rejected in the past year, with most pointing to issues around app completeness and in-app purchase compliance. For a closer look at these numbers, check out the full App Store statistics report.
The fastest way to avoid these pitfalls is to learn from them. From my experience, these are the rejection reasons that pop up again and again:
- Guideline 2.1 - App Completeness: This is the big one. Your app simply cannot feel like a beta. It must be a finished, polished product, completely free of crashes, broken links, or placeholder content. Every single button should work, and every feature needs to be fully implemented.
- Guideline 3.1.1 - In-App Purchases: This guideline is a minefield. You absolutely have to test your IAP flow. Reviewers will check that your purchase process is clear, prices are displayed correctly, and that the "restore purchase" functionality works as expected. I know testing this in the sandbox environment can be a pain, but it's essential for a smooth review.
- Guideline 5.1.1 - Data Collection and Storage: Privacy is everything to Apple. If you collect user data, you must explain why. Your app will get shot down if it's not crystal clear what data you're collecting and how you're using it.
Proactive Strategies for a Smoother Submission
Instead of just waiting to react to a rejection, build a proactive strategy. Use the "Notes for Reviewer" section in App Store Connect to your advantage. Clearly document your app's functionality. If you have a complex feature, walk them through how it works and explain why it’s valuable to the user.
Ultimately, navigating the submission process is the final step in your quality assurance journey. If you've been diligent with your app testing iOS strategy all along, this stage should be a confirmation of your hard work, not a source of last-minute stress.
For a deeper dive into the entire process from idea to launch, our guide on how to create an app for the App Store is a great place to start.
Common Questions About App Testing for iOS
When you first dive into testing for iOS, a lot of questions come up. Teams are constantly trying to figure out how to balance speed, cost, and quality, and it's easy to get bogged down. Let's cut through the noise and answer some of the most common questions we hear from developers and QA pros every day.
What’s the Difference Between Testing on a Simulator vs. a Real Device?
This is probably the number one question I get, and for good reason. Getting this right is fundamental to a solid testing process. The simplest way to think about it is that a simulator is a useful but ultimately flawed imitation. It’s just a piece of software on your Mac that pretends to be an iOS environment.
Simulators are brilliant for quick, early checks. You can spin one up in seconds to see if a new layout breaks or if a button click takes you to the right screen. It’s fast and convenient for day-to-day development. But it can’t ever truly replicate what a user will experience.
Real device testing, on the other hand, is the moment of truth. It's the only way to know for sure how your app will perform in the wild, in a real person's hands.
- Hardware Features: A simulator has no access to a real camera, GPS, accelerometer, or Bluetooth. If your app uses any of these, you have no choice but to test on a physical device.
- Performance: Your Mac's processor and memory are beasts compared to a phone's. An app that feels silky smooth on the simulator might stutter and lag on an actual iPhone 11. This performance gap is where simulators can be dangerously misleading.
- Real-World Conditions: What happens when a user gets a phone call while using your app? Or when their Wi-Fi drops? Or they get a low battery warning? Simulators can't reliably mimic these chaotic, real-world interruptions.
A smart strategy uses both. Do the bulk of your quick-and-dirty functional checks on simulators. Then, for anything performance-related, user experience validation, and your final pre-release sanity checks, you absolutely must move to real devices.
How Can Small Teams Afford to Test on Multiple Devices?
Let's be real: buying every new iPhone and iPad simply isn't an option for most indie devs and small startups. The cost is staggering. The good news is, you don't have to. This is exactly what cloud-based device farms were built to solve.
Platforms like Sauce Labs or BrowserStack give you remote access to massive libraries of real, physical iOS devices. You can run your manual and automated tests on their hardware through the cloud, getting wide device coverage for a predictable subscription fee instead of a huge upfront investment.
For a small team, a cloud device farm isn't a luxury—it's a strategic tool. It levels the playing field and gives you access to the same kind of device coverage that the big players have, without the crippling overhead.
To get the most out of these services, be strategic. Don't waste your budget trying to test on every obscure model. Dig into your app's analytics, find the top three to five devices your actual users have, and focus your testing efforts there. It's the 80/20 rule in action.
What Is the Most Important Type of Testing for an iOS App?
This can feel like a trick question, but if I had to pick one, it's a tie between UI/UX and functional testing. Apple users have famously high standards. An app that's buggy is bad, but an app that's ugly, confusing, or clunky is even worse—it gets deleted instantly. Functionality is about making sure the app works; UI/UX is about making sure it feels great to use.
Running a very close second is regression testing. Every time you ship a new feature or fix a bug, you risk breaking something that used to work perfectly. Regression testing is your safety net. It's the practice of re-running old tests to make sure your new code hasn't introduced any unintended side effects. A solid, automated regression suite is your best defense against seeing your hard-earned App Store rating plummet after an update.
Ultimately, your job is to make sure your app does what it promises and that users enjoy the experience. If you can nail those two things with every release, you're already ahead of the game.
Ready to take the guesswork out of your app's monetization strategy? Nuxie is an AI-powered paywall platform that helps you design, target, and ship high-converting paywalls in minutes without needing to submit a new app update. Discover how Nuxie can help you grow your subscription revenue.