A Guide to Launching the App with Smart Paywalls
A practical guide to launching the app with dynamic, trigger-based iOS paywalls. Learn SDK integration, A/B testing, and analytics to maximize revenue.
Getting your app into the world is about more than clean code; it's about having a smart monetization plan baked in from the very beginning. The real trick is to stop thinking about paywalls as static roadblocks and start seeing them as dynamic, trigger-based offers. This approach lets you present the right offer at the exact moment a user is most engaged, making the purchase feel like a natural next step, not an interruption.
Rethinking Your App Launch with Dynamic Paywalls
The old "build it and they will pay" mindset just doesn't cut it anymore in such a packed marketplace. Too often, developers treat monetization as the last item on the checklist, slapping a generic paywall on the app right before hitting "submit" to the App Store. This almost always falls flat because it completely ignores the user's journey and whether they've even had a chance to see the app's value.
A modern strategy weaves monetization into the fabric of the user experience. Instead of abruptly stopping the user in their tracks, you identify those "aha!" moments—when engagement is highest—and present a subscription as the perfect solution or a valuable upgrade. This shift is what separates apps that struggle from those that build sustainable revenue.
The Problem with Static Paywalls
Think of a static paywall—the kind that pops up for every single user on their first launch—as a blunt instrument. It makes the huge assumption that everyone is ready to buy right away, which we know isn't the case. This can backfire badly.
- High Churn: Users who aren't yet sold on your app's value will just bounce.
- Negative Reviews: An immediate paywall often feels aggressive and can lead to a flood of bad ratings.
- Lost Opportunity: You completely miss out on converting users who might have happily subscribed later, once they'd experienced what your app can do.
The competition is fierce, making a thoughtful launch absolutely critical. Global app downloads are projected to hit a staggering 218 billion in 2024. With nearly two million apps on the Apple App Store alone, you can't afford to be generic. For a deeper dive, I recommend reading the full research about current app statistics to really grasp the competitive landscape.
Let's break down the core components of a successful launch strategy built around dynamic, behavior-driven paywalls.
Key Elements of a Modern Paywall Launch Strategy
This table outlines the pillars we'll be covering. Each one plays a crucial role in shifting from a static "ask" to a dynamic, user-centric conversation.
| Pillar | Description | Key Benefit |
|---|---|---|
| SDK Integration | Seamlessly adding a tool like Nuxie to your iOS app to enable remote paywall configuration. | Agility—update paywalls without shipping a new app version. |
| On-Device Triggers | Setting up specific user actions (e.g., completing a task 5 times) to display a paywall. | Relevance—the offer appears at the moment of highest intent. |
| Campaign Logic | Defining the rules, audiences, and A/B tests for your paywalls from a central dashboard. | Control—run sophisticated monetization experiments with ease. |
| User Segmentation | Grouping users based on behavior or demographics to show them the most relevant offers. | Personalization—increases conversion by matching the offer to the user. |
| Analytics & A/B Testing | Measuring paywall performance, testing variations, and iterating based on real user data. | Optimization—data-driven decisions lead to higher revenue and retention. |
By mastering these elements, you're not just launching an app; you're launching a dynamic business that can adapt and grow with its user base.
This flow illustrates the modern approach, moving from the initial build to a dynamic paywall that's triggered by actual user behavior, ultimately leading to a purchase.
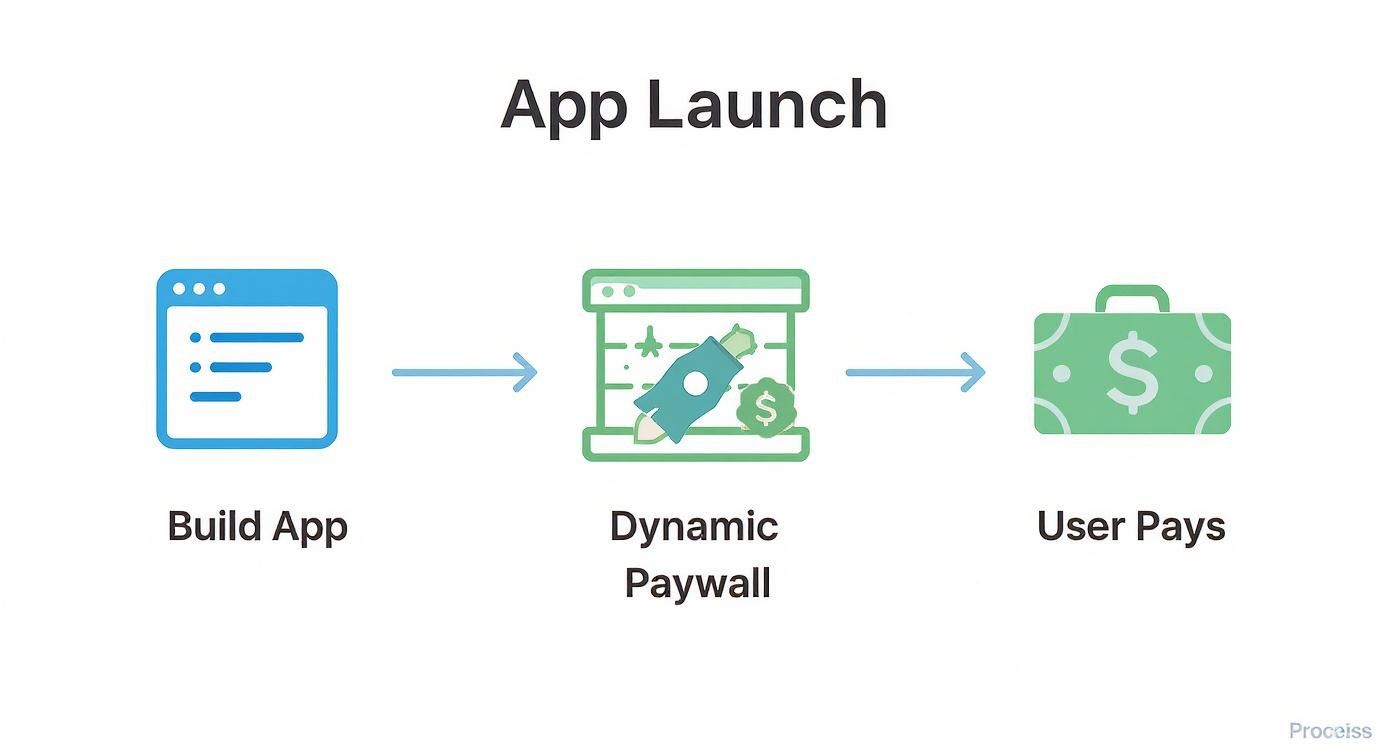
The key takeaway here is simple: A paywall isn't the final step of the development process. It's a crucial, integrated part of the user experience that should intelligently respond to how people actually use your app.
Alright, let's get our hands dirty and hook up the Nuxie SDK. Adding a new SDK can sometimes feel like a heavy lift, but we’ve made sure integrating Nuxie into your Xcode project takes just a few minutes. A clean setup is the first real step toward launching more effective paywalls.
It’s hard to overstate just how critical a solid monetization engine is on iOS. Global app revenue is projected to smash $190 billion in 2025, and a whopping 65.8% of that comes from iOS devices. This is a huge deal, especially since iOS has fewer downloads than Android. It proves Apple users are ready to spend, making your paywall one of the most important screens in your app.
Adding the Swift Package
First things first, let's add the package. Nuxie is distributed through the Swift Package Manager (SPM), which is baked right into Xcode. This means no more wrestling with manual frameworks or complex dependency managers.
- In Xcode, head over to File > Add Packages...
- Pop the Nuxie SDK package URL into the search bar.
- For the version rules, "Up to Next Major Version" is your best bet. It keeps you on the latest feature and bug-fix releases without risking breaking changes.
- Click "Add Package," and make sure you add the Nuxie library to your app's main target.

And that’s all there is to it. Xcode fetches the SDK and links everything up for you. For the exact package URL and more details, you can always refer to our official guide on how to integrate the iOS SDK.
Initializing the SDK at Launch
With the package in place, you need to wake Nuxie up when your app launches. This is a critical step that connects your app to your Nuxie dashboard, allowing it to pull down paywall configurations and report back analytics. You’ll need your API key for this, which you can grab from your project settings in the Nuxie dashboard.
You'll want to initialize the SDK as early as possible in your app's lifecycle.
- For SwiftUI apps: The perfect spot is inside your
Appstruct'sinit()method. - For UIKit apps: The classic
application(_:didFinishLaunchingWithOptions:)method in yourAppDelegateis the way to go.
A Quick Word of Advice: Never hardcode your API key directly in your codebase. A much safer practice is to store it in a separate configuration file, like a
.plist, and then add that file to your.gitignore. This simple step keeps your credentials out of your version control history.
Once you’ve added the initialization code, run your app. To make sure everything is connected, just pop over to your Nuxie dashboard. You should see the "last seen" status for your app update, giving you the green light that the SDK is talking to our servers. This quick check confirms you’re all set to start building triggers and launching campaigns.
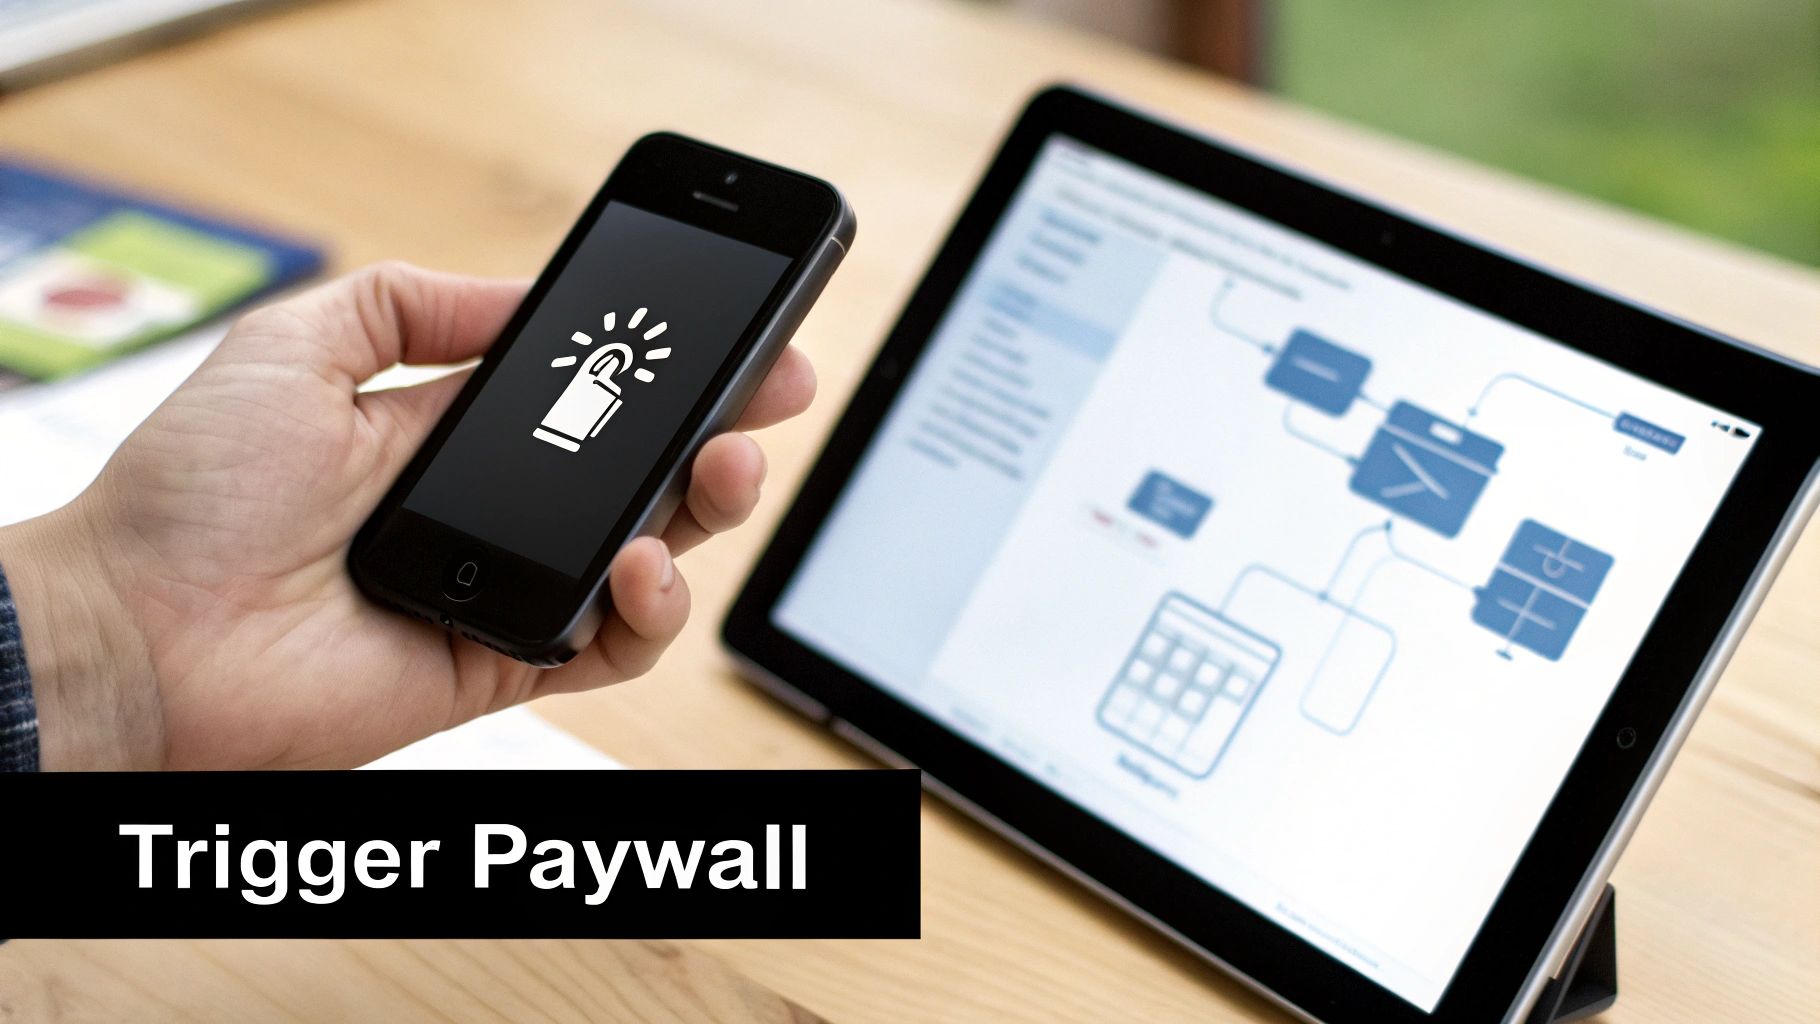
Designing Your First On-Device Paywall Trigger
Okay, so you've got the Nuxie SDK integrated. Think of that as laying down the foundational plumbing. Now, let's get smart about when to turn on the faucet. This is where we shift from just having a paywall to having a real monetization strategy—one that uses intelligent triggers based on what users are actually doing in your app.
The old-school approach of hitting every user with a paywall the moment they launch the app is dead. Or at least, it should be. A much more effective strategy involves figuring out the precise moment a user is most likely to convert. We’re going to set that up right from the Nuxie dashboard.
Instead of a brute-force interruption, we’ll make your paywall feel like a perfectly timed solution. This context-aware approach is a game-changer for conversion rates because you're presenting the offer right when the user feels the need for it.
Moving Beyond the Launch Screen
The big idea here is to connect your paywall to specific, meaningful events inside your app. An "event" is just an action you track, like a user tapping save_project, finishing a meditation_session, or trying to use a pro_feature.
By triggering a paywall after one of these actions, you’re anchoring the value proposition. The user just did something cool, and now you’re offering them a way to do even more.
Let’s take a photo editing app as an example. Instead of a paywall on the first open, imagine triggering it the moment a user taps on a premium filter. Their intent is crystal clear—they want that effect. Your paywall becomes the key to unlocking it, not an arbitrary gate.
This respects the user's experience. It lets them get their feet wet and see the value before you ask for anything in return.
Creating Your First Campaign
Alright, let's walk through a real-world scenario. Imagine we're building a campaign for a fitness app. Our goal is simple: show a paywall only after a user has completed their third workout. Why three? Because that’s a great signal of genuine engagement.
You'll set this up in the Nuxie dashboard without touching a single line of code. It’s all done through a straightforward rules engine.
- Choose Your Event: Start by selecting the
workout_completedevent you're already tracking. - Define the Condition: Next, set the rule for this event to fire only after it has occurred 3 times. This little counter is powerful; it’s how you differentiate a casual browser from a potential power user.
- Link the Paywall: Finally, pick which paywall design you want this trigger to show. You might have several different designs for various campaigns.
And that’s it. The on-device SDK is now silently listening. It’ll count those workout_completed events locally on the user's device and, milliseconds after the third one, present your paywall. No latency, no server calls.
If you want to dive deeper into the nuts and bolts, our documentation covers the fundamentals of Nuxie paywalls in great detail.
Expert Tip: Don't try to boil the ocean with your first trigger. Keep it simple. Identify the single most important "aha!" moment in your app—that point where users really get it—and build your first campaign around that one action.
This transition from a static, launch-based paywall to a dynamic, event-based model is the single biggest lever you can pull to improve monetization. You're no longer just interrupting; you're responding to clear user intent. It’s a subtle shift in mindset that makes all the difference when building a healthy subscription business, starting from the very first time a user is launching the app.
Using User Segments for Personalized Offers
Showing the same offer to every single user is a fast track to mediocre results. Think about it: a user who just installed your app five minutes ago has a completely different mindset than someone who has used it daily for two weeks. Personalization is your most powerful tool here, and user segmentation is the engine that drives it.
Instead of a one-size-fits-all message, segmentation lets you group users based on shared characteristics or behaviors. This means you can craft specific offers that actually resonate with each group, which dramatically increases the likelihood of conversion. When launching the app, this strategy is key for building momentum by converting your most engaged early adopters first.
Defining Your Key User Segments
First things first, you need to think about who is using your app and how. Nuxie gives you the flexibility to build segments based on all sorts of properties, so you can define groups that are truly meaningful for your business. You can spin these up right in the dashboard by combining different rules.
Here are a few high-impact segments you can create right away:
- New Users: This is a simple but essential group. You might define this as anyone who installed the app within the last 7 days. These folks are still in the evaluation phase, so a welcome offer or an extended trial can be the perfect hook.
- Power Users: This group is your bread and butter. You could define them as users who have triggered a key event, like
project_saved, more than 10 times. They already love your app, so you can confidently offer them an annual plan for the best value. - Geographic Segments: Targeting by country is crucial for pricing localization. You can create a segment for users in a specific country to show them a launch discount that makes sense for their local currency and economy.
For a deeper dive into what’s possible, you can explore the different properties and logic in the official documentation for Nuxie segments and events. It’ll give you a much clearer picture of how to build complex, behavior-driven audiences.
Linking Segments to Paywall Campaigns
Once your segments are defined, connecting them to a campaign is dead simple. This is where you bring your personalized strategy to life. Instead of showing a campaign to "all users," you just select the specific segment you want to target.
Real-World Example: Imagine you're launching a productivity app. You could create a campaign that targets your 'Power User' segment. When someone from this group tries to access a premium feature, you show them a paywall that says, "You're one of our top users! Unlock unlimited projects with 40% off the annual plan." This message feels exclusive and rewarding, making the offer far more compelling than a generic pop-up.
This level of precision is what separates apps that just scrape by from those that build a truly effective and user-friendly revenue model. It acknowledges that users aren't all the same and respects their journey by presenting offers that are relevant to their specific context. This thoughtful approach pays dividends long after the initial app launch.
Fine-Tuning Your Paywalls with A/B Testing
Once your app is live, the real work on monetization begins. The most successful apps don’t just set and forget their paywalls; they treat them like a core product feature, constantly iterating and improving. This is where A/B testing becomes your secret weapon, letting you swap out guesswork for hard data.
It's so easy to fall into the trap of assuming what your users want. You might be convinced that a slick, animated background is the key, but what if a simple, static image with a clear call-to-action converts 15% better? You’ll never know for sure until you test it. Nuxie is built for exactly this, allowing you to experiment with headlines, pricing, and imagery on the fly, without needing to push a new app update for every single change.
This cycle of continuous optimization is what separates apps with flat revenue from those that see consistent, long-term growth. Small, data-backed tweaks really do compound over time, leading to major lifts in your most important metrics.
Building a Strong Test Hypothesis
Before you dive in and start changing things, you need a solid hypothesis. A good hypothesis isn't just a vague idea; it's a specific, testable statement about what you're changing, for whom, and what you expect the result to be. I always follow a simple framework: "If I change [Variable], then [Expected Outcome] will happen, because [Rationale]."
For instance, a weak hypothesis is something like: "Let's test a new headline." It's not actionable and has no clear success metric.
A much stronger hypothesis would be: "If we change the headline from 'Unlock Premium' to 'Start Your Free 7-Day Trial,' we expect the trial start rate to increase by 10% because the new copy highlights the risk-free nature of the offer."
See the difference? This approach forces you to think through the why behind your test. It turns random tinkering into a structured experiment with a clear finish line.
A well-formed hypothesis is the foundation of any successful A/B test. It brings clarity and focus, ensuring you’re working toward a measurable business goal, not just testing for the sake of it.
Making Sense of Your Results in Nuxie
After your test has run long enough to collect meaningful data, the Nuxie analytics dashboard is where you’ll uncover the results. The temptation is to just glance at the winning conversion rate and call it a day, but to get the full picture, you need to look at the results from a few different angles.
I recommend starting with these key metrics:
- View-to-Conversion Rate: This is your primary indicator of paywall performance. It’s a simple calculation: what percentage of users who saw the paywall actually converted?
- Average Revenue Per User (ARPU): Did your change bring in more subscribers but at a lower price point? ARPU helps you see the bigger financial picture, balancing the number of conversions with the value of each one.
- Trial-to-Paid Conversion Rate: If you’re testing different trial offers, this metric is crucial. A high trial start rate means very little if none of those users stick around and become paying customers.
Let's walk through a real-world scenario. Say you test a deeply discounted annual plan. You might see a huge spike in conversions—great! But if that change causes your ARPU to drop significantly, the test might actually be a net loss for the business. The data will guide you, helping you make an informed call that truly improves your bottom line long after you're done launching the app.
To help you get started, here are a few high-impact A/B testing ideas you can run to quickly find out what resonates with your audience.
High-Impact Paywall A/B Testing Ideas
| Element to Test | Variant A Example | Variant B Example | Primary Metric to Watch |
|---|---|---|---|
| Headline / Value Prop | "Unlock All Features" | "Start Your 7-Day Free Trial" | Trial Start Rate |
| Call to Action (CTA) | "Continue" | "Start Free Trial & Subscribe" | View-to-Conversion Rate |
| Price Anchoring | Show monthly price only | Show annual price with "Save 50%" badge | Annual Plan Adoption Rate |
| Social Proof | No social proof | "Join 500,000+ Happy Users" | View-to-Conversion Rate |
| Feature List | 3 bullet points | 5 bullet points with icons | View-to-Conversion Rate |
| Imagery/Video | Static product image | Short video of the app in action | Engagement Time & Conversion |
Running tests on these core elements can lead to quick wins. The goal is to isolate one variable at a time so you can be confident that the change you made was responsible for the outcome you see.
Ensuring a Safe and Compliant Launch

When you’re pushing new paywalls live, trust is everything. It's the currency you trade on with your users, and you can’t afford to lose it. Introducing a dynamic system like this brings up new questions about privacy and operational safety, but handling them correctly from the start builds a solid foundation for long-term growth.
First thing’s first: you have to be obsessive about user data. Regulations like GDPR and Apple's own privacy rules aren't just legal hurdles to clear; they’re about doing right by your users. Thankfully, a platform like Nuxie was built from the ground up with privacy in mind. It's designed to collect only the bare minimum, non-personally identifiable info needed to make segments and triggers work.
Navigating Privacy and User Data
When you set up Nuxie, you're not hoovering up sensitive personal info. The focus is entirely on anonymized events and device properties. This approach keeps you compliant without sacrificing the powerful data you need for smart targeting.
So what does that actually look like in practice?
- Anonymized Identifiers: Nuxie assigns a random, unique ID to each device. It’s completely disconnected from a user's real-world identity.
- Event-Based Data: You’re tracking in-app actions—think
level_completeorarticle_read—not who the user is. - No PII Collection: The SDK is intentionally designed to avoid collecting Personally Identifiable Information (PII) like names, emails, or phone numbers.
The secret is focusing on behavioral data, not personal data. This lets you build incredibly sophisticated segments and triggers while staying well within the bounds of privacy regulations. It's a critical distinction that protects you and your users.
The Essential Rollback Strategy
Let's be realistic: sometimes a campaign goes wrong. Imagine you launch a new, aggressive paywall, but a bug causes it to block a core free feature. The one-star reviews start pouring in. In the old days, this was a full-blown emergency—a mad dash to code a fix, submit a new build to Apple, and then pray for a quick review.
This is where a remote configuration tool becomes your safety net. With Nuxie, you can kill any problematic campaign right from the dashboard. No code, no new build. The change rolls out to your users' devices within minutes, effectively turning off the broken paywall.
This instant control is non-negotiable for a safe launch. It gives you the freedom to be bold with your A/B tests and targeting, because you know you have an immediate "off switch" if something hurts the user experience. What could have been a disaster becomes a minor hiccup you fix in seconds. That kind of agility is what gives you the confidence to optimize without fear.
Got Questions About App Launches? We've Got Answers
When you're deep in the trenches of an app launch, monetization questions are always top of mind. Nail these, and you'll set yourself up for better early traction and a much healthier revenue stream down the road. Let's tackle some of the big ones I hear all the time from developers.
These aren't just theories; this is practical advice based on what actually moves the needle for successful apps.
So, When Exactly Should I Show the Paywall?
Almost never on the very first open. That's a classic mistake that often leads to a spike in uninstalls and a flurry of one-star reviews before anyone has a chance to see what your app is all about.
A much smarter approach is to use a trigger-based system. You want to wait until the user has actually experienced that "aha!" moment and understands the value you're offering.
The best time to present a paywall isn't tied to a clock; it's tied to user intent. Let their actions—not a timer—signal when it's the right moment to make the ask.
Instead of a generic timer, tie your paywall to key engagement milestones. For example, trigger it:
- After a user successfully completes a core action 2-3 times.
- The instant they tap on a locked, premium feature they want to use.
- After they’ve shown consistent engagement, maybe on their third day of active use.
What Metrics Should I Really Be Watching?
Downloads are just a vanity metric. To understand if your subscription model is actually working, you need to dig deeper into the numbers that reflect financial health.
Your go-to indicators should be Trial Conversion Rate (the percentage of free trials that roll into a paid subscription) and your Paywall View-to-Conversion Rate. Beyond that, keeping a close eye on your Average Revenue Per User (ARPU) and Churn Rate will give you a brutally honest picture of how your paywall is performing financially.
How Many Paywall Variations Should I A/B Test at Once?
Don't overcomplicate it, especially when you're just starting out. For your first A/B test, a simple two-variant setup (A vs. B) is more than enough. The golden rule here is to change only one significant element at a time.
You could test the headline, the primary call-to-action button, or the pricing structure. If you try to test a new headline, a new image, and new prices all at once, you’ll have no idea which change actually made the difference. Keep it clean and focused.
Ready to put a smarter paywall strategy into action for your iOS app? With Nuxie, you can build, target, and A/B test high-converting paywalls in a matter of minutes—no need to ship a new app update. Find out more and get started for free at Nuxie.