Master the App Store Connect API for iOS Automation
A complete guide to the App Store Connect API. Learn to automate workflows, manage builds, and access analytics for streamlined iOS app management.
If you've ever managed an app on the App Store, you know the grind. Uploading builds, updating screenshots, tweaking metadata, wrangling TestFlight releases—it's a seemingly endless list of clicks and manual data entry. For a long time, the only way to do any of it was by logging into the App Store Connect web portal.
This manual process is more than just tedious; it’s a bottleneck. It slows down your release cycle, invites human error, and just doesn't scale, especially when you're managing multiple apps or localizing for different markets.
The End of Manual App Store Management
The App Store Connect API is Apple's answer to this problem. It’s a REST API that lets you programmatically control nearly every aspect of your app's lifecycle. Think of it less like a tool and more like a direct, automated pipeline into Apple's ecosystem.
Instead of clicking through a website, you can write scripts to handle the heavy lifting. This is the fundamental shift: moving from a repetitive, manual workflow to a streamlined, code-driven one. It frees up your team to do what they do best—build incredible apps—instead of getting bogged down in administrative tasks.
From Solo Devs to Enterprise Teams
The power of this automation scales to fit any team. A solo developer might set up a simple script that automatically uploads a new build to TestFlight after every commit to their main branch. Simple, but it saves time and keeps testers on the latest version.
A larger company, on the other hand, can integrate the API directly into its CI/CD (Continuous Integration/Continuous Deployment) pipeline. This unlocks a whole new level of efficiency, enabling fully automated, hands-off releases across their entire portfolio of apps.
The advantages are hard to ignore:
- Go Faster: Ship updates and new features to your users in a fraction of the time.
- Eliminate Mistakes: Automation removes the risk of someone forgetting to update the release notes or selecting the wrong build.
- Scale Effortlessly: A single script can manage one app or one hundred apps with the same level of effort.
- Standardize Workflows: Everyone on the team follows the same automated, repeatable process, ensuring consistency.
This image from Apple's own documentation gives a great overview of just how much you can control.
From managing your app's metadata and TestFlight builds to pulling sales reports and even responding to customer reviews, the API covers it all.
This isn't just about convenience. Treating your App Store presence as "infrastructure as code" is a core tenet of modern iOS development. It unlocks an efficiency that's simply impossible to match with a manual approach.
Since Apple rolled it out in 2018, the App Store Connect API has quickly become a must-have for serious developers. An internal Apple report suggested that over 48% of the top 1,000 highest-grossing apps rely on the API for build uploads or analytics, and that number has been growing by about 12% every year.
Learning the API is as fundamental today as knowing how to create an app for the App Store was a decade ago. Mastering it is the key to building a release pipeline that's fast, reliable, and ready to scale.
Getting Your API Keys for Secure Access
Before any of your tools can talk to the App Store Connect API, they need to prove they're allowed to be there. That's where API keys come in. Think of them as a special set of credentials—a digital keycard and a secret handshake—that give your automated scripts permission to access your App Store Connect account.
This isn't your standard username and password. This method is built specifically for machine-to-machine communication, making it far more secure. It lets you grant very specific permissions, so your automation tools can only do exactly what you want them to do, and nothing more. The whole process starts by generating three crucial pieces of information from inside your App Store Connect account.
The Three Keys to the Kingdom
To get authenticated, you'll need a trio of credentials. Each one has a specific job in proving your identity to Apple’s servers.
- Issuer ID: This is a unique string of letters and numbers that identifies your team on the App Store. It’s like your organization's official ID.
- Key ID: Every API key you create gets its own unique, 10-character ID. This acts like a serial number, telling Apple precisely which key is being used for a request.
- Private Key (.p8 file): This is the crown jewel. It's a file you download that contains a cryptographic key you must guard carefully. This key is used to digitally "sign" every API request, which is how Apple knows it really came from you.
These three elements work together to create a secure connection, ensuring only your authorized systems can get in.
How to Generate Your Credentials in App Store Connect
Getting these credentials is a pretty simple walk-through in the App Store Connect portal, as long as you have an Account Holder or Admin role.
- Head to the Integrations Tab: Log into App Store Connect and click on Users and Access. You'll see an Integrations tab at the top of the page.
- Find the App Store Connect API Section: On the left sidebar, click on "App Store Connect API." This is your command center for all API keys.
- Generate a New Key: Click the blue “+” button. You’ll need to give the key a descriptive name (like "CI Build Server") and assign it a role. The role dictates its permissions. It’s always best to start with the most restrictive role that gets the job done, like "Developer" or "Sales." This is a security best practice known as the principle of least privilege.
- Download and Secure Everything: After you create the key, App Store Connect will show you the Issuer ID and Key ID. Critically, you will have one chance to download the private key (.p8 file).
Security First: Treat this private key with the same level of care as your main account password. It grants powerful access. Store it somewhere safe, and whatever you do, never commit it to a public Git repository. If you lose that
.p8file, you can't get it back; you'll have to generate a whole new key.
Once you have these three pieces of info safely stored, you’re ready for the final step: creating a JSON Web Token.
Putting It All Together with a JSON Web Token
A JSON Web Token (or JWT) is the digital passport your script will show with every single API request. It’s a compact, secure token that bundles your credentials and a digital signature into one long string. To keep things tight security-wise, your script will generate a new JWT for each session, and these tokens expire quickly—after a maximum of 20 minutes.
Creating a JWT means programmatically combining your Issuer ID, Key ID, and your private key. The private key signs a data payload that asserts your identity and proves you are who you say you are.
Just about every modern programming language has a library to handle this. For instance, a Python developer would probably reach for PyJWT. The flow is always the same: you build a header with your Key ID, create a payload with your Issuer ID and an expiration time, and then sign the whole thing with your private key. The resulting JWT is then sent in the Authorization header of your API calls, giving you temporary, secure access to the powerful App Store Connect API.
Core API Endpoints for App Management
Once you’ve nailed down the authentication process, you can get to the fun part: actually managing your app. The App Store Connect API isn't just one giant tool; it's a collection of specialized endpoints, each designed for a specific job. Think of it as a workshop full of power tools that let you programmatically build, polish, and ship your app.
Instead of just running through a dry list of functions, let's focus on the three areas where the API delivers the most bang for your buck in day-to-day development: managing builds, updating your store presence, and automating your TestFlight pipeline. These are the endpoints that will save you countless hours and prevent the most common manual mistakes.
Managing App Versions and Builds
The first and most fundamental task is getting your app build from a developer's machine into App Store Connect. The API completely automates this, turning what used to be a series of manual clicks and drags into a single, scriptable command. This is the absolute core of any good CI/CD pipeline for iOS.
The process is surprisingly straightforward. You essentially tell the API you want to upload a build, it gives you a secure, temporary location to send the file, you upload the binary, and then you let the API know you're done. This clever workflow ensures that even massive app files are handled securely and reliably without relying on specific Apple software.
The key endpoints involved are:
- Build Uploads: Your starting line. You make a
POSTrequest to create abuildUploadsresource, which is like raising your hand and saying, "I've got a new build coming!" - Build Upload Files: After signaling your intent, you provide details about your
.ipafile and receive a unique, secure URL to upload the binary directly. - Mark as Complete: Once the upload finishes, a final
PATCHrequest tells App Store Connect to start processing your build.
This infographic gives a great high-level view of the authorization flow, which is the key that unlocks all of these endpoints.
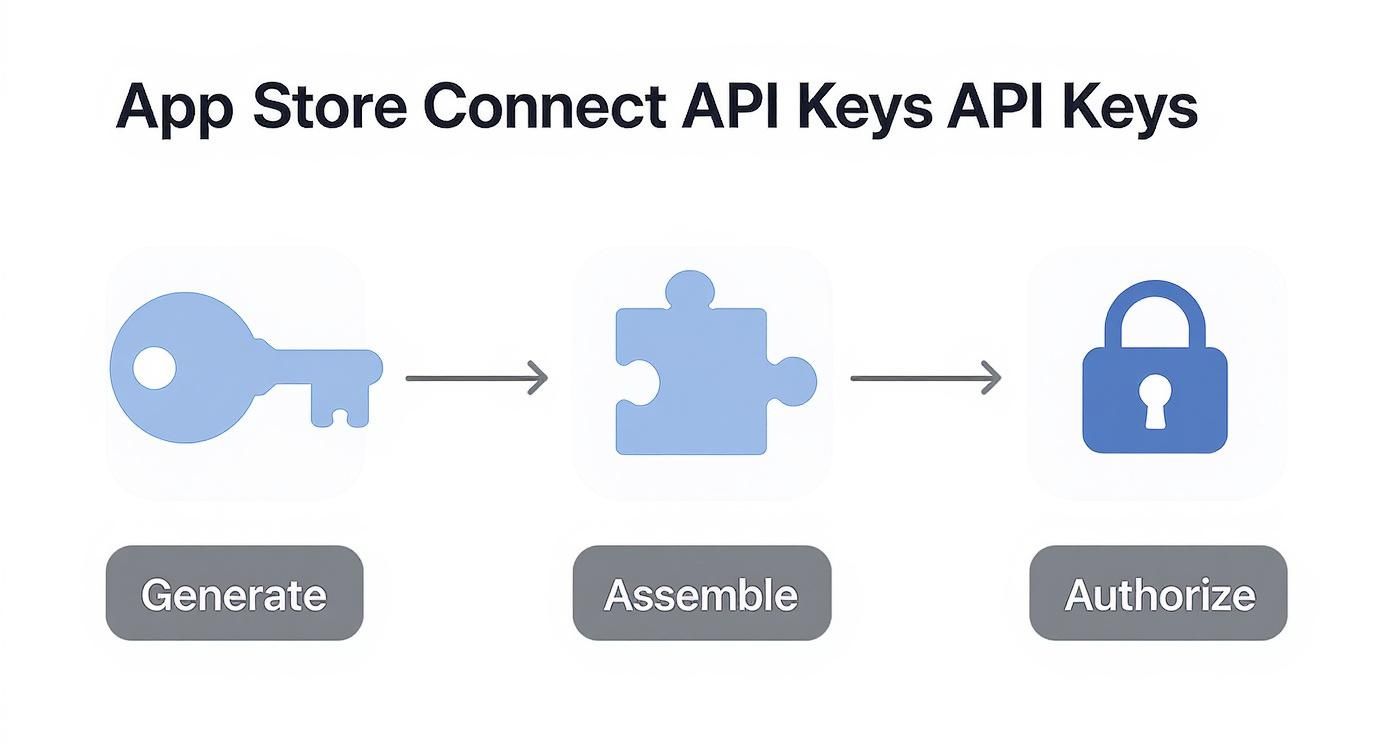
From generating your keys to building the JWT, this authorization handshake is the foundation for every single API interaction, including pushing new builds.
Updating App Store Metadata and Pricing
Your app's product page is its digital storefront, and keeping it sharp is absolutely critical for attracting new users. Manually updating screenshots, descriptions, and pricing—especially across multiple languages—is a soul-crushing task. With the API, it becomes a simple, automated job.
Imagine you're launching in 10 new countries. Instead of hours of clicking, you can run a script that loops through each new localization, uploading the right screenshots and promotional text with a single command. It doesn't just save time; it ensures consistency and eliminates those embarrassing copy-paste errors.
The real game-changer is when you start treating your App Store presence as code. Your app's description, release notes, and even pricing can live right in your Git repository. Changes get deployed automatically via the API, bringing the same reliability and discipline from software development to your marketing.
The API gives you fine-grained control over virtually every part of your product page:
- App Store Versions: Create new versions, update your release notes, and manage phased rollouts.
- App Previews and Screenshots: Programmatically upload new media for different device sizes and languages.
- In-App Purchases: You can fully manage your in-app products. For a deeper look, check out our guide on how to allow in-app purchase functionality.
- Pricing: Adjust the price tier for your app or IAPs across different regions.
Automating TestFlight Releases
TestFlight is non-negotiable for getting feedback before you go live. The App Store Connect API lets you weave beta testing directly into your development workflow, creating a seamless feedback loop from the moment code is committed.
As soon as a new build finishes processing, you can use the API to automatically push it out. You can add it to specific internal or external testing groups, update the "What to Test" notes with info pulled straight from your commit logs, and even submit the build for Beta App Review—all without ever opening a browser.
This is a massive win for agile teams. A developer pushes a new feature, and a CI/CD job can build the app, upload it, and have it in the hands of the QA team's TestFlight group in minutes. This rapid feedback cycle helps you crush bugs faster than ever before, a far cry from the old days of waiting on a manual process that could take hours.
To give you a clearer picture of what’s possible, here’s a quick summary of the main API categories and what they help you accomplish.
Key App Store Connect API Endpoint Categories
| Category | Primary Function | Example Use Cases |
|---|---|---|
| TestFlight | Manage beta builds, testers, and groups. | Automatically distribute new builds to QA, update "What to Test" notes from commit logs, manage tester access. |
| Users and Access | Control user roles and permissions. | Onboard new team members, adjust access levels for developers vs. marketers, audit user permissions. |
| App Metadata | Manage your app’s product page. | Update screenshots for a new device, localize descriptions for new countries, change pricing tiers. |
| Provisioning | Create and manage profiles and certificates. | Automatically generate provisioning profiles for new devices, manage signing certificates for your build server. |
| Reporting | Access sales, financial, and analytics data. | Pull daily sales numbers into a dashboard, download financial reports for accounting, analyze user engagement metrics. |
As you can see, these endpoints cover the entire lifecycle of an app, from the initial code signing all the way to analyzing how it performs in the market.
Unlock Business Insights with Reporting Automation

While automating builds and metadata is a huge time-saver, the real strategic power of the App Store Connect API comes from its reporting features. This is where you move beyond simple operational tweaks and tap into a direct pipeline of raw data that shows exactly how your app is performing in the wild.
Forget the days of manually downloading CSV files every week. The API lets you pull that data automatically, so you can build out the powerful, custom business intelligence tools you've always wanted.
Think of it this way: the standard App Store Connect dashboard is like a pre-built car. It’s useful and gets you where you need to go, but it has its limits. The API, on the other hand, hands you all the individual parts—the engine, the wheels, the chassis—and lets you build any vehicle you want. Need a high-speed racer to track launch day metrics in real-time? Or maybe a rugged off-roader to explore user behavior in emerging markets? The API gives you the components to build it yourself.
This freedom means you can pull crucial data directly into your own systems, whether that's a company-wide dashboard, a dedicated Slack channel, or a custom analytics database. Suddenly, you can answer the complex questions that the default web interface just can’t handle.
Accessing Key Performance Metrics
The API’s reporting endpoints are a goldmine of information on your app's financial performance and user engagement. You can finally stop guessing and start making decisions based on hard data.
Here are some of the key reports you can automate:
- Sales and Trends Reports: Pull detailed data on app units, in-app purchases, and proceeds. Want to know exactly where your revenue is coming from? You can filter everything by territory, device, and date range.
- Financial Reports: Your finance team will love this. You can programmatically download the monthly financial reports they need for accounting and reconciliation, eliminating a tedious manual task.
- Subscriber Reports: If you have a subscription-based app, this is absolutely essential. Track active subscriptions, conversions, and churn events to get a crystal-clear picture of your subscriber lifecycle.
- Engagement Metrics: Get your hands on vital user analytics like daily active devices, sessions per user, and crash rates to monitor the health and stickiness of your app.
Building Custom Dashboards and Alerts
Once you have this data flowing automatically, the possibilities are endless. You could build a live dashboard that visualizes download spikes the moment a marketing campaign goes live. Or, you could set up an alert that pings your product team in Slack if user retention in a key market drops below a certain threshold.
This isn't just about looking at data; it's about making that data actionable. By integrating API-driven reports into your daily workflows, you can build a culture where decisions are backed by real-time numbers, not just hunches.
Imagine tracking the performance of a new in-app purchase by the hour or analyzing retention rates across different countries side-by-side. These are the kinds of deep insights that give you a true competitive advantage.
Driving Growth with Data Automation
Automating your data collection with the App Store Connect API has a direct impact on your bottom line. The API's analytics endpoints grant access to metrics like daily active devices, sessions, and crash statistics. Teams that have used the API to monitor global engagement have seen an average day-1 retention rate of 42% and a day-7 rate of 28%.
Even better, automating A/B tests and custom product pages through the API has led to conversion rate increases of up to 22%. You can learn more about these sales and trends insights on Hubifi.com.
By turning raw data into accessible insights, the API empowers you to go far beyond the default dashboards. It lets you create a tailored business intelligence engine that fuels smarter, faster growth.
Integrating the API into Your CI/CD Pipeline
Connecting the App Store Connect API to a CI/CD (Continuous Integration and Continuous Deployment) pipeline is where the real magic happens. This is the moment you graduate from manual, repetitive tasks to a fully automated, hands-off release machine. Think of it as building an assembly line for your app—raw code goes in one end, and a polished build, ready for your testers, comes out the other.
Imagine this scenario: a developer pushes the final code for a new feature. Almost instantly, a build server whirs to life. It fetches the latest code, runs all the unit and integration tests, archives the app, and signs it for distribution. From there, it uses the API to automatically bump the build number, upload the final binary to App Store Connect, and assign it to your QA team's TestFlight group. The entire sequence unfolds in minutes, flawlessly, every single time.
This isn't just about moving faster; it's about building a dependable, error-proof release cycle that eliminates the risk of someone forgetting a step or clicking the wrong button.
Setting Up Your Build Environment
Your first move is to get your build server ready. Whether you're using a self-hosted Jenkins instance, a GitHub Actions runner, or another platform, it needs your API credentials. But you have to be incredibly careful here. Never, ever hard-code your private key directly into your configuration files. That's a huge security risk.
Instead, lean on the secure secret management tools that come with your CI/CD platform:
- GitHub Actions has encrypted secrets for this very purpose.
- Jenkins offers its built-in Credentials Manager.
- GitLab CI/CD gives you protected variables.
You'll store your Issuer ID, Key ID, and the contents of your .p8 private key as secure variables. This way, your build scripts can safely access them at runtime to generate the JWT needed for authentication, without ever exposing your private key in logs or version control. For a detailed walkthrough of this initial setup, you can check out our quickstart guide.
Scripting the Automated Workflow
With a secure server ready to go, the next step is scripting the release workflow itself. You'll typically do this in a configuration file, like a workflow.yml for GitHub Actions. This script is your orchestrator, telling different tools and API endpoints what to do and in what order.
A standard automated release script usually breaks down into a few key stages:
- Build and Archive: The CI server fires off a command (often using
xcodebuild) to compile your source code and package it into a signed.ipafile. - Authenticate and Upload: Using the securely stored secrets, the script generates a JWT. It then makes a few calls to the App Store Connect API to upload that
.ipafile. This usually involves creating abuildUploadsresource, pushing the binary to a temporary URL provided by Apple, and then confirming the upload is complete. - Monitor Build Processing: Now, it's a waiting game. The script will poll the API every so often to check the build's status. It just has to wait for Apple's servers to finish processing it, which can take anywhere from a few minutes to much longer.
- Distribute to TestFlight: As soon as the build is processed and ready, the script makes one last API call to add it to a specific TestFlight group. Just like that, it's available to your internal testers or external beta users.
This whole process is completely customizable. You could easily add a step that automatically pulls release notes from your commit history or pings your team's Slack channel the moment a new build is live on TestFlight.
The Financial Impact of Automation
This level of automation delivers more than just operational efficiency; it has a real, tangible impact on your bottom line, especially if your app relies on subscriptions. From a business perspective, the App Store Connect API is an absolute necessity. The global subscription app market on iOS has ballooned to over $80 billion annually, and the API gives you the granular, regional data you need for smart planning.
For instance, US-based subscription apps saw a median monthly revenue per user (MRPU) of $7.49, while in Europe and the Asia-Pacific regions, the figures were $6.12 and $5.87, respectively. You can find more details in these app revenue reports on Hubifi.com. When your CI/CD pipeline is fully automated, you can react to this kind of data in real-time, pushing updates and pricing experiments to different markets far faster than your competition.
Got Questions About the App Store Connect API? We Have Answers.
Once you get your hands dirty with the App Store Connect API, a few questions inevitably pop up. After you’ve sorted out authentication, you’ll start running into the real-world stuff: performance quirks, weird errors, and understanding exactly what you can (and can’t) do.
Think of this section as a field guide to those common hurdles. We’re tackling the most frequent stumbling blocks developers face, so you can spend less time debugging and more time building solid, reliable automation from the get-go.
How Worried Should I Be About Rate Limits?
It’s a natural concern—no one wants their automation grinding to a halt because they made too many requests. Apple is intentionally cagey about the exact numbers for its rate limits because they shift based on server load to keep things stable for everyone. The good news? For most typical tasks, the limits are actually pretty generous.
You’ll only really run into trouble if you get too aggressive with your scripts. The classic mistake is hammering the API to check a build's processing status. Instead of polling every few seconds, build in an exponential backoff strategy. Start by checking every 30 seconds, then a minute, then two, and so on. It’s a much smarter, more respectful way to automate and ensures your scripts don't get temporarily locked out. Also, be smart about caching data you know won't change often.
What’s the Best Way to Handle API Errors?
Solid error handling is what separates a brittle script from a production-ready tool. The API uses standard HTTP status codes, which give you your first big clue.
4xxErrors (It's you): Something is wrong with your request. A401 Unauthorizedmeans your JWT is probably bad or expired. A403 Forbiddenis a classic sign that your API key doesn't have the right permissions for what you're trying to do.5xxErrors (It's them): This signals a problem on Apple's side. The best response is to wait a moment and try again. A simple, timed retry mechanism in your code can make your automation far more resilient.
But the real gold is in the JSON error response. Don't ignore it! It contains specific codes and a human-readable message that can tell you exactly what’s wrong. Always, always log this information.
Heads up on a very common pitfall: expired tokens. The JSON Web Tokens you generate for the API only live for a maximum of 20 minutes. To save yourself a headache, just generate a fresh token every time your script runs.
Can I Actually Manage In-App Purchases and Subscriptions?
Absolutely, and this is where the API truly shines. It’s not just for uploading builds. You get a whole suite of endpoints to manage the entire lifecycle of your in-app purchases and subscriptions, which is a massive unlock for your monetization strategy.
You can programmatically create new IAPs, tweak their details, and submit them for review. Think about the pain of manually setting prices across different territories—with the API, you can script it. For subscriptions, you can manage everything from groups and pricing tiers to promotional offers. Imagine writing a script that rolls out a holiday discount across 150 countries. That's the kind of power we're talking about.
What's the Difference Between the API and Fastlane?
This is a fantastic question because it gets right to the core of tools versus fundamentals. Think of it this way: Fastlane is a brilliant, user-friendly toolkit that wraps the App Store Connect API in simple, clean commands.
Behind the scenes, Fastlane is just making the same API calls you could make yourself. For common, everyday tasks—like uploading a build to TestFlight or taking screenshots—it's often the fastest way to get the job done.
But if you need to build something truly custom, integrate with your company's internal dashboards, or need fine-grained control over every single step of a process, you'll want to work with the API directly. It gives you ultimate flexibility and power, while Fastlane gives you speed and convenience.
Ready to build, target, and ship high-converting paywalls in minutes? Nuxie is an AI-powered paywall studio that lets you design and deploy optimized offers without needing an app update. Integrate our Swift SDK in about five minutes and start growing your subscription revenue today. Learn more about Nuxie.