Launch the App an Expert Guide to iOS Publishing
A practical guide on how to launch the app on iOS. Learn about pre-launch checks, App Store Connect setup, paywall integration, and submission.
Before you even think about hitting that "Submit for Review" button, you need to lay the groundwork. This isn't just about a last-minute to-do list; it's about doing the strategic work that separates a smooth launch from a stressful one, from squashing bugs and optimizing performance to creating marketing assets that actually get people to download. Getting this right from the start is absolutely crucial.
Your Essential Pre-Launch Checklist

I get it. After months of coding, the finish line feels so close, and it's tempting to just rush your app out the door. But trust me, the steps you take right now are what determine whether your app makes a fantastic first impression or falls flat. Think of this phase as building the launchpad for your rocket—without a solid base, you're not going anywhere.
Master the Fundamentals First
Before you get tangled up in App Store Connect, your focus has to be on the product itself. The goal is simple: deliver an experience that’s polished, reliable, and frankly, a joy to use from the moment someone opens it.
Here’s where to pour your energy:
- Rigorous Bug Squashing: Don't just test on your own device. Test your app relentlessly across different iOS versions and device models—think iPhone 15, an older iPhone SE, and an iPad Pro. Use TestFlight to get it into the hands of a small beta group to catch those weird bugs you'd never find on your own.
- Performance Optimization: A sluggish app is a dead app. Profile your code to hunt down and eliminate performance bottlenecks. You're aiming for snappy load times and minimal battery drain. Anything less will have users hitting the delete button.
- Data Security and Privacy: Apple does not mess around with user privacy, and neither should you. Make sure your app has a crystal-clear and easy-to-find privacy policy. More importantly, only ask for permissions that are absolutely essential for your app to function. This isn’t just about getting approved; it’s about building trust.
Prepare Your Marketing and Store Presence
Your app could be the best thing ever made, but if you can't communicate its value, it might as well not exist. You're launching into a massively competitive space. There are over 1.64 million apps on the App Store, and Apple’s review team is known to reject around 40% of initial submissions. If your presentation isn't perfect, you'll just get lost in the noise. You can find more insights on the competitive app market to see what you're up against.
Think of the App Store as your digital storefront. If the window display is messy or unconvincing, people will walk right by. Your screenshots, icon, and description are your best—and sometimes only—tools to convince someone to come inside.
A compelling store presence is more than just filling out forms. It’s a carefully crafted combination of visuals and words that speaks directly to your ideal user.
A Framework for Success
To keep all these moving parts organized, I like to break the pre-launch phase down into a few key areas. This helps ensure nothing important slips through the cracks as you gear up for launch.
Here’s a quick table to help you visualize the critical tasks and what you’re trying to achieve with each one.
Pre-Launch Critical Task Overview
| Task Area | Key Objective | Core Activities |
|---|---|---|
| Technical Readiness | Deliver a stable and reliable product | Bug testing, performance profiling, security audits |
| Store Listing Assets | Attract and convert potential users | Icon design, screenshot creation, preview video production |
| Compliance & Legal | Meet Apple's guidelines and build trust | Privacy policy writing, age rating selection, data handling review |
By tackling each of these areas methodically, you transform a "finished" app into a truly launch-ready product. It's this disciplined preparation that makes the difference between a chaotic release and a successful one.
Getting Your App Set Up in App Store Connect
Alright, your app is built and looking sharp. Now it’s time to switch gears and focus on how it will look to the rest of the world on the App Store. Think of App Store Connect as your mission control for everything public-facing. This is where you’ll handle your app's name, description, pricing, and availability. Don't rush this part—it’s less about admin work and more about marketing. A strong listing here can be the difference between getting discovered and getting lost in the crowd.
First things first, you need to create a new app record. This is the foundational step where you'll lock in some core details that can't be changed later, so pay close attention.
- App Name: This needs to be unique, memorable, and give a hint about what your app does. Do a quick search on the App Store first to make sure your dream name isn’t already taken.
- Primary Language: Simple enough—just select the main language for your store listing.
- Bundle ID: This is the critical link between your Xcode project and this App Store record. It has to be an exact match to the one in your build.
- SKU: This is just a unique ID for your own internal records. It won't be seen by users, so you can use whatever system makes sense for you.
Once those are set in stone, you can dive into the more creative—and arguably more important—aspects of building your store presence.
Building a Listing That Actually Converts
This is your sales pitch. You have a few seconds to grab a potential user's attention and convince them your app is worth their time. A great listing can seriously boost your organic downloads by answering the user's main question: "Why should I care?"
Your description needs to be compelling from the very first sentence. Most people will only see those first couple of lines before deciding whether to tap "more," so lead with your app's biggest benefits. Weave in your most important keywords naturally, but don't overdo it. Keyword stuffing is an old trick that Apple's algorithms and savvy users will see right through.
You'll find all the fields you need to prepare your app for submission right inside the App Store Connect dashboard.
This interface is where you'll manage your app's entire lifecycle, from the initial setup to checking on its performance after launch.
Remember, visuals do most of the talking. Your app icon is the first impression you make, so make it count. Your screenshots shouldn't just be random captures; they should tell a story. Curate a set of images that walks the user through the best parts of your app and clearly shows off its value.
Don't Sweat the Small Stuff (Actually, Do)
There are a handful of settings in App Store Connect that can easily trip you up, even if you’ve been through this process before. Getting these right from the start is key to avoiding frustrating rejections and delays when you finally launch the app.
Setting the correct age rating is a big one. Be completely honest here. If you misrepresent your app's content—even something that seems minor, like cartoon violence or infrequent profanity—you're risking a swift rejection or, worse, getting your app pulled down the line.
You also need to set your pricing and availability. This is where you decide which countries your app will be sold in and at what price tier. This applies even if your app is free; you'll just select the free tier.
For developers managing multiple apps or just looking for a more efficient workflow, it's worth exploring Apple's automation tools. You can learn more about how the App Store Connect API works and see how it can save you a ton of time on repetitive setup tasks. Taking a few extra minutes to double-check these details now can save you days of waiting for review.
Getting Your Paywall Ready for Primetime
If you’re planning to make money with your app, the paywall isn’t just another screen—it’s the heart of your business. It’s where your app's value turns into revenue. But getting it right involves more than just asking users for money; it's a careful mix of App Store setup, a bit of code, and a solid user experience.
Everything starts in App Store Connect. Before you write a single line of paywall code, you have to define the actual products users can buy. This is a non-negotiable first step.
Here’s a bird’s-eye view of how you’ll set up your in-app purchase items, which is a crucial part of getting ready to launch the app.
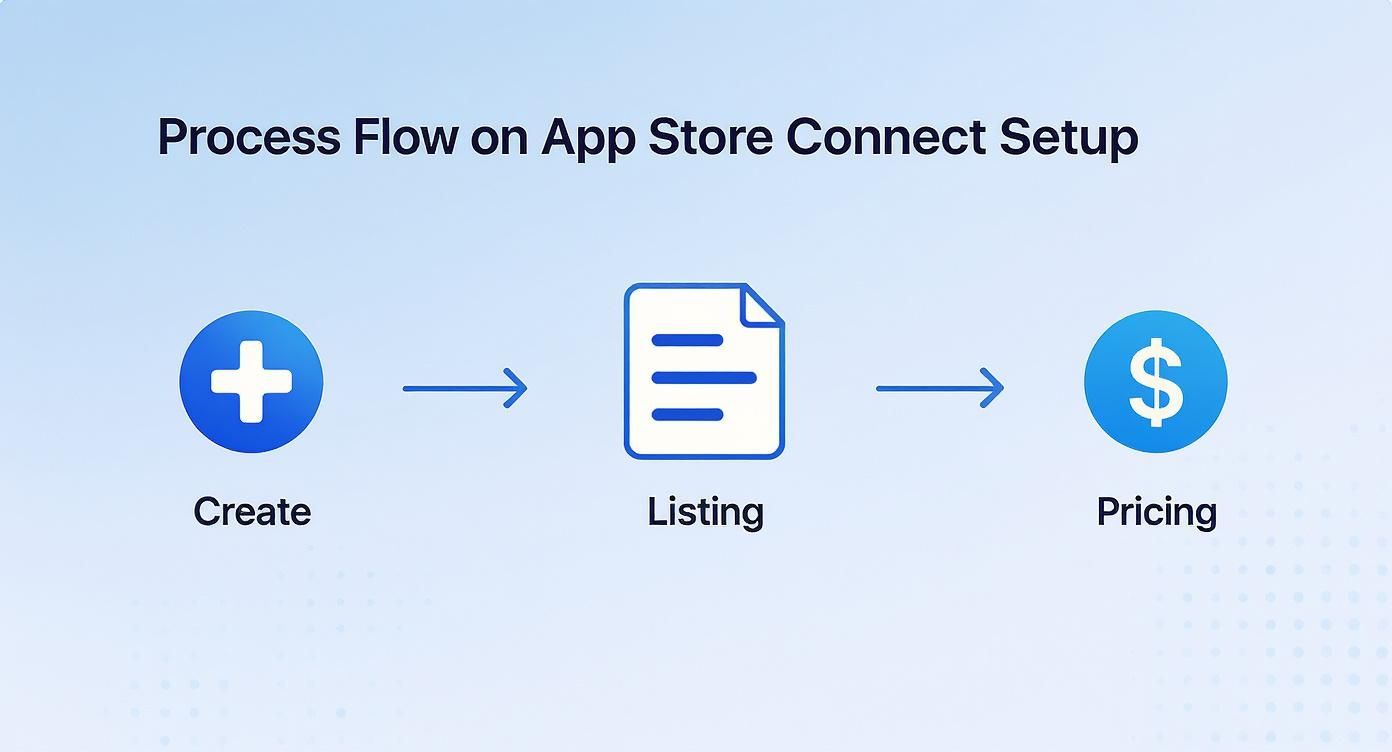
This graphic breaks down the essential steps inside App Store Connect: creating the purchase itself, filling out its store details, and setting the price. Nail these details, and you’ll make life easier for both Apple's review team and your future customers.
Defining Your In-App Purchases
Apple gives you a few different ways to sell things, and the one you choose really depends on what your app does.
- Consumable: Perfect for things that get used up and bought again. Think extra lives in a game or a bundle of credits.
- Non-Consumable: This is for one-time purchases that unlock something permanently, like an ad-free version or a "pro" feature set.
- Auto-Renewable Subscription: This is the go-to for most service-based apps. It gives users access to content or features for a set period, like a month or a year.
If you go the subscription route, you’ll also need to set up subscription groups. These let you bundle different tiers or pricing options together, giving users flexibility.
My Two Cents: Be incredibly careful when setting up your product IDs, pricing, and descriptions in App Store Connect. I've seen a simple typo in a product identifier cause major headaches, preventing the app from fetching products and blocking all purchases. Double-check everything.
Integrating the Nuxie SDK
Once your products are configured on Apple's side, it’s time to bring the paywall into your app with the Nuxie SDK. The goal here is speed and simplicity. Nuxie is built to get you up and running with a fully functional paywall in minutes, not days.
The integration process is pretty straightforward:
- First, you’ll initialize the SDK with your API key right when your app starts up.
- Your app then talks to both Apple and Nuxie to pull down all the product information you just created.
- When you’re ready to show the paywall—say, after a user finishes onboarding—you trigger the Nuxie screen. It's often just a single line of code.
- Nuxie then takes over, handling the entire purchase flow securely through StoreKit and letting your app know if the transaction was a success.
Using a flexible paywall solution like this means you can experiment with different designs and pricing without having to resubmit a whole new version of your app for review. If you want to get into the technical nitty-gritty, our guide on how to allow in-app purchases has you covered.
When you launch an app in 2025, you're stepping into a massive $935 billion global market. To put that in perspective, a record $150 billion was spent globally on apps and in-app purchases in 2024 alone. These numbers show just how critical a well-built paywall strategy is.
Getting Your App Through Apple's Review
You’ve built, tested, and polished your app. Now it’s time for the final boss battle: getting through Apple's review process. Don't underestimate this step. It's the critical gatekeeper between your hard work and your future users.
A smooth submission can get your app live in under a day, while a sloppy one can leave you stuck in a frustrating back-and-forth with the review team for weeks. Trust me, I've seen it happen.
The journey from a finished app to a live product starts, as always, in Xcode. This is where you'll tie up the last technical details before handing your masterpiece over to App Store Connect. Pay close attention here, because small mistakes can cause big delays.
Finalizing Your Build in Xcode
Before you can upload anything, you need to create an archive. This is simply the compiled version of your app that Apple will actually review. The very first thing to get right is your version and build numbers.
The version number (like 1.0.1) is what your users will see on the App Store. The build number (like 1, 2, 3) is purely for your own internal tracking. A simple rule I follow is to bump the build number for every single upload to TestFlight or App Store Connect, even for the tiniest tweak. It keeps things clean.
With your numbers set, it’s time to create the archive. In Xcode, just select Any iOS Device (arm64) as your build target, then head up to the menu and choose Product > Archive. This process neatly packages everything up into a format ready for App Store Connect.
Uploading and Submitting for Review
Once your archive is created, the Xcode Organizer window will pop up automatically. This is your mission control for distribution.
From here, you can validate and upload your app. I always run Validate App first. Think of it as a free pre-check that can catch common problems like missing icons or incorrect entitlements before you waste time on a full upload.
After a successful validation, hit Distribute App and follow the prompts to send it directly to App Store Connect. The upload will finish, but Apple still needs to process the build on their end. You'll get an email when it's ready, which usually takes anywhere from a few minutes to an hour.
Now, jump back over to your app's page in App Store Connect. You should see your newly processed build under the TestFlight tab. All you have to do is select that build and associate it with the app version you're preparing for review.
Pro Tip: Never, ever skip the "Notes for App Review" section. This is your one chance to talk directly to the reviewer. If your app needs a login, provide a demo account. If it has a paywall, explain exactly how to find and test it. Clear, concise notes can be the difference between a quick approval and a rejection for "incomplete information."
Avoiding Common Rejection Pitfalls
Apple rejects thousands of apps every week, and honestly, most rejections are for the same preventable reasons. My experience shows they fall into a few key categories. If you know what they are, you can check for them before you ever hit "Submit."
Here are the top offenders to watch out for:
- Bugs and Crashes: This is an instant rejection. If the reviewer launches your app and it crashes, you're done. Test it one last time on a real, physical device right before you submit.
- Misleading Information: Your screenshots, preview videos, and description must be an honest representation of your app. No bait-and-switch.
- Privacy Violations: Be completely transparent about any data you collect. You need a clear, accessible privacy policy linked in App Store Connect.
- Incomplete App: If your app feels like a half-finished project or lacks real content, it might get rejected for not providing enough value to users.
By getting ahead of these common issues, you dramatically increase your odds of a first-time approval. And that means you can finally launch the app and get it into the hands of your users without any unnecessary headaches.
So You've Launched. Now What?
Popping the champagne after your app goes live is a great feeling, but the real work starts now. Getting your app onto the App Store isn't the finish line; it’s the starting block. The moves you make in these first few weeks will either set you up for long-term growth or a slow fizzle into obscurity. Your focus needs to pivot immediately from building to listening.
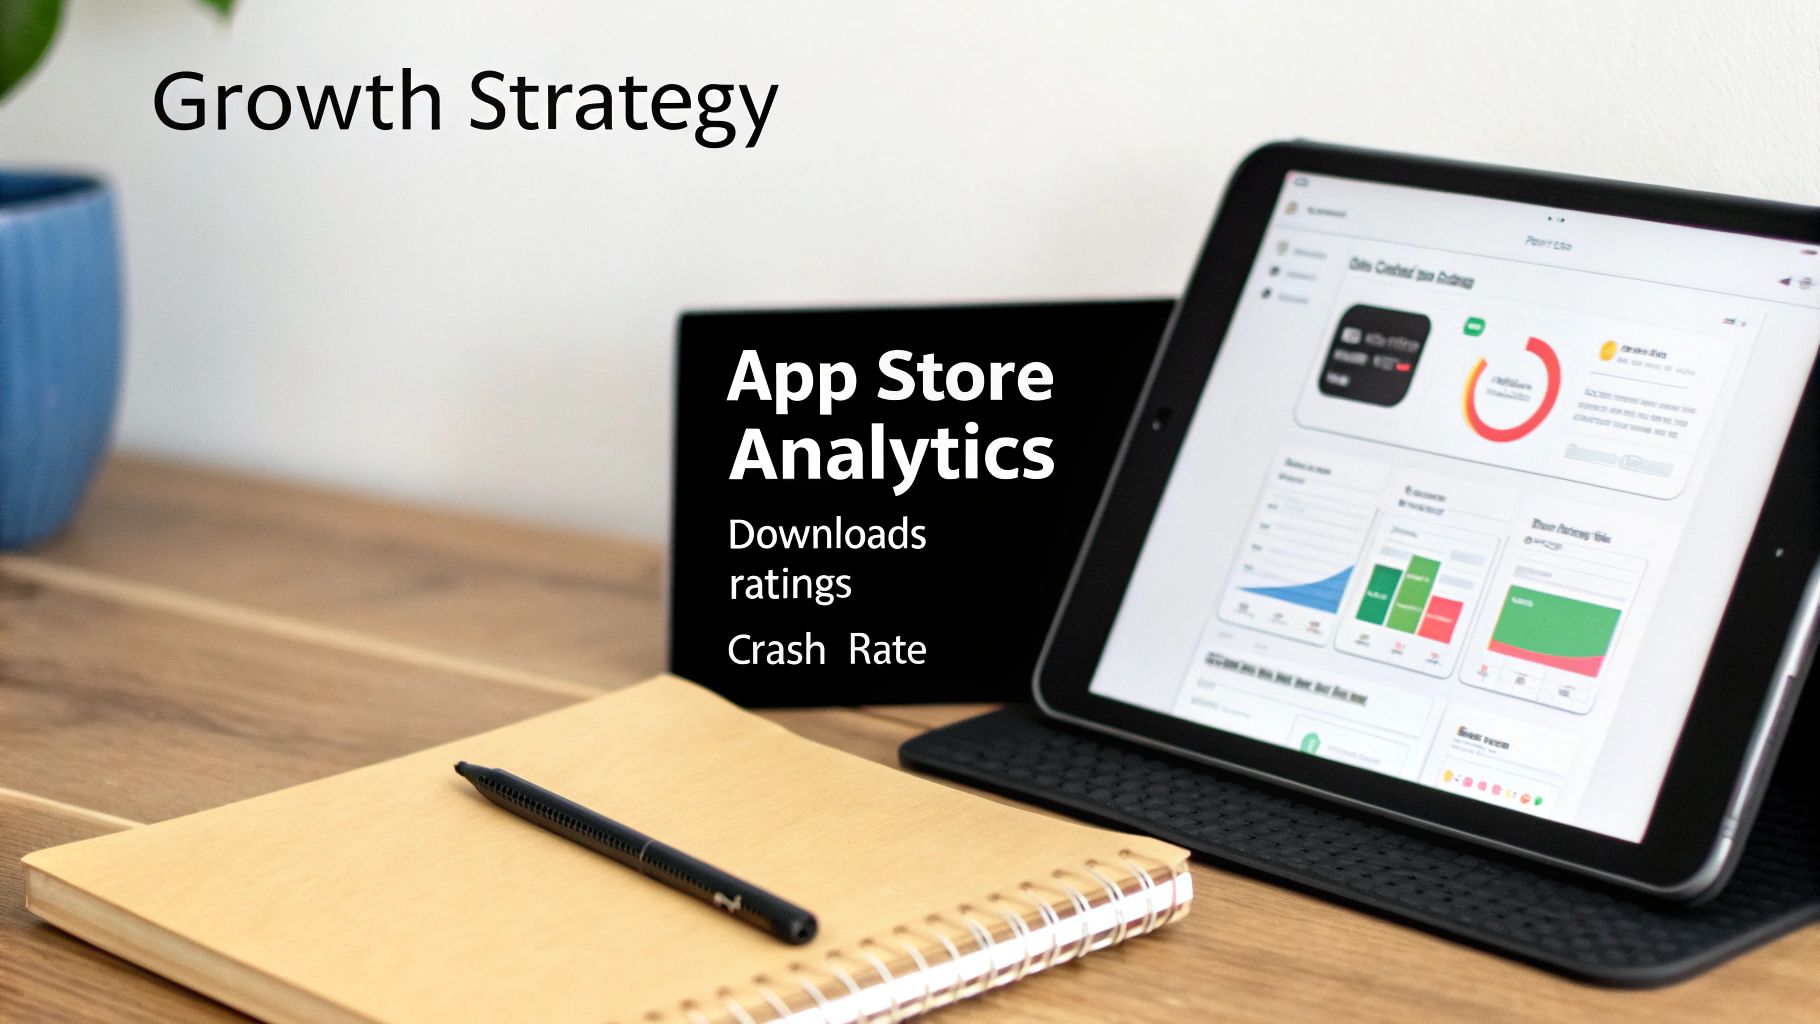
Those initial hours and days are all about checking your app's vital signs. For this, App Store Connect Analytics is your new best friend. It’s easy to get lost in the data, so zero in on a few key metrics that tell the most important story:
- Download Numbers: Are people actually installing the app? Did that initial marketing push create a spike?
- Crash Rates: Is the app stable out in the wild? A high crash rate is a one-way ticket to bad reviews and a wave of uninstalls.
- User Ratings: What are those first reviews saying? Pay close attention to both the star rating and the actual written feedback.
This early data is your first, unfiltered look at how your app performs in the real world. It's the honest truth you need to figure out what comes next.
Your First Users Are Your Most Valuable Asset
Think of your first wave of users as a free focus group. They are the ones who will immediately find that confusing UI element, that annoying bug, or that one missing feature they really wish you had. You need to actively hunt for their opinions. Scour your App Store reviews and keep a close eye on any support channels you have, like an email address or a contact form.
This feedback loop is absolutely essential.
When you see multiple people bringing up the same issue or asking for the same feature, that's your roadmap for your first update. It’s a direct signal telling you exactly what to prioritize. Make a point to respond to reviews, too—especially the negative ones. It shows you’re listening and that you care about making things better.
Launching an app is less about the download count and more about sustained engagement. Mobile users globally spend an average of 3.5 hours per day in apps. But keeping them is tough: most apps lose nearly 80% of their users within the first three days.
This means your entire post-launch strategy has to be laser-focused on giving people a reason to come back. This is where a tight cycle of product iteration and smart marketing comes in. To keep the momentum going, check out our deep dive on user acquisition strategies for apps.
The Gentle Art of Asking for a Review
Good reviews are pure gold. They provide the social proof that convinces new users to hit the "Get" button. But you have to be clever about how you ask.
Never, ever interrupt someone in the middle of a task or hit them with a pop-up right when they open the app. The perfect moment to ask for a review is right after a user has achieved something positive—like they’ve just finished a key task, won a level in your game, or saved their first project.
The best way to do this is with Apple's native SKStoreReviewController API. It triggers a standard, unobtrusive prompt that users are familiar with and can easily dismiss. Even better, the system automatically limits how often any single user sees the prompt, which protects their experience and makes it far more likely you’ll get that five-star rating when the time is right.
Common App Launch Questions Answered
When you're finally ready to launch your app, a few questions always seem to pop up. Getting these sorted out ahead of time can save you a world of stress and help set the right expectations for that final push to the App Store.
How Long Does App Review Really Take?
Apple's official line is that most reviews are done within 24 to 48 hours, but you shouldn't treat that as a hard guarantee. From my own experience, I've seen simple bug-fix updates get the green light in less than a day. It's a different story for a brand-new, more complex app, especially if it’s in a heavily regulated space like finance or health—those can easily take several days.
My advice? Build a buffer of at least one week into your launch timeline. It gives you some much-needed breathing room to handle any potential rejections or last-minute requests from Apple without blowing up your entire schedule.
What Are the Most Common Reasons for Rejection?
The top reasons I see apps get rejected are, frankly, almost always preventable. They typically boil down to a few key areas:
- Bugs and Crashes: If the app crashes on the reviewer, it's an automatic rejection. No exceptions.
- Mismatched Metadata: Your screenshots and description must perfectly match what the app actually does.
- Privacy Policy Problems: A missing, incomplete, or hard-to-find privacy policy is a huge red flag for Apple.
- Not Enough Value: Apple has been known to reject apps it considers too simple, "spammy," or just a repackaged website.
The best defense is a good offense. Test your app until you're sick of it, and then have someone else test it. And make sure you’ve actually read the latest App Store Review Guidelines—it's not the most exciting read, but it's essential.
The single biggest avoidable mistake is giving the reviewer incomplete information. If they can't log in or get past a paywall, they can't review your app. Always, always provide a demo account with clear instructions.
Can I Update My App Store Listing After It's Live?
Yes, and you absolutely should! You can update your app's metadata—the description, keywords, screenshots, and preview videos—anytime you want without having to submit a whole new app build.
You just make the changes in App Store Connect, and they usually go live after a very quick review from Apple. This is a fantastic way to continuously optimize your app's page for better visibility and more downloads.
Ready to build a paywall that converts without endless app updates? Nuxie lets you design, target, and launch high-performing paywalls in minutes. Start for free on nuxie.io and see how easy it is to grow your subscription revenue.