Mastering the iOS Product Free Trial
A complete guide to designing and implementing an iOS product free trial. Learn to use StoreKit 2 and RevenueCat to boost app conversions and revenue.
Giving users a free trial of your product is more than just a promotional tactic—it’s a powerful growth engine. The idea is simple: let people experience your app's best features for a limited time, completely free. This isn't just a giveaway; it’s a strategic way to let your product sell itself.
By removing the upfront cost, you lower the barrier to entry and let users see firsthand how your app solves their problems. When they experience that value for themselves, subscribing feels like the next logical step, not a risky purchase.
Why a Free Trial Is Your Secret Weapon for Growth
Before we get into the nitty-gritty of implementation, let's talk strategy. Why does this work so well? It all comes down to user psychology. You’re swapping an abstract sales pitch for a tangible, hands-on experience.
Think about it. When someone uses your premium tools to achieve something meaningful—whether it's editing a video, finishing a workout, or organizing their finances—they form a real connection. The trial period lets your app become a part of their routine. Once that happens, the thought of losing access becomes a powerful motivator to pull out their credit card.
Proving Your App’s Worth and Earning Trust
In a sea of apps all vying for attention, trust is everything. Offering a free trial is one of the strongest signals of confidence you can send. You're basically telling users, "Go ahead, try it. We’re so sure you'll love it that we'll let you use it for free." That kind of transparency is a huge differentiator.
It's also a fantastic way to get honest feedback. Watching how trial users engage with your premium features gives you a direct line into what's working and what isn't. This is pure gold for refining your onboarding, tweaking your features, and helping new users hit that "aha!" moment even quicker.
A well-designed free trial doesn't just convert users—it creates educated customers. They subscribe because they know your app is worth it, leading to better retention and a healthier business in the long run.
Keeping Up With What Customers Actually Want
The "try before you buy" model isn't a novelty anymore; it’s what people expect. The data is pretty clear on this. Recent studies show that 75% of consumers are far more likely to subscribe to a service if they can try it first.
Even more telling, 78% believe a trial is a key part of a great customer experience. Yet, surprisingly few brands are doing it—only about 25% of top subscription companies offer one. This gap presents a massive opportunity for developers to get a serious edge. If you want to dive deeper, these subscription statistics paint a very clear picture.
Choosing the Right Free Trial Model for Your App
So, you've decided to offer a free trial. That’s a huge step. But the next decision is arguably even more important: what kind of trial will it be? This choice will define your entire acquisition funnel, so it's worth getting right.
You're essentially facing a fork in the road. You can go with an opt-in free trial (no credit card required) or an opt-out free trial (credit card required upfront). Neither one is universally "better"—the right path depends entirely on your app, your audience, and your goals.
This decision tree lays out the high-level choice pretty clearly. Offering a trial puts you on a path toward subscriber growth. Deciding against it? Well, that's often a missed opportunity.
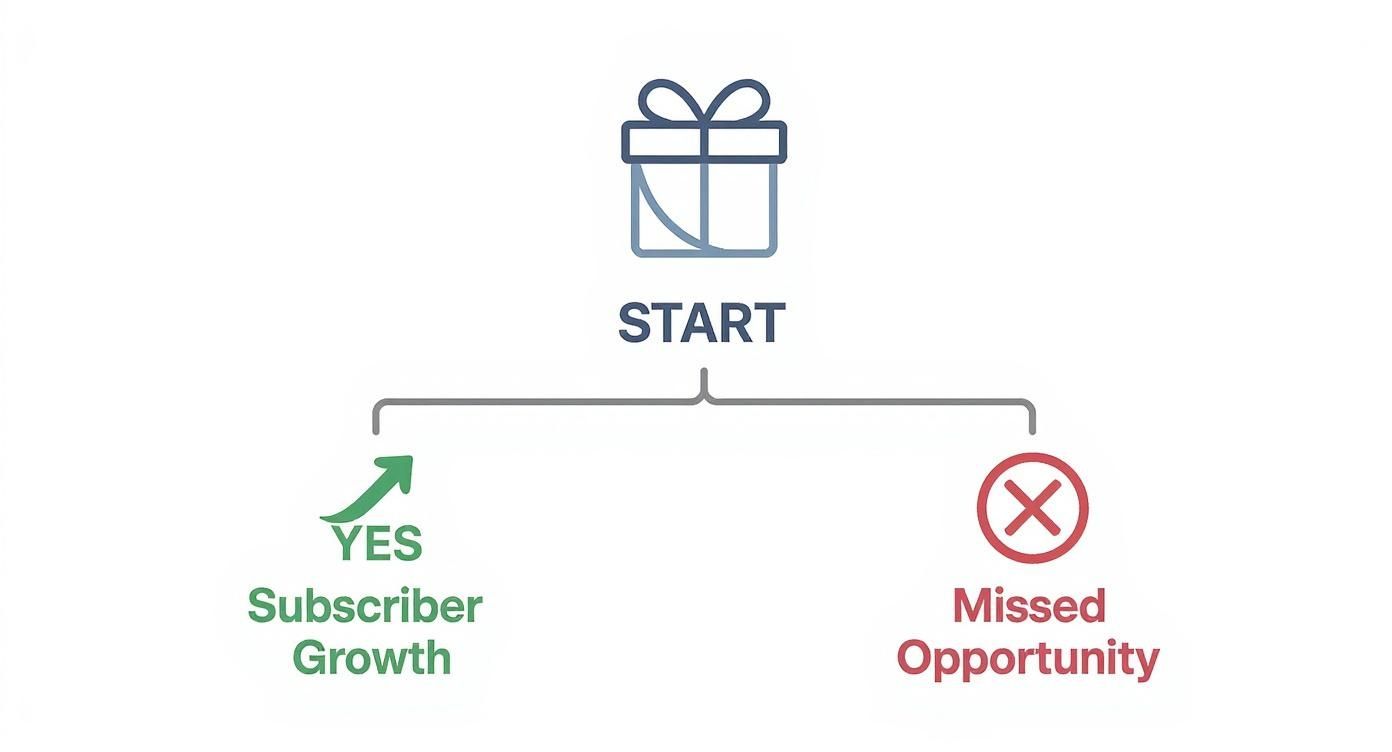
Ultimately, implementing any trial forces you to be strategic. You have to pick a model that actually aligns with where you want your business to go.
The Opt-In Model: Casting a Wide Net
The opt-in model, where a user can start a trial without pulling out their wallet, is all about reducing friction to zero. It’s the "try before you buy" approach in its purest form.
By removing the payment barrier, you open the floodgates. This is a fantastic strategy if your app has broad appeal and a quick "aha!" moment. Think of a simple photo editor or a habit-tracking app—users get the value almost instantly. The goal here is sheer volume. You get a ton of people in the door, creating a massive top-of-funnel you can nurture with slick onboarding, push notifications, and timely emails.
The catch? This high volume comes with lower-quality leads. A lot of users will just be kicking the tires with no real intention of ever paying. Consequently, your trial-to-paid conversion rate will naturally be lower.
My Take: Go with an opt-in model when your main goal is rapid user acquisition. It works best if you're confident in your app's ability to "wow" users quickly and convert them through great in-app experiences once they're hooked.
The Opt-Out Model: Filtering for High Intent
On the other side, you have the opt-out model. Here, you ask users for their payment details before the trial begins. It's a bigger ask, and it absolutely adds friction to the signup process. You will get fewer trial starts. Period.
But here’s why that’s not a bad thing: it's a powerful filter. A user who is willing to enter their credit card information is sending a crystal-clear signal. They are serious. They have a problem, and they believe your app might be the solution. You're pre-qualifying them as a high-intent lead.
This approach is a natural fit for more complex or niche apps—a professional-grade video editing suite, a B2B project management tool, or a specialized financial modeling app. The value here takes longer to uncover, and the users are typically more motivated from the get-go.
The data backs this up. Industry benchmarks show a massive difference in user commitment. Opt-in trials tend to convert at around 18-25%, but opt-out trials? They see conversion rates skyrocket to an impressive 49-60%. As you can learn more about free trial conversion statistics, asking for the card upfront weeds out the casual browsers, leaving you with a smaller, more committed group of potential customers.
Comparison of Free Trial Models
Choosing between these two models is a critical strategic decision. This table breaks down the core differences to help you see which one aligns better with your app's specific needs and goals.
| Attribute | Opt-In (No Card Required) | Opt-Out (Card Required) |
|---|---|---|
| User Friction | Low | High |
| Trial Starts | High Volume | Low Volume |
| Lead Quality | Lower, mixed intent | High, pre-qualified |
| Conversion Rate | Typically 18-25% | Typically 49-60% |
| Best For | Apps with a quick "aha!" moment, broad audience, focus on user acquisition. | Niche or complex apps, professional tools, focus on revenue efficiency. |
| Example | A simple meditation app or a casual photo filter app. | A pro video editor or a specialized business analytics tool. |
At the end of the day, the opt-in model maximizes your reach, while the opt-out model maximizes the quality of each trial user.
Making the Strategic Choice
So, which is it going to be? Here are a few questions I always ask when helping teams make this call:
- How complex is your app? If the core value is obvious in five minutes, opt-in is great. If it takes a few sessions to really "get it," you'll want the more committed users that an opt-out model brings.
- Who is your audience? Targeting a massive, general consumer audience? The low-friction opt-in model is your friend. Serving a smaller, professional niche? Opt-out will attract the serious users you need.
- How strong is your brand? A well-known app from a trusted developer has an easier time asking for a credit card upfront. If you're a newcomer, you might need the goodwill an opt-in trial generates to get people to even give your app a chance.
The goal isn't just to pick a model; it's to align your product free trial with your core business strategy. Whether you're playing the volume game or the quality game, this decision is a cornerstone of your app's entire monetization plan.
Getting Your Trial Live with StoreKit 2 and RevenueCat
Alright, let's get our hands dirty and move from strategy to code. This is where the real fun begins. To get a product free trial up and running, you'll be working in two main places: App Store Connect to set things up and your Xcode project to make it all work. We'll use RevenueCat to act as the bridge, which saves a ton of headaches when dealing with subscription logic.
This isn't just about slapping some code together. It’s about creating a seamless link between Apple's backend and a clean, intuitive user experience. By the end of this, you’ll have a clear, actionable path to get your trial live.
Setting Up Your Introductory Offer in App Store Connect
Before you write a single line of Swift, your first stop is App Store Connect. This is where you officially tell Apple about the free trial you plan to offer. It's important to know that an introductory offer isn't a separate product; it's an option you add to an existing auto-renewable subscription.
Here’s how you get there:
- First, navigate to your app in App Store Connect.
- Head over to the Subscriptions section and pick the Subscription Group that holds the product you're adding a trial to.
- Click into the specific subscription (like "Pro Annual").
- Look for the Subscription Prices area and click Add Introductory Offer.
You’ll see a few choices. For a classic free trial, you’ll want to select the Free type. This is where you define the duration—7 days, 14 days, 1 month, whatever works for your model. This period gives the user full access before their first payment is due. Once you save it, the offer is ready for your app to fetch.
Letting RevenueCat Handle the Heavy Lifting
You could manage all of this directly with StoreKit 2, but honestly, it puts a lot on your plate. You'd be on the hook for handling receipt validation, tracking who's eligible for a trial, and managing subscription states across devices. This is exactly why a tool like RevenueCat is a game-changer.
RevenueCat essentially acts as a smart layer on top of StoreKit, taking care of all the messy parts of in-app purchases. This frees you up to actually work on your app's features. The first thing you'll do is get the SDK initialized.
After you've installed the SDK, just configure it with your API key. I usually drop this in the AppDelegate or the main SwiftUI App file.
import RevenueCat
func application(_ application: UIApplication, didFinishLaunchingWithOptions launchOptions: [UIApplication.LaunchOptionsKey: Any]?) -> Bool { Purchases.logLevel = .debug Purchases.configure(withAPIKey: "YOUR_API_KEY") return true } With just those few lines, RevenueCat is up and running, ready to talk to Apple's servers and your app. Simple.
Fetching and Displaying Your Trial Offer
With the SDK ready, your paywall now needs to show the trial information you configured back in App Store Connect. A common mistake is to hardcode something like "7-Day Free Trial" directly into your UI. Don't do that. Instead, you'll fetch the available products—or "offerings," as RevenueCat calls them.
This dynamic approach is so important because it lets you tweak your offers in the RevenueCat dashboard without having to ship a whole new app update every time.
import RevenueCat
// In your paywall view model
Purchases.shared.getOfferings { (offerings, error) in
if let package = offerings?.current?.availablePackages.first {
// Now you have the package containing your trial information
// You can use package.storeProduct.localizedIntroductoryPriceString
// to display text like "7-day free trial"
}
}
That package object is a goldmine. It contains everything you need: the price, the subscription duration, and—crucially—the localized string for your introductory offer. This means the text will always be accurate and even translated for your international users automatically.
Kicking Off the Purchase Flow
When a user finally taps your "Start Free Trial" button, the last piece of the puzzle is to trigger the purchase. RevenueCat turns this into a simple one-liner. All you do is pass the Package object you just fetched into the purchase() method.
import RevenueCat
// Inside your button's action Purchases.shared.purchase(package: myPackage) { (transaction, purchaserInfo, error, userCancelled) in if purchaserInfo?.entitlements["pro"]?.isActive == true { // Unlock premium content and dismiss the paywall print("Trial started successfully!") } }
Key Insight: RevenueCat's entire system is built around entitlements. This is a big deal. Instead of checking if a user bought a specific product, you check if they have an active entitlement (like "pro access"). This decouples your app's features from your pricing, giving you incredible flexibility to change products and offers later without breaking your code.
This single command handles the whole dance with StoreKit, including popping the native iOS payment sheet where the user confirms their subscription. If you want to go even deeper on this topic, our guide on how to purchase in-app items on iOS is a great next read. By pairing App Store Connect's configuration with RevenueCat's slick SDK, you've built a robust and flexible system for your free trial.
Designing Paywalls That Actually Convert with Nuxie
You can have the most generous trial offer and a flawless technical setup, but it’s all for nothing if your paywall doesn't do its job. You have just a few seconds to grab a user's attention and convince them to take the leap. If the value isn’t crystal clear, your product free trial will fall flat.
This is where a dedicated paywall studio like Nuxie really shines. It helps you move past generic templates to build experiences that genuinely connect with users and drive them to convert.
The secret to a great paywall isn't flashy animations—it's psychology. It has to answer three questions for the user almost instantly: What am I getting? Why should I care? How does this solve my problem? Your copy, your visuals, and your layout all need to work together to answer these questions loud and clear.
A well-designed paywall uses a strong visual hierarchy to guide the user’s eye straight from the benefits to the "Start Free Trial" button. The goal is to make saying "yes" as easy as possible.
Nailing Your Paywall Copy and Visuals
Your paywall copy has to be all about the benefits, not the features. Nobody cares about your "advanced filtering tools." What they want is to "find the perfect photo in seconds." See the difference? One is what your app does, the other is what the user achieves.
Here’s a quick breakdown of what works:
- Lead with a powerful headline. This is your one shot. Summarize your core value proposition in a single, punchy line. A fitness app might go with "Your Personal Trainer, On Demand" instead of something bland like "Premium Workout Plans."
- Use bullet points for scannability. Let's be real, users don't read dense paragraphs on a paywall. List your top 3-4 benefits in short, snappy bullet points.
- Sprinkle in some social proof. A simple line like "Join 100,000+ happy subscribers" works wonders for building credibility and easing hesitation.
- Have a crystal-clear call-to-action (CTA). "Start Your Free Trial" is direct, effective, and tells the user exactly what's next. Avoid wishy-washy CTAs like "Continue" or "Submit."
Visuals are just as crucial. They set the emotional tone. If you have a meditation app, you’ll want calm, serene imagery. A productivity app? Clean, professional graphics that scream efficiency. The visuals have to match the feeling your app promises.
The Real Game-Changer: Advanced User Segmentation
A one-size-fits-all paywall is a massive missed opportunity. This is where a tool like Nuxie truly flexes its muscles. It lets you ditch the static screens and start delivering dynamic, personalized offers based on how people actually use your app. This is how you get the right message to the right person at the exact right moment.
From what I've seen, a personalized paywall that acknowledges a user's specific journey can boost trial start rates by over 50%. It shows you're paying attention to their needs, which builds a ton of trust at that critical decision point.
Think about these real-world scenarios you can set up with simple targeting rules:
- The Power User: You have a user who has already engaged with a key premium feature three times. Don't just show them the standard 7-day trial. Set up a rule to present a special paywall offering an extended 14-day product free trial. Your copy could even say, "Looks like you're loving our editor. Take 14 days to explore everything else on us."
- The Hesitant User: Someone's opened the app for five days straight but still hasn't started a trial. You could trigger a paywall that highlights a specific benefit they haven't touched yet, maybe paired with a small, limited-time discount on the annual plan if they start their trial today.
- The Win-Back Opportunity: A user who tried the app months ago (but didn't convert) just re-installed it. Instead of hitting them with the same old paywall, greet them with a unique "Welcome Back" offer and a quick 3-day trial to check out all the new features you've added.
By segmenting users based on their actions, you turn the paywall from a dumb gate into a smart, responsive part of their journey. This kind of personalization makes the offer feel less like a sales pitch and more like a helpful, relevant next step. Our guide to launching your app digs deeper into how these early experiences can define your long-term success.
Ultimately, this strategic approach ensures your best offers find their way to your most promising users, which dramatically improves your odds of turning them into happy, paying subscribers.
Finding the Optimal Trial Length and Measuring Success
Getting your product free trial live is a huge milestone, but it's really just the starting line. The real growth comes from treating your trial not as a static feature, but as a dynamic engine you’re constantly tuning. A "set it and forget it" approach is a surefire way to leave money on the table.
True success comes from continuous measurement and optimization, and that process starts with one of the most critical variables: your trial's duration.
Is a 7-day trial the magic number? Or does your app need a full 30 days for users to have that crucial "aha!" moment? The answer isn’t a gut feeling; it’s a decision that has to be backed by data. You're looking for that perfect balance—just enough time for users to see undeniable value, but not so long that the sense of urgency completely evaporates.
How Long Should Your Free Trial Be?
The ideal trial length is almost always tied directly to your app's "Time to Value" (TTV). Simply put, how long does it take for a brand-new user to understand why your app is worth paying for?
Short Trials (3-7 days): This is the sweet spot for apps with a quick, obvious value proposition. Think of a utility like a photo editor or a simple habit tracker. A user can see the core benefits in just a few sessions.
Medium Trials (14 days): This works well for apps that need a bit more integration into someone's daily life. A project management tool or a meal planning app fits this mold perfectly, giving users enough time to get set up and see tangible results.
Long Trials (30+ days): Save this for complex, high-commitment software. We're talking about sophisticated data analysis tools or in-depth language-learning platforms where progress is measured in weeks, not days.
Some recent data offers fascinating context here. For starters, a staggering 82% of users begin their trial on the very same day they install an app, which really hammers home the importance of that first impression.
While trials between 17-32 days show a strong median conversion rate of 45.7%, it's the shorter trials of 7 days or less that convert at an incredible 79% rate. You can dig into more of these subscription app trends from RevenueCat to see how different durations are performing across the ecosystem.
The goal is simple: your trial needs to be long enough for the user to become dependent on the value you provide. When it ends, the thought of losing that functionality should make subscribing feel like an absolute no-brainer.
A/B Testing Your Way to the Perfect Offer
There’s absolutely no reason to guess what works. A/B testing is your best friend when it comes to optimizing your free trial. Using a platform like Nuxie, you can easily run experiments on different user segments without having to push a new build to the App Store every time.
And don't just stop at the trial length! Your paywall is a goldmine for testing. Create variants to experiment with everything:
- Headlines: Pit benefit-driven copy against feature-focused copy.
- Call-to-Action (CTA): Does "Start Your Free Trial" beat "Try Pro for Free"?
- Visuals: Test a static background image against a subtle video.
- Pricing Display: Try highlighting the annual plan's savings versus just showing the monthly price.
By methodically testing these elements, you replace assumptions with cold, hard data, turning your paywall into a finely tuned conversion machine. For a deeper dive into experimentation ideas, check out our guide on leveraging free trials for products.
The Metrics That Matter Most
To optimize anything, you have to track the right numbers. It's easy to get lost in a sea of data, but focusing on the handful of key performance indicators (KPIs) that truly reflect the health of your trial is what really moves the needle.
To make this crystal clear, I've put together a table of the essential metrics you should have on your dashboard.
Key Metrics for Free Trial Performance
This table summarizes the essential KPIs to track for monitoring and optimizing the health of your iOS app's free trial program.
| Metric | What It Measures | Why It's Important |
|---|---|---|
| Trial Start Rate | The percentage of new users who begin a trial. | This is your top-of-funnel metric. A low rate can signal problems with your paywall's visibility or a weak value proposition. |
| Trial-to-Paid Conversion Rate | The percentage of trial users who become paying subscribers. | This is the ultimate measure of your trial's success. It tells you if users found enough value to pull out their wallets. |
| Paywall View-to-Trial Start | The conversion rate of users who see the paywall and then start a trial. | This isolates the performance of your paywall itself. A low number here means your design, copy, or offer needs work. |
| Time to Conversion | How long it takes a user to start a trial after their first session. | Understanding this helps you optimize when and where you present the paywall for the biggest impact. |
Keeping a close eye on these metrics while continuously running A/B tests is how you transform your product free trial from a simple marketing offer into a predictable and powerful growth engine for your iOS app.
Common Questions About iOS Free Trials
Even with a solid plan, the world of iOS subscriptions is full of little details and "gotchas." Apple’s rules can be tricky, and figuring out the best strategy often leads to a lot of specific questions. Let's tackle some of the most common ones I hear from developers rolling out free trials.
Getting these things right is non-negotiable. A simple mistake with eligibility rules or a poorly timed reminder can kill your conversion rates and erode user trust before you even get started. Let's clear up these common sticking points.
How Many Times Can a User Get a Free Trial?
This is probably the most critical rule to get straight from Apple. A user is eligible for only one introductory offer (like a free trial) per subscription group. That's it. It’s a hard and fast rule.
Once someone redeems a free trial for any product in a subscription group, they can't get another one from that same group, ever. This is true even if they cancel and later decide to subscribe to a different plan within that group. It's strictly a one-time deal per user, per group.
This is exactly where a subscription management platform becomes a lifesaver. A service like RevenueCat automatically checks a user's receipt history and eligibility before you even think about showing them a trial offer. This stops you from offering a trial to an ineligible user, which would just trigger a confusing App Store error and lose you the sale.
What Are the Most Common Free Trial Mistakes?
Beyond the technical setup, a few common strategic blunders can completely derail a great trial offer. I’ve seen developers make the same handful of mistakes over and over again.
Here are the big three to watch out for:
- A Lifeless In-Trial Experience: The single biggest mistake is launching a trial and then just… disappearing. If you aren't using push notifications, in-app messages, or a quick email sequence to guide users to your app's "aha!" moment, they'll probably forget they even signed up. Your job is to make your app feel essential before the trial clock runs out.
- Poor Communication Near the End: Nothing sours the user experience like a surprise charge hitting their credit card. Forgetting to send a clear, timely reminder that their trial is about to convert to a paid subscription feels sneaky. It's a guaranteed way to trigger immediate churn and a flood of one-star reviews.
- Mismatched Trial Length and Value: Offering a 3-day trial for a complex productivity app is just setting users up to fail. They won't have enough time to do anything meaningful, let alone see the long-term benefits. Your trial duration has to match your app’s "Time to Value"—the time it takes for a user to truly get hooked.
Should I Localize My Free Trial Offers?
Yes. One hundred percent. This isn’t just a "nice to have"; it’s one of the highest-impact things you can do for international growth. Showing your paywall in a user's native language and local currency is foundational for building trust.
Put yourself in their shoes. If you live in Japan or Germany, seeing a price in US dollars creates instant friction. It forces you to do mental math and introduces a sense of uncertainty about the actual cost.
When you localize, you make the decision to start a product free trial feel natural and safe. Modern platforms are built for this. With tools like Nuxie and RevenueCat working in tandem, you can manage regional pricing and translated paywall copy from one place, making a global strategy surprisingly easy to pull off.
Ready to design, target, and ship high-converting paywalls without waiting for app updates? Nuxie gives you an AI-powered studio and campaign platform to orchestrate the perfect offers for every user segment. Learn more and start your free plan.