A Developer Guide to Allow In App Purchases in iOS Apps
Learn how to allow in app purchases in your iOS app. This developer guide covers App Store Connect, StoreKit, testing, and dynamic paywalls.
If you're looking to allow in-app purchases in your iOS app, you first need to get the lay of the land. It’s not just about flipping a switch; it's about understanding the entire ecosystem, from your high-level monetization strategy all the way down to the specific product types Apple supports.
The right model for your app—whether it's subscriptions for ongoing content or consumables for in-game items—is a decision you need to make before you even think about the technical setup.
Understanding the In-App Purchase Ecosystem
Before you write a single line of code, you need a solid monetization plan. In-app purchases (IAPs) aren't just a feature you tack on to make money. They are a core part of the user experience that, when done right, can seriously boost engagement and the lifetime value of your users.
The numbers don't lie. The global in-app purchase market was valued at an estimated USD 150 billion in 2023 and is on track to hit USD 500 billion by 2032. You can dig into more insights on this massive market growth over on Dataintelo. This explosive growth just goes to show how crucial it is to nail your IAP strategy from day one.
The Four Types of In-App Purchases
Apple gives us a clear framework for IAPs, dividing them into four distinct categories. Each one serves a different purpose, and picking the right one is key to meeting user expectations and hitting your business goals.
Let's break them down.
Here’s a quick reference table to help you decide which IAP type is the best fit for your app's features.
Types of In-App Purchases on iOS
| IAP Type | Primary Use Case | Is Restorable | Example |
|---|---|---|---|
| Consumable | Items that are used up and can be purchased again. | No | In-game currency, extra lives, or hints. |
| Non-Consumable | One-time purchases that unlock permanent features. | Yes | Removing ads, unlocking a "pro" version. |
| Auto-Renewing Subscription | Provides ongoing access to content or services. | Yes | Monthly access to a streaming service. |
| Non-Renewing Subscription | Grants access for a fixed period; must be repurchased. | Yes | A season pass for a specific sports league. |
Choosing the right IAP type makes your monetization feel like a natural part of the app experience, adding genuine value instead of creating a frustrating paywall.
Consumable and Non-Consumable Products
Let’s start with the most straightforward types.
Consumables are items a user buys, uses up, and can buy again. Think in-game currency, extra lives, or hints in a puzzle game. Once they're gone, they're gone.
Non-Consumables are the exact opposite. These are one-time purchases that permanently unlock features or content. Things like an ad-free experience, a "pro" version of your app, or a new pack of photo filters fall into this category. Once bought, they belong to the user forever and can be restored on any of their devices.
As you can see, different app models call for different IAP types. A game's economy is very different from a productivity tool's feature set, and your choice of IAP should reflect that.
A Deeper Look at Subscriptions
Subscriptions have become a powerhouse in the App Store, creating a reliable, recurring revenue stream and fostering a deeper, long-term relationship with your users.
The real secret to a successful subscription isn't just getting the initial buy-in; it's about consistently delivering value. Users aren't just buying a feature. They're investing in an ongoing service or content stream that makes their experience better over time.
Apple offers two flavors of subscriptions:
Auto-Renewing Subscriptions: This is the big one. It gives users access to content or services on a recurring basis—weekly, monthly, or yearly—and renews automatically until they cancel. It's the model that powers everything from streaming services to premium news apps.
Non-Renewing Subscriptions: These grant access for a fixed amount of time and do not renew automatically. This is a great fit for time-boxed content, like a season pass for a sports app that only covers the current season.
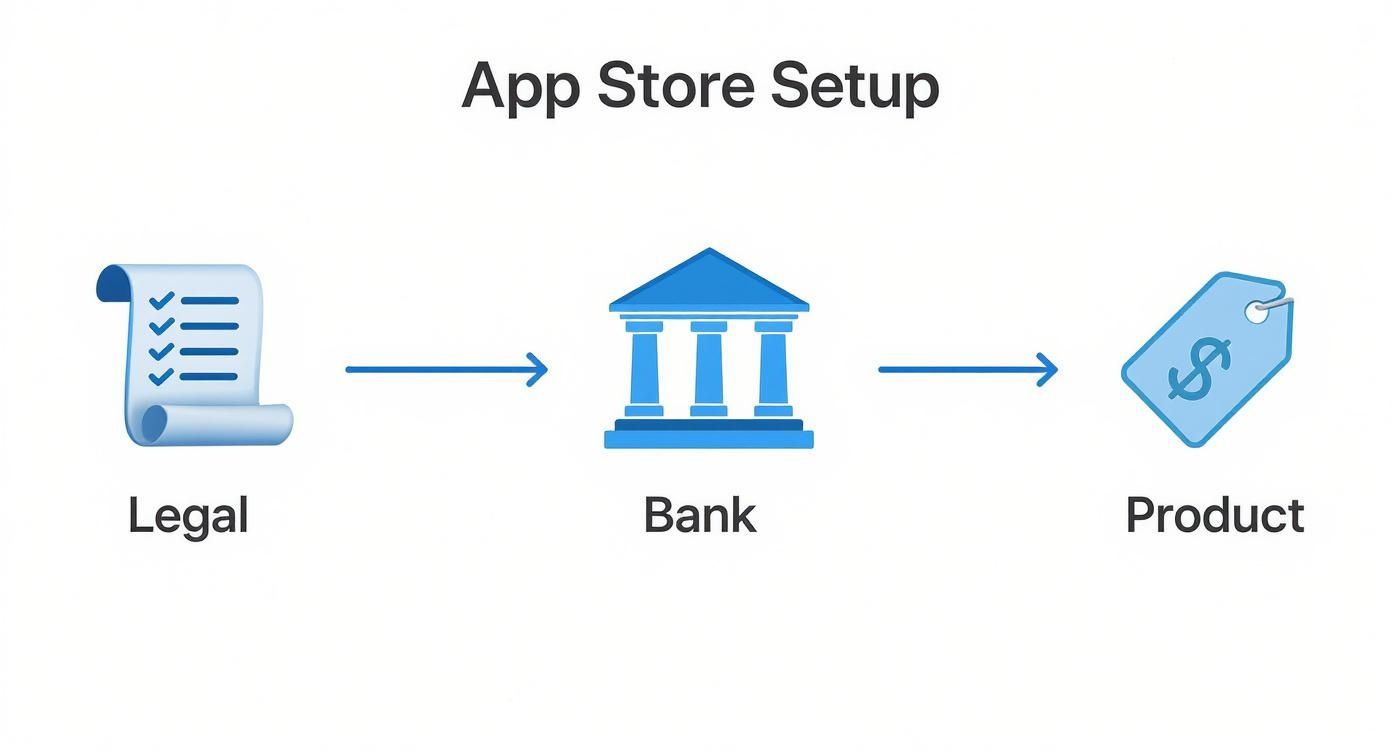
Diving Into App Store Connect
Alright, you’ve got your monetization plan. Now it's time to get your hands dirty in App Store Connect. This is where your strategy starts to take shape, and getting this initial setup right is absolutely critical. A tiny mistake here can lead to massive headaches down the road—think products not showing up in your app or, even worse, failed transactions.
Before you can sell anything, you’ve got to sort out the legal and financial paperwork. It’s not the most exciting part of the job, but it’s a hard requirement. To even allow in app purchases, Apple requires you to accept their Paid Applications Agreement. This is the contract that spells out all the rules of the road, from Apple’s commission to your responsibilities as a seller.
Once that’s done, you’ll need to set up your banking and tax details. Apple needs to know where to send your money and how to handle taxes. Be meticulous here. Double-check every single field, because a typo in your bank details can delay payouts for weeks.
Creating Your First IAP Products
With the admin work out of the way, you can finally start creating the actual products your users will see. Every single in-app purchase, whether it’s a "Pro Annual Subscription" or a "500-Gem Pack," needs to be defined as a product in App Store Connect.
For each IAP, you'll need to define a few core attributes:
- Reference Name: This is just for you. It's an internal label like "Annual Subscription - Tier 45" that helps you stay organized within App Store Connect.
- Product ID: This is a crucial one. It’s a unique identifier, usually in reverse-DNS format (e.g.,
com.yourapp.annualpro), that your app code will use to fetch product info. Choose this carefully, because you can't change it later. - Pricing: You don’t set a direct price. Instead, you select a price tier, and Apple handles the currency conversion for all the different App Store regions automatically.
- Display Name & Description: This is what the user sees on the payment screen. Make it clear, concise, and compelling.
Pro Tip: I can't stress this enough: come up with a consistent, scalable naming convention for your Product IDs from day one. A messy system becomes a nightmare to manage as you add more products. This is also a great time to consider automating product management. Check out our guide on the App Store Connect API to see how you can handle this programmatically.
The Bigger Picture on Monetization
Getting these details right is more than just a technical step; it’s the foundation of your app’s revenue stream. And it’s a good moment to remember just how big the opportunity is.
Recent market projections for 2024 to 2033 show in-app purchase revenue skyrocketing from USD 188.96 billion in 2024 to an incredible USD 922.89 billion by 2033. If you want to dig into the numbers, you can explore the full market analysis on Straits Research. This explosive growth shows why a rock-solid IAP setup isn't just a feature—it's your ticket to tapping into a massive and expanding market.
Integrating StoreKit to Handle Transactions
Alright, you've done the groundwork in App Store Connect. Now comes the fun part: writing the code that actually connects your app to the App Store and lets users buy things. This is where your monetization strategy comes to life, and we'll be using StoreKit 2, Apple's latest and greatest framework for the job.
If you're starting a new project today, there's really no reason to use the original StoreKit. StoreKit 2 leans on Swift's modern async/await syntax, which makes the whole process of fetching products, starting a purchase, and verifying transactions so much cleaner and more reliable. I've spent countless hours debugging tricky edge cases with the old delegate-based system, and trust me, StoreKit 2 is a massive improvement.
The diagram below recaps the essential setup you've just completed in App Store Connect. Think of it as the foundation—without the legal agreements, banking info, and product definitions in place, the code we're about to write wouldn't be able to do anything.
With that solid foundation built, let's dive into the code.
Fetching Products from the App Store
First things first: your app has no idea what products you're selling or how much they cost. You can't just hardcode prices into your UI—that's a huge mistake and against Apple's rules. Instead, you need to dynamically fetch this information from the App Store using the Product IDs you defined earlier.
This ensures your users always see the correct, localized pricing, which Apple manages for you across different regions.
The process is surprisingly simple with StoreKit 2. You just need to call Product.products(for:) with your list of IDs. It's an asynchronous call, so it won't block your UI while it talks to Apple's servers. It returns an array of Product objects, each packed with the localized title, description, and price you need to populate your paywall.
import StoreKit
// The unique Product IDs you created in App Store Connect let productIDs = ["com.yourapp.annualpro", "com.yourapp.monthlypro"]
// Asynchronously fetch the product details do { let storeProducts = try await Product.products(for: productIDs) // You now have the product objects needed to build your paywall updatePaywall(with: storeProducts) } catch { print("Failed to fetch products: (error)") }
This is the only right way to do it. It keeps your pricing dynamic and respects Apple's guidelines.
Initiating and Handling the Purchase
When a user is ready to buy and taps that button on your paywall, you kick off the purchase flow. With StoreKit 2, this is a one-liner: just call the purchase() method on the Product object the user selected.
StoreKit takes over from there, presenting the familiar system sheet that asks the user to confirm with Face ID, Touch ID, or their Apple ID password. It’s a seamless and trusted user experience.
One of the best things about StoreKit 2 is its resilience. If the user's connection drops or they get a phone call mid-purchase, the transaction isn't lost. StoreKit holds on to it and delivers the result the next time your app is running. This is a huge win for reliability.
Your app's job is to simply await the result of the purchase() call. It returns a Product.PurchaseResult, which you can handle with a simple switch statement:
.success(let verificationResult): The purchase went through! The next step is to verify the transaction and then unlock the feature or content for the user..userCancelled: The user changed their mind and hit "Cancel." This isn't an error; it's a normal part of the flow. Just dismiss the purchase UI..pending: The purchase needs more time. This often happens with "Ask to Buy" when a parent needs to approve a child's purchase.
A critical piece of the puzzle is listening for transaction updates right from your app's launch. This allows you to catch any purchases that were completed while your app was in the background or closed. For a more detailed walkthrough on setting up a robust transaction listener, our comprehensive guide on iOS in-app purchasing implementation has you covered. Getting this right is key to making sure you never miss a sale.
Testing and Debugging Your Purchase Flow
https://www.youtube.com/embed/PthFk5je350
Shipping a feature without testing it is a recipe for disaster, and this is doubly true when money is on the line. Before you enable in-app purchases for real users, you need a rock-solid testing strategy to make sure the entire flow is seamless, from the moment they tap "buy" to when they get their content. A bug here doesn't just annoy a user; it erodes trust and can kill your revenue stream before it even starts.
Thankfully, Apple gives us a robust sandbox environment that lets you run through real transactions without spending a dime. Your first move should be to create a few dedicated Sandbox Tester accounts in App Store Connect. These are just special Apple IDs you can use on a physical device to test your IAP implementation from end to end.
A word of advice: don't rely on the simulator for purchase testing. It's notoriously flaky. For the most accurate results, always grab a real device and log in with your sandbox account.
Accelerate Development with a StoreKit Configuration File
While a sandbox account is essential for that final pre-launch check, it’s honestly a bit slow for day-to-day development. Constantly logging in and out of Apple IDs on a test device is a real pain. This is where a StoreKit Configuration file becomes your best friend.
This nifty Xcode feature lets you create a local mock of the App Store right on your machine. You can define all your IAP products—including subscriptions with custom renewal cycles and introductory offers—directly within a .storekit file. The beauty of this is that you can test the entire purchase flow in the simulator, which dramatically speeds up your feedback loop.
You can even get creative and simulate tricky scenarios:
- Transaction failures: Find out what happens when a payment is declined.
- Interrupted purchases: Mimic a user losing their connection mid-transaction.
- Subscription renewals: Test how your app handles subscription state over time without waiting weeks.
Using a local configuration file like this is a game-changer for building a resilient IAP system.
Diagnosing Common IAP Problems
Even with the most careful setup, you're going to run into problems. It’s a rite of passage for every iOS developer working with IAP. Knowing where to look first can save you hours of head-scratching.
One of the most common pitfalls I see is a simple mismatch. If your app requests a Product ID that doesn't perfectly match what you configured in App Store Connect, the product will never load. It's often just a typo, but it can bring your entire monetization flow to a grinding halt.
Other frequent culprits include an expired Paid Applications Agreement in App Store Connect or forgetting to sign out of your real Apple ID on your test device before logging in with a sandbox account. Keeping a mental checklist of these common points of failure is a smart move.
As the market continues to explode, with global IAP revenue projected to hit $40 billion in Q1 2025 alone, a flawless user experience is non-negotiable. You can read more about these digital market trends on Sensor Tower. Numbers like that really highlight just how critical it is to get every single detail of your purchase flow right.
Deploying Dynamic Paywalls with Nuxie
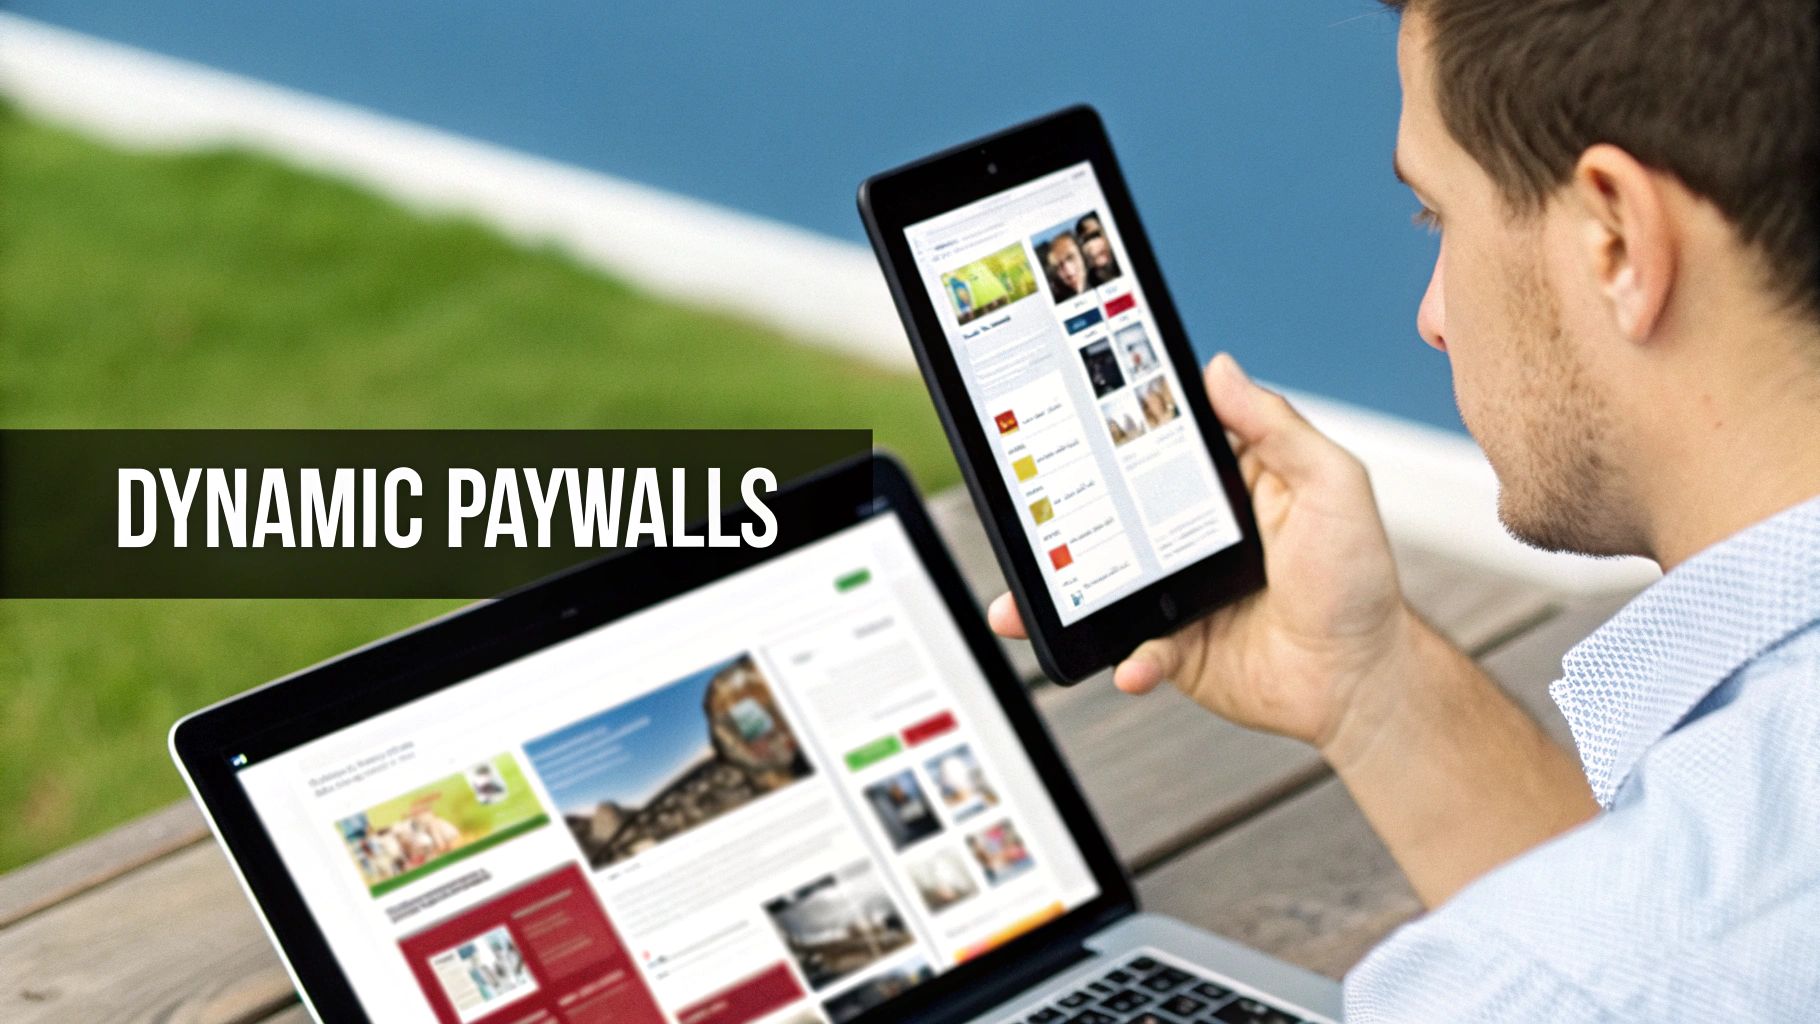
Now that you have the StoreKit logic wired up, let's talk about what the user actually sees: the paywall. It's tempting to just hardcode a simple screen and call it a day, but that’s a massive missed opportunity. To really dial in your conversions, you need the freedom to test, tweak, and personalize your offers—all without getting stuck in the App Store review queue every single time.
This is where server-driven paywalls completely change the game. A tool like Nuxie lets you update your paywall on the fly, so you're no longer shipping a new app version just to change a headline or test a different price point.
The Power of Agility in Monetization
Think about it. You want to run a special weekend promotion or see if a different call-to-action button works better. The old way? You’d have to make the changes in Xcode, submit a new build, and then wait... and wait... for Apple's approval. By the time your update goes live, the moment could be long gone.
A dynamic paywall system separates your paywall's design and content from your app's code. This gives you the power to:
- Run A/B tests on everything from pricing and layouts to button colors and copy.
- Segment your offers to show specific paywalls to different user groups.
- Launch promotions or flash sales instantly to capitalize on seasonal events or holidays.
This isn't just about convenience—it's a real strategic advantage. Being able to iterate quickly means you can respond to user feedback and market trends in real time, which is essential for any app that needs to allow in app purchases to succeed.
Integrating a Dynamic Paywall SDK
Getting started with a solution like Nuxie is pretty straightforward. You'll add their SDK to your project and then swap out your static paywall view with a dynamic one provided by the SDK. The concept is simple: your app calls the Nuxie SDK, which then fetches the right paywall configuration from its servers and displays it to the user.
This approach hooks directly into the StoreKit foundation you’ve already built. When a user taps a purchase button on your Nuxie-powered paywall, the SDK simply triggers the same Product.purchase() call you’d make yourself. All your transaction logic remains the same; only the presentation layer becomes flexible and powerful.
For developers who need to move fast, this can make a world of difference, especially when you're still trying to find product-market fit. As the team at Nuxie points out, a fast and efficient process is critical when launching the app on the Nuxie blog. The time you get back from not having to constantly manage paywall code and App Store submissions can be poured back into building the core features your users actually care about.
Common Questions About In-App Purchases
When you're deep in the code trying to get in-app purchases working, you're bound to hit a few snags. It happens to everyone. Let's walk through some of the most common questions and sticking points that pop up, with practical answers to get you back on track.
These are the little details that can stall a release, so getting them right is crucial for building a solid IAP system.
What's the Difference Between StoreKit and StoreKit 2?
Think of StoreKit as Apple's original toolkit for IAPs. It’s been around for a while and relies on a delegate pattern with completion handlers. It works, but it can get a bit messy.
StoreKit 2, which landed with iOS 15, is the modern, Swift-native successor. It uses async/await, which makes for much cleaner, more readable, and less error-prone code. It also has some fantastic quality-of-life improvements, like built-in entitlement checking and direct access to a user's purchase history.
For any new app, Apple's clear recommendation is to use StoreKit 2. It just simplifies so much of the process.
Do I Really Need a Server to Validate IAP Receipts?
Technically, you can do on-device validation, but you absolutely shouldn't. Relying only on the device to verify a purchase is a huge security hole. It opens the door to all sorts of simple hacks and jailbreak tweaks that can fool your app into unlocking paid features for free.
The right way to do it is to send the receipt from the app to your own server. Your server then talks directly to Apple's servers to confirm the purchase is legitimate. This creates a secure, single source of truth that you control. It's the only way to reliably prevent fraud, especially for subscriptions and non-consumables.
Let's be blunt: if you care about your revenue, server-side receipt validation isn't optional. It's the professional standard for protecting your business and making sure only paying customers get what they paid for.
Why Aren't My In-App Purchase Products Showing Up?
Ah, the classic. This is probably the most frequent and frustrating IAP problem you'll run into. When your products just won't load in your test builds, it almost always boils down to one of these culprits.
- Paid Applications Agreement: First thing's first: log into App Store Connect. Is your agreement active? Is all the banking and tax info filled out and approved? An incomplete contract is a silent killer for IAPs.
- Product ID Mismatch: Go back and check your code. Now check App Store Connect. Does the Product ID string match perfectly? A single typo, an extra space, or a case-sensitivity issue will cause the request to fail silently.
- Propagation Delay: Sometimes, you just need to wait. After you create a new IAP product or edit an existing one, it can take a few hours for the changes to ripple through all of Apple's servers. Grab a coffee and check again later.
- Wrong Test Environment: Remember, you need to test on a physical device logged in with a Sandbox Tester account. While you can test IAPs in the simulator, it requires setting up a StoreKit Configuration file, and it can still be finicky. A real device is your best bet.
How Do I Handle Restoring Purchases?
Apple's guidelines require you to have a "Restore Purchases" button somewhere in your app. This is non-negotiable, and you'll usually find it in a settings menu or on the paywall screen itself.
When a user taps that button, your job is to call the correct StoreKit function to kick off the restore process. StoreKit takes over from there, asking the user to sign in with their Apple ID.
Once they authenticate, StoreKit will deliver a fresh transaction for every non-consumable and active subscription that user has ever bought. Your app's transaction observer should be set up to catch these "restored" transactions and unlock the content, just as if it were a brand new purchase.
Ready to ship paywalls that convert without waiting for app reviews? Nuxie gives you the power to design, target, and launch high-performing paywalls in minutes. Explore Nuxie today and see how dynamic, server-driven paywalls can transform your monetization strategy.