How to optimize mobile app: Boost UX, retention & results
Ready to optimize mobile app performance? Learn the key metrics, UX tweaks, retention tactics, and testing frameworks that drive engagement and growth.
If you want to optimize a mobile app, you first have to know where you stand. That means getting a clear, data-driven picture of its current performance. We're talking about digging into its technical health to find those hidden bottlenecks and setting up analytics to see what real users are actually experiencing. Without this baseline, you’re just guessing.
Establishing Your App Performance Baseline
You can’t improve what you don’t measure. It’s a classic saying for a reason. Before you even think about refactoring code or redesigning a single screen, the first real step is to create a detailed snapshot of your app's current state.
This baseline is your source of truth. It's what you'll use to pinpoint the areas that will give you the most bang for your buck and to prove your hard work is actually paying off. Think of it like a doctor running diagnostics before prescribing a treatment—you want to make sure your efforts are focused where they’ll make the biggest difference.
This initial audit isn't just about finding what's broken. It's about understanding the complete user experience from their perspective. A seemingly minor half-second delay in loading a screen or a slight stutter during an animation might not seem like a big deal in isolation. But those little friction points add up, leading to user frustration and, eventually, churn.
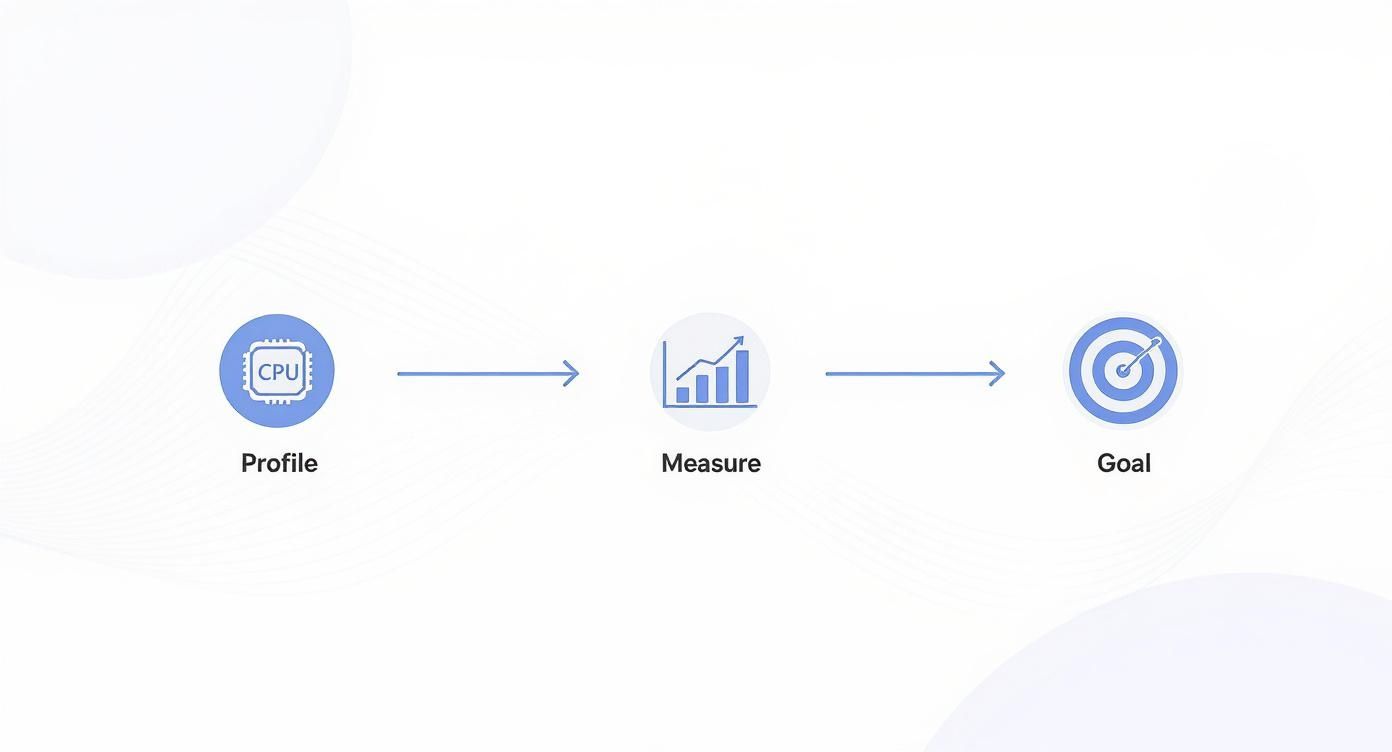
The whole process is methodical: you profile, you measure, and then you set smart goals. This is the bedrock of any optimization strategy that actually works.
Getting Your Hands Dirty with Xcode Instruments
Your journey to optimize your app starts locally, right on your machine. For iOS developers, Xcode Instruments is the go-to tool. It's a powerhouse suite of utilities that lets you diagnose performance issues directly on a device or simulator. It's like putting your app under a microscope to see exactly how it’s using—or misusing—system resources.
When you fire up Instruments, there are a few key areas you should immediately zero in on:
- CPU Usage: The Time Profiler instrument is your best friend here. It’ll show you exactly which methods and functions are hogging the CPU. High CPU usage is a classic culprit for a sluggish UI, terrible battery drain, and even making the device feel hot to the touch.
- Memory Allocation: Using the Allocations and Leaks instruments, you can track every single object your app creates in memory. This is non-negotiable for hunting down memory leaks—those pesky objects that are no longer needed but never get released. Unchecked, leaks will slow your app down and eventually lead to a crash.
- Energy Impact: The Energy Log instrument gives you a detailed report card on your app's battery manners. It shines a spotlight on expensive operations like intense CPU activity, chatty network requests, and constant GPS pings.
Measuring How Your App Performs in the Wild
Profiling on your own device is essential, but let's be honest, it doesn't tell the whole story. Your souped-up development machine on a blazing-fast Wi-Fi connection is not the real world. You absolutely need to understand how your app behaves out there, on a variety of devices, network conditions, and iOS versions.
This is where Real-User Monitoring (RUM) tools come into play.
Integrating an SDK like Firebase Performance Monitoring or Instabug is a game-changer. These tools collect aggregated, anonymized data from your actual users, giving you insights that are impossible to replicate in a controlled lab environment.
A critical part of this is understanding the sequence of events from the moment a user taps your icon to when they can actually use the app. For a deeper look at this, check out our guide on the application lifecycle for iOS. This knowledge helps you pinpoint exactly where startup optimizations will have the most impact.
When you look at this real-world data, you need to be laser-focused on a few key metrics.
Key App Performance Metrics to Track
To truly understand what your users are experiencing, you need to track the right numbers. The table below outlines some of the most critical metrics for diagnosing your app's health, what they mean, and how to measure them.
| Metric | What It Measures | Ideal Benchmark (iOS) | Recommended Tool |
|---|---|---|---|
| App Startup Time | Time from app launch to the first interactive screen. | Under 2 seconds (cold start) | Firebase Performance |
| Crash-Free Rate | Percentage of user sessions that don't end in a crash. | Above 99.9% | Sentry, Instabug |
| Network Latency | Time taken for key API requests to complete. | Under 1 second | Charles Proxy, Firebase Perf. |
| Screen Rendering | Time to draw and display UI frames (measures UI jank). | 60 FPS (16.7 ms per frame) | Xcode Instruments (Core Anim.) |
| Memory Footprint | Amount of RAM the app is actively using. | Varies by device; watch for spikes. | Xcode Instruments (Allocations) |
Watching these metrics will help you move beyond your own perfect testing conditions. You'll finally see the experience of a user on an older iPhone with a spotty 4G connection in a crowded subway. In a global market, that context is everything.
Fine-Tuning Performance and the User Experience
Alright, you've got your baseline metrics. Now it's time to roll up your sleeves and turn those numbers into a better app. This is where the real work begins—translating diagnostic data into a user experience that feels snappy, intuitive, and polished.
When it comes to optimization, you’re really fighting a battle on two fronts. On one side, you have the raw, technical performance—the engine under the hood. On the other, you have the user’s journey and how the app feels to use. A technically brilliant app that's a nightmare to navigate won't last long on a user's home screen.
Boosting Your App's Technical Horsepower
Often, the biggest performance wins come from how your app juggles different tasks. One of the most common culprits for a sluggish app is running heavy operations on the main thread. This thread is your UI’s lifeline; it handles all the rendering and user interactions. When you block it with something like a complex network request, your app freezes. The user sees a stuttering, unresponsive screen and quickly gets frustrated.
For anyone working with iOS, Grand Central Dispatch (GCD) is your best friend here. By pushing long-running tasks onto a background queue, you let the main thread do its job: keeping the interface buttery smooth. For instance, instead of parsing a massive JSON response on the main thread, do that heavy lifting in the background. Once the data is ready, you can simply hop back to the main thread to update the UI. It's a fundamental shift that makes a world of difference.
Don't forget about your app's download size, either. A bloated binary is a huge turn-off, especially for users on spotty Wi-Fi or with limited data plans.
- Slim down your assets. Compress your images (HEIC is your friend) and make sure you aren't bundling huge, unnecessary resources.
- Strip out the fat. Turn on compiler optimizations to remove unused code and symbols from the final build.
- Use On-Demand Resources. Apple’s framework is perfect for content that isn't needed right away, like specific game levels or tutorial videos. Let users download them when they actually need them.
These aren't glamorous changes, but they add up. Together, they make that crucial first interaction—the download and install—as painless as possible.
Crafting a Smoother User Journey
Technical speed is objective, but perceived speed is what your users actually experience. You can optimize a mobile app by making it feel faster, even if the underlying tasks take the same amount of time. It’s a bit of UX psychology, and it’s incredibly effective.
Think about a screen that needs to fetch data from a server. Showing a blank white page with a spinning loader is a classic sign of a slow, clunky experience. It just feels broken. We can do much better by using smarter UI patterns that manage the user's perception of waiting.
Key Takeaway: True optimization isn't just about shaving milliseconds off a function's execution time. It's about reducing the user's cognitive load and their sense of waiting, which creates an experience that feels effortless.
A fantastic technique for this is implementing skeleton screens. These are essentially placeholder UIs that mimic the final layout of the content while it’s loading. It provides immediate visual feedback, shows the user what to expect, and makes the wait feel significantly shorter.
For an even more responsive feel, you can try optimistic UI updates. For actions that are highly likely to succeed—like tapping a "like" button—you can update the UI instantly. The actual network request happens quietly in the background. In the rare case it fails, you just revert the change and let the user know. This makes the app feel lightning-fast. To see how in-depth testing can inform these UX choices, check out our guide on improving your iOS app testing process.
Finally, take a hard look at your key user flows. Map out every single step a user takes to sign up or make a purchase. Are there any redundant screens you can cut? Can you use clearer language to remove ambiguity? Every tap you eliminate makes the app feel faster and more intuitive. This is how you transform a merely functional app into one people actually love to use.
Boosting Retention And Driving Conversions

Technical polish is only part of the battle. You can shave milliseconds off load times, but if someone opens your app once and walks away, it doesn’t matter. The real win happens when a user comes back again—and again—and ultimately opts into a paid plan.
This shift—from raw speed to strategic engagement—means designing every touchpoint to reinforce your app’s value. Let’s dive into practical ways to keep people hooked and ready to convert.
Nailing The First Impression With Onboarding
Before anything else, guide new users straight to that “aha!” moment. Onboarding shouldn’t be a chore or a checklist; it should spotlight the very feature that makes your app indispensable.
Consider these tactics:
- Map The “Happy Path”: Chart the quickest route to your core benefit.
- Cut The Clutter: Delay nonessential permissions and form fields until after the user has experienced value.
- Show, Don’t Tell: Swap static overlays for interactive hints that teach by doing.
A smooth onboarding flow slashes day-one churn. For extra ideas, check out how to reduce app churn.
Optimizing Your Paywall For Maximum Conversions
Your paywall is where your app either pays off—or doesn’t. Treat it like a science experiment: form hypotheses, test variations, measure impact, repeat.
Here’s what to play with:
- Price Points: Try different monthly and annual rates.
- Subscription Tiers: Offer Basic, Pro, or Premium bundles.
- Value Propositions: Swap headlines and bullet lists to highlight convenience, exclusivity, or power.
- Trial Length: Compare 3-day, 7-day, and 14-day free trials.
A platform like Nuxie lets you spin up paywall variants on the fly—no app release required. That way, you can quickly zero in on the mix that drives the highest revenue.
Orchestrating Campaigns To Re-Engage Users
Even rock-solid onboarding and paywalls won’t keep everyone hooked forever. That’s where targeted campaigns come in, blending push notifications with in-app messages to recapture attention.
Push notifications shine when they’re timely and personal—think a workout reminder or a badge for hitting a milestone. In-app messages work best as gentle nudges, like announcing a new feature or offering a limited-time discount during an active session.
Retention numbers don’t lie:
| Metric | Overall Users | Weekly Plan | Annual Plan |
|---|---|---|---|
| Day 1 (24 hours) | 21% | – | – |
| Day 30 | 3.7% | – | – |
| Year 1 | – | 3.5% | 28% |
These figures highlight why you need to optimize your mobile app with personalized content and seamless flows. Dive into more app development statistics to benchmark your retention targets. By leveraging real-time data, you can craft campaigns that feel like helpful advice instead of pushy ads.
Weaving Data into Your App’s DNA with A/B Testing
Lasting improvements aren’t born from gut feelings or what you think users want. To truly get ahead, you have to stop guessing and start measuring. This is all about embedding a culture of A/B testing into your team's DNA, where every meaningful change is treated as a hypothesis that needs to be proven with real user data.
This mindset shifts product development from a series of risky bets to a calculated process of continuous improvement. Instead of debating which button color is “better” in a meeting, you let your users show you with their taps and swipes.
Tools like Firebase A/B Testing or Optimizely give you the framework to run these experiments methodically. They let you serve up different versions of your app to different user groups, then track which one performs better against a key goal, whether that’s boosting trial starts or driving feature adoption.
Crafting a Testable Hypothesis
Every great A/B test starts with a solid, testable hypothesis. A weak one is just a vague idea—something like, "Changing the paywall will make more money." A strong hypothesis, on the other hand, is specific, measurable, and built on an actual observation about how users are behaving in your app right now.
A good structure to follow is: "If we [make this specific change], then [this specific outcome] will happen, because [this is the user behavior we believe it will influence]."
Let’s look at a real-world example:
"If we change the primary CTA on our paywall from 'Start Your Trial' to 'Unlock All Features,' then we will see a 15% increase in trial conversions, because the new language focuses on the benefit to the user, not the action they have to take."
This formula forces you to be crystal clear about what you're changing, what you expect to happen, and the reasoning behind it. It turns a random thought into a scientific experiment, which is absolutely essential for interpreting the results correctly and learning from both your wins and your losses.
Deciding What to Test First
You could A/B test almost anything in your app, but your time and resources are finite. That’s why you have to prioritize tests that could actually move the needle on your most important metrics. Don't get stuck in a loop of testing tiny, inconsequential changes.
Focus your energy on these high-impact areas:
- Onboarding Flow: Try different sequences. Pit an interactive tutorial against static screens. Test when you ask for permissions. The whole point is to get users to that "aha!" moment as fast as humanly possible.
- Paywall Design: This is often the single most powerful lever you can pull. Experiment with headlines, value props, pricing tables, and trial lengths.
- Call-to-Action (CTA) Buttons: Test the text, color, size, and placement of your most important buttons. You'd be surprised how much of a difference "Sign Up Free" versus "Get Started" can make.
- Feature Discovery: Have a powerful feature nobody seems to use? Test different ways to surface it, like in-app messages, subtle tooltips, or a banner on the home screen.
To give you a clearer picture, here’s a quick rundown of some practical A/B testing ideas you can try.
A/B Testing Ideas for App Optimization
| Test Area | Example Hypothesis | Primary Metric to Track |
|---|---|---|
| Onboarding | If we add a 3-step interactive tutorial, new user activation will increase by 10% because users will understand core value faster. | Activation Rate (e.g., user completes key action) |
| Paywall Copy | Changing the headline to focus on a specific outcome (e.g., "Design Stunning Posts in Seconds") will lift trial starts more than a generic headline. | Trial Conversion Rate |
| CTA Button | A high-contrast, green CTA button on the subscription screen will outperform our current blue button, increasing tap-through rate. | Button Click-Through Rate |
| Pricing Display | Presenting the annual plan with a "per month" price alongside the total will increase annual plan selection by 20%. | Annual vs. Monthly Plan Ratio |
| Push Notification Opt-in | Triggering the push permission prompt after a user's first positive action (e.g., saving an item) will increase opt-in rates. | Push Notification Opt-in Rate |
These are just starting points, of course. The key is to form a hypothesis based on your own app's data and user feedback, then measure the outcome relentlessly.
Once you start running experiments, your dashboard will give you a clear view of how your variants are performing against the original.
This kind of dashboard makes it easy to compare the baseline and the variant, showing you the impact on your target metric and the statistical confidence that one version is truly better than the other.
Digging Deeper: Analyzing the Results
Once an experiment wraps up and you've reached statistical significance, the work isn't over. It’s not enough to just crown a winner. You have to dig into the data to understand the why behind the numbers.
This is where segmenting your analytics is a game-changer. Did the new feature connect better with brand-new users or with your long-time power users? Did a price adjustment impact users in Europe differently than those in North America?
Analyzing results by user cohorts can reveal some incredibly powerful insights. You might find that a change with a neutral or even slightly negative overall impact was actually a massive success with a smaller, high-value segment of your audience. These are the learnings that fuel your next round of hypotheses, creating a powerful feedback loop that drives continuous, data-backed growth.
Implementing Smart Rollouts and Continuous Monitoring
https://www.youtube.com/embed/zFMgpxG-chM
After all the hard work profiling, optimizing, and testing, it’s tempting to smash that "release" button and push your improvements out to everyone. But hitting 100% of your users at once is a high-stakes gamble. A single, hidden bug could send your crash-free rate plummeting and undo months of effort.
Shipping your code safely is every bit as important as writing it. This final phase is all about taking the risk out of deployment. You need a solid game plan that lets you release changes confidently, catch issues before they escalate, and prove your updates are actually working.
Mitigating Risk with Phased Rollouts
Instead of a big-bang release, a much safer bet is the phased rollout. The idea is simple: you release your app update to a small slice of your user base and gradually open the floodgates over a few days. The good news is that App Store Connect has this feature built right in, and it's an absolute game-changer.
You can start by pushing the update to just 1% of users. Think of this group as your canaries in the coal mine. For that first day, you’ll want to be glued to your monitoring tools, watching for any unexpected spikes in crashes or weird performance metrics. If everything looks good after 24 hours, you can dial it up to 5%, then 20%, and eventually to 100%.
This deliberate, step-by-step process buys you critical reaction time. If a nasty bug surfaces at the 1% stage, you can hit the brakes, pause the rollout, and submit a fix before the other 99% of your users even know there was a problem.
The Power of Feature Flags
While phased rollouts manage the entire app binary, feature flags (also called feature toggles) give you surgical control over specific pieces of code within that binary. They’re basically remote on/off switches for your features. You can ship a major code change completely turned off by default, sitting dormant in the app.
Once your update is live in the App Store, you can use a dashboard (from a service like LaunchDarkly or your own internal tool) to:
- Turn the feature on for your internal team for a final round of real-world testing.
- Enable it for a small percentage of users, like 5% or 10%, as a controlled beta.
- Kill the feature instantly for everyone if you spot an issue, no emergency app update or expedited review required.
This is an incredibly effective way to optimize a mobile app, especially when you're making big backend changes or overhauling a key user flow. It separates deployment (getting the code onto the device) from release (making it visible to users), which lets you move faster with far less risk.
The real magic happens when you combine phased rollouts with feature flags. This two-layer safety net means you can confidently ship updates, knowing you can isolate any problem—whether it's in the app binary or a specific feature—before it impacts your entire audience.
Continuous Monitoring After Launch
Hitting 100% on your rollout doesn't mean the job is done. A successful release is the starting line, not the finish. Now it's time to shift into continuous monitoring mode to make sure your optimizations are actually delivering results and haven't introduced any sneaky, slow-burning issues.
This is where you go back to the baseline metrics you defined at the very beginning. Are your app startup times measurably faster? Is your crash-free rate holding steady (or, even better, improving)? Are people spending more time in that feature you just streamlined? The data will tell you if you truly succeeded.
Be sure to set up automated alerts for any major regressions. Your monitoring tools should be configured to scream at you if network error rates, memory usage, or other key vitals suddenly spike after a release. This kind of proactive alerting is your best defense against the problems you can't see, helping you protect the user experience and maintain a high-quality app for the long haul.
Frequently Asked Questions About App Optimization
Even with the best strategy in place, you're going to have questions when you dive into optimizing your mobile app. It's just part of the process. I've been there, and I've heard the same questions pop up from countless developers and product managers over the years.
This section is my attempt to answer some of the most common ones directly. Think of it as a quick cheat sheet for the practical, day-to-day decisions you'll face.
What Metrics Matter Most for a New App?
When you first launch, it's incredibly tempting to track every metric under the sun. Don't. You'll just drown in data that doesn't tell you what you actually need to know. For a new app, you need to focus on the core signals of health and potential.
I always tell teams to zero in on these three to start:
- Crash-Free Rate: This one is table stakes. If your app is constantly crashing, nothing else you do will matter. You absolutely have to aim for 99.9% or higher, right from day one.
- Day-1 Retention: This is your "first impression" metric. It answers a simple question: did they like it enough to come back tomorrow? It's a raw, honest look at whether your app's core value proposition is landing with new users.
- Onboarding Completion Rate: You'd be surprised how many users drop off before they even see the good stuff. If people aren't making it through your initial setup, you have a critical friction point that needs immediate attention.
Nailing these three gives you a solid foundation. You're confirming your app is stable, engaging, and accessible.
How Often Should We Run Optimization Cycles?
There isn't a single right answer here, but I've found the most successful teams treat optimization as a steady, continuous rhythm, not a series of frantic, one-off projects.
A quarterly cadence usually hits the sweet spot. Setting aside a dedicated sprint or focus period every three months gives your team enough breathing room to do the job right.
It allows you to:
- Gather enough data from your last release to see real patterns.
- Form a strong, evidence-based hypothesis (not just a guess).
- Properly implement and A/B test a change without cutting corners.
- Analyze the results thoughtfully and roll those learnings into the next product cycle.
This rhythm prevents optimization from feeling like a chore and bakes it into your team's DNA.
Optimization isn't just a technical task; it's a core business function. A well-optimized app directly impacts revenue, especially with in-app advertising, a market expected to surpass $390 billion globally by 2025. This growth is driven by mobile commerce and diverse monetization strategies beyond gaming. Find out more about how to turn every tap into revenue.
Balancing New Features with Performance Improvements
Ah, the classic product dilemma. Do we build the shiny new thing, or do we fix and polish what we already have? My answer is always: you have to do both.
The trick is to stop thinking of them as competing priorities. The best teams I've worked with integrate performance work directly into their regular development sprints. They don't have a "features sprint" and then a "bug-fix sprint."
A practical way to do this is to allocate a fixed percentage of your team's capacity—maybe 20% of every sprint—to tackling performance bottlenecks, refactoring code, and smoothing out existing user flows. This approach prevents performance debt from creeping up on you and becoming a five-alarm fire down the road. It makes optimization a consistent, predictable part of building a great product.
Ready to stop guessing and start growing your subscription revenue? With Nuxie, you can design, target, and A/B test high-converting paywalls in minutes—without waiting for an app release. Get started for free today.